Know How... 119 (Transcript)
Net Casts
you love from people you trust. This is
Twit! Bandwidth for Know How is brought to you by Cachefly.com.
This
episode of Know How is brought to you by Smart things. Smart Things lets you control and monitor
your home from anywhere in world using your smart phone. Get started, visit smartthings.com/twit and
you’ll save 10% off any home security or solution kit when you use the code
Twit10 at checkout.
And by IFixIt. You can fix it and IFixIt makes it easy with free step by step repair guides, high quality replacement
parts and all the tools you’ll ever need. For $10 off your purchase of $50 or more go to ifixit.com/twit and enter
the code knowhow at checkout.
On this
episode of Know How, probes, drones, we teach you how to put power into your LiPo packs without killing yourself. Oh, and your feedback and a way to download
YouTube videos that can’t be blocked.
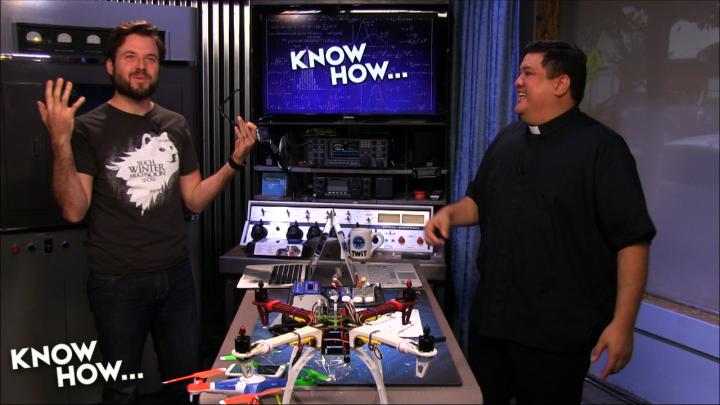
Father Robert Ballecer: Welcome to Know How. The Twit show where we bend, build, break and
upgrade. I’m Father Robert Ballecer.
Bryan Burnett: And I’m Bryan Burnett.
Fr. Robert: And for the next 45 to 50 minutes we are going to show you some of the
projects that we’ve been geeking out to for the last
week or so.
Bryan: That’s right. And these are some
pretty cool stories that just came out this week. And this first one has been ten years in the
making, which is kind of crazy to think about.
Fr. Robert: We don’t wait ten minutes, and when you think about the distances
involved and how much travel has been done, the landing of the Rosetta Stone mission with the filet probe onto the Comet 67P it is
amazing. It is 310 million miles away from earth. It had to travel 6.4 billion miles just to
get there. And, as you said it has been
10 years in the making.
Bryan: So I was thinking about what I was doing ten years ago and I was playing
Halo 2.
Fr. Robert: So as you were pretending that you were going to the stars, you weren’t
actually going to the stars.
Bryan: I mean this is the sort of science, this deep space science that really
gets me going. You are talking about 310
million miles away. So this is like playing a game from 310 million miles away.
Fr. Robert: With technology that we had 10 years ago. That was before all the things
that took to plan up to that point. And all the math to
just get it in the neighborhood is mind boggling. And the fact that they were able to take a
probe that was about the size of a washing machine, weighs 222 pounds, and land it on this thing. And the earth is moving. And the comet is moving. And the probe is moving in relative velocity
to the two. I never thought this would happen.
Bryan: Just the idea of orbiting this mass in space is kind of crazy because it
is moving and the gravity changes as it goes along. And even when it landed on the comet it had
to harpoon itself down onto the surface.
Fr. Robert: Which is interesting because the harpoon system didn’t work. It didn’t fire. Remember this has no thrusters, so it has no
way to slow itself down. It’s got no way
to push itself back to the comet, so it kind of bounced a little bit and then
settled back down. It is not actually
secured to the comet because they can’t get the harpoon system to fire. So now they are worried. They’ve got a drill they want to start out,
but will that shoot it away from the comet? So they are going to spend the next 60 or so hours, because that is how
long the batteries work, getting data from the comet. The problem they are having is that it landed
in the shadow of the peak. So it’s not
getting any power on its solar cells. So
it is running on battery power right now. It could be bad, but just the fact that they got it there. Big propos to the ESA.
Bryan: That
is pretty fascinating. The idea of it. We’ve been playing with the drones, and when
they go a certain distance you lose the signal. So the idea that they’re sending signals out to this.
Fr. Robert: There is someone saying, it’s like a 27 minute trip. So at the speed of light it takes 27 minutes
for it to get a signal and 27 minutes for it to get back. Actually someone in the chat room is saying
it broke it’s parking brake. Just put some blocks under the wheel.
Bryan: Let’s just send another satellite up and in 10 years it will be able to
help it out.
Fr. Robert: The issue is that the comet is not really big enough to have any speakable gravity. So once you start drifting from it, you’re not going to stop. They are going to do all of the passive
signs. They’ve got a gascomotographer so they can actually do spectrum analysis of any of the gases that are
lingering near the comet surface. They’ve got a way to detect magnetic fields so they can see if a comet
has any magnetic field to speak of. They’ve
also got a way to look at temperatures so they can look at temperature and
density throughout the area. I think
there is going to be a lot of interesting science that will confirm things that
we’ve been speculating about for year.
Bryan: Just
the fact that they are able to get it there is mind blowing in itself. The idea of comets, we’re still trying to
figure out did life originate from comets and hitting earth and what other kind
of materials can be found on them? So,
just the comet itself and what it is made up of is pretty fascinating.
Fr. Robert: It
really is. Speaking of
things that are fascinating. It
has been weird. There have been a lot of drone news recently. There
was that drone that can deliver an AED, the defribrilator. If someone is having a heart attack the
drone can fly over and drop it down. Because is it 5-8 minutes is key. If you can’t get that to the patient within that time frame you start
seeing some serious brain damage. A
drone can cut through all the traffic, land. You’ve got the AED, put the paddles on, and restart the heart. There is also a drone that delivered life
preserver. Which I thought that was
cool.
Bryan: I
like that idea because the most dangerous thing is when you are trying to save
someone who is drowning, that person could pull you down with them.
Fr. Robert: Right. The old way was that you have a life guard
with some sort of flotation device. They
would swim out there and put the victim on it. Well, this is a lot easier. And a lot faster. The life guard has a drone next to
him. He can drop up to three life
preservers. Just fly over and drop. See you back at the beach!
Bryan: Don’t worry. I’m here to save
you. Take the life preserver.
Fr. Robert: No, but DJI just got back into the frame. I’m going to give credit where credit is
due. DJI was really the first company
that could mass produce a reasonably priced drone that almost everybody could
fly, that could actually do something useful.
Bryan: The range between range – what was the DJI
priced? A $1000?
Fr. Robert: When they first came out it was priced at about $1000 and that has
dropped down to about $500. They’ve got
the Phantom 2 that has the integrated 10AP camera. That thing is beautiful.
Bryan: And this is the brand new one.
Fr. Robert: This is the new hotness. This is
the DJI Inspire. It is a ready to fly
drone with a 4K camera. It has GPS features, so you could navigate it. It records 4K, 60 MG per second, it can
record in Adobe RAW, it has a 90 degree wide angle
lens, 18 minutes of flight time. You are
going to like this. I know you
complained that in a lot of the drone videos you see the propellers.
Bryan: That was the biggest complaint I had about the other DJI we had.
Fr. Robert: But if you look at this, it’s got variable geometry. The arms holding the motors cn actually pivot up and away so that when you are
recording the video you can do 360 around the drone and it will never see the
motors.
Bryan: That is so cool.
Fr. Robert: It is pretty cool indeed.
Bryan: I kind of feel like the design, they grabbed some people from Valve and
it looks like something from Portal.
Fr. Robert: Is that Platus?
Bryan: Exactly.
Fr. Robert: What
are we doing? Very cool and the stuff
that I’ve seen from DJI, it’s very high quality. Very nice. And you know what? It really is simple enough for someone who
has never flown a drone to fly around a little bit and get the hang of it
within a week or so. One
issue. Price.
Bryan: Well, it’s a little more expensive than the last one. Is it around about
$5000?
Fr. Robert: About $3000 but you could put it up to $5000 if you wanted to.
Bryan: We’ll take four of them.
Fr. Robert: Anyone have Leo’s credit card? This is something I hope DJI sends one for us to play with. The big thing about the DGI drones, I’m
fixing the Phantom that we’ve got, they are not using anything that is
different than from what we are going. Their
big advantage is software. They’ve done
a lot of software development to get that flight controller to work properly
for a camera. And the gyro stabilizer
platform for their cameras is fantastic. It is really smooth. If you
remember back a couple of episodes ago, right after CES, I showed a flight that
I did with a Phantom 2, over Vegas. It
looked like a crane shot it. It looked
like it was hanging off of a solid structure. The copter was vibrating and those all vibrating. But the gimball was
able to take out those vibrations. The
one on this drone is even better.
Bryan: I think the other advantage they have is that it is a complete package
and if you want to get something that has around the same quality, the next
step us is $10,000 to $12,000 for the Octocopter with
a DSR attached to it.
Fr. Robert: That is one of the weird things. This is actually going to be cutting in to one of DJI’s most lucrative
sales. They’ve got an Octocopter that they do sell, which is twice the price of
this. And that doesn’t include a
camera. That includes a mount for a
DSLR. Like a 4K camera. The fact that they are
making this self-contained. In
other words, I don’t need to buy anything else. I buy the kit, I charge it, I put the battery in, I fly it and I hit
record. That is cool. Speaking of things that are
cool and automatic. Maybe we
should take some time right now and talk about the sponsor of Know How.
Bryan: Yeah, in home automation.
Father Robdert: Home
automation. It is all the rage. We’ve actually be wanting to do a couple of episodes on home automation. One of the issues that we’ve had though is that there are so many
different vendors from home automation products that you don’t want to get
stuck in one if maybe the light switch you want is from another. Or the appliance control you want is from
there. Or maybe the thermometer and
temperature settings and the camera are going to be from 3rd and 4th parties. You really want a single system
that can control everything. That is why
we have SmartThings.
Bryan: It
is one of those things you don’t want to plug it or worry about it.
Fr. Robert: That
is what SmartThings does. If you could be my Vanna White and show off the SmartThings. Here is the idea. You’ve got this central hub that allows you
to communicate with pretty much everything that might control and monitor your
home. You can do this from anywhere in
the world using your smart phones. Some
of the cool things that you can do with SmartThings are: get notifcations when someone you don’t know tries to enter your home, or get instant alerts to
prevent a small leak from causing a major flood. You get to control and automate your lights
from wherever you are. And you can stay
connected to your family by getting those notifications when people come and
go. Smart Things help protect valuable
items and secure areas that are off limits and it does this all by seeing
through it’s various
sensors. With the SmartThings app you can easily see what is happening in every room with all these connected
devices. It’s like having your home in
the palm of your hand. The SmartThings app is free and it is available for iOS for
Android and for Windows. The really
great thing about SmartThings is that the
possibilities are endless. SmartThings, family of smart sensors works with hundreds of
popular connected devices including Logitech, Drop Cam, Nest, Sonos, so you are not going to be locked in to any single
vendor. SmartThings will talk with them all. If you are a
developer you can also create new ways to use SmartThings and then publish them for everyone to use. Talk about the internet of things. This could be the gateway to the internet of things in your home. Here is what we want you to do. We want you to try out SmartThings. We want you to see if you’ll love it as much
as we do. To get started creating your
smart home, visit smartthings.com/twit. And you’ll save 10% off any home security or solution kit by entering
the code twit10 at checkout. For fans of
Twit solution kits at just $170 and home security kits start at $350. Each kit includes a smart things hub for
everything you need to turn your home into a smart home. In as little as 15 minutes. You’ll also get free shipping within the
United States. That is
smartthings.com/twit and remember to enter the code twit10 at
checkout. And we thank SmartThings for their support of Know How.
Bryan: Yes, yes.
Fr. Robert: Now let’s get into some feedback. We’ve actually got some really, really good feedback from our users and
now we want to answer a couple of their questions. This first one, this comes from Jocelyn for
Vallejo, CA. She says, “Dear Know Hole-ers, I'm starting to do reviews on YouTube and I need help
with the audio for the voiceovers. I'm using a USB headset but I get a lot of
echoes and breath sounds. I'm happy with my camera and
lighting, but I need to get my audio sorted and I've only got about $300 to
spend. Can you suggest a solution?"
Bryan: Oh, can we! And Leo has pointed out that if you audio is not good no one is going to care
about your video.
Fr. Robert: That is the thing. 90% of our
interest still comes from our audio listeners. You can have crystal clear video but if you’ve got scratchy audio it
just turns people off.
Bryan: It actually makes the video feel worse.
Fr. Robert: That is the sad part. If you’ve
got great content but your audio is sub-par, you’ve basically sabotaged
yourself.
Bryan: Well fortunately it looks like you have a few suggestions here.
Fr. Robert: I’ve got a couple. Okay. So you are working in a budget Jocelyn. I understand that. So I’m going to give you the first solution
which would be within your budget and then I’m going to give you something that
maybe you can a little extra cash you might want to get. You have really identified a couple
things. One: Budget. Two: Bad audio. Three: Echoes. Those are three separate
things you have to contend with. The
budget thing is easy because we just choose parts that are within your
budget. The tininess,
that audio quality and the echo. Those can be a little more difficult to get rid of. The first thing you want to do is you want to get a decent
microphone. I know that you think your
USB headset is great, it’s really not. You use those…
Bryan: The worst are the Apple headphones.
Fr. Robert: Yeah. Just don’t use them. It is fine for a conversation over skype but
if you are recording it and you want people to listen to your voice you want
something that is going to bring out the tones in your voice and you also need
something that isn’t going to add a bunch of extra noise. Especially the cancelling
noise headsets. They add in a
whine. Just a low
level hum. That is just no
good. This is a great solution right
here. This is an Audio Technica 2020 USB plus. It’s a condenser microphone so it has really nice reproduction. Not as big a bottom as some dynamic
microphones. But it is really clean so
you can add in a little base if you need to later on. It’s got a USB interface so this will plus straight
into your Mac, your PC or even your Linux, and allow you to have a nice clean interface. One
of the worst things you can do and you’ve seen people do this before. Plug in their iPhone head phone into the
audio jack into the computer. That is horrible.
Bryan: Not a good idea. Especially if they fidget at all. Or gesticulating.
Fr. Robert: Stop moving!! This will give you
nice sound isolation. Don’t just buy the
microphone. You actually need something
to hold the microphone. I would suggest
this. This is a stand I bought off of
Amazon. They call this one the
adjustable desk stand for $13.00. The
mike is about $170. This is a navy shock
mount which is nice because it means any vibrations from the table are not
going to translate into the microphone. It actually holds the microphone in this little spider lattice of bungee
cords. We use something like this.
Bryan: That is nice to have especially if people are typing on their keyboard, so many times I’ve heard the click.
Fr. Robert: It just translates right through. The Navy also comes with this pop filter which will get rid of those
close things that you are having when you are recording a voice over. There is another thing that I like to
do. Some people don’t like this but when
you are speaking in your microphone, a lot of people will speak directly into
the microphone. You can do that if you
can do that if you have really good breath control. If you don’t have good breath control what
you can do is take it to the side a little bit. You want the side address to still be pointing at your mouth but if you
put it off to the side, it is going to dramatically decrease the amount of
breath sounds you get.
Bryan: Cool. And then you have another one here?
Fr. Robert: Actually one more part. To get rid of the echo. Especially if you are in a
hard concrete room. This is not
magic but it does work wonders if you are trying to do a sound boot. You can get these ten packs or twelve packs
of acoustic foam. The idea is that you
don’t want the sound directing directly back from your microphone because you
will get echoes from the wall. If you
layer enough of that on the area where you are going to be doing your voice
over it will kill some of the echoes. The
other thing that will kill the echoes is that this is a really good mike at
rejecting sounds from the rear. So that
is one thing.
Bryan: If
you ordered the foam, don’t be alarmed if it is really compact because after
about a day it comes back into shape.
Fr. Robert: It
expands. Now this entire solution is
going to run you about $245. If you
don’t need the foam it is going to be about $205 so that is well within your
$300 budget. Now let me show you
something that is not within your budget. That would be something like this. This is the microphone that we love here at the studio. It’s got a huge big bottom which means it is
going to bring out the base in your voice which is great for voice over. This is a Heil PR40. This microphone is sort of the gold standard
for those in internet broadcasting. It
is a dynamic microphone and it does require shadow power. But you will notice that it has an XLR output
so you are going to need something to go from XLR to the USB on your
computer. This I the
sure X2U. This is what I swear
by. It is nice because it will work on
condenser mikes or dynamic mikes. It is
very clean and it is crazy adjustable. So if you want a lot of control over how you sound this is the way to do
it. You also need a stand and you are going
to need a pop filter. These are nice and
cheap, this one comes from Amazon and I think it was $7 or something like
that. It just goes right over the front
and it will stop those from hitting. Now
here is the problem. This is actually
what I would prefer because this has such great sound projection that you could
probably get away without have the acoustic foam.
Bryan: It is very directional, so you have to
make sure to talk into it.
Fr. Robert: We have a problem with guests sometimes when they will do this and it
won’t pick up your voice. You have to be
right here.
Bryan: Which is great if you don’t want any background noise to get in. But if you’re not speaking into it, it
doesn’t work that way.
Fr. Robert: One problem, the mike itself is over your budget. This is a $330 mike. You could get a kit that includes the mike, a
carrying case, the stand, and a cable that will help you with the cost a little
bit but you are still going to need to get a pop filter, you are still going to
need the X2U USB adaptor which is close to $100.
Bryan: I think Bob make a Bluetooth adaptor you could use.
Fr. Robert: So you are talking about $430 to $470 for that solution. Now, I know that is over your budget but if
in any way shape or form you could get another $100 I would take the PR40 over
the 2020 USB. Now if you can’t do that,
if you really are stuck at the $300 price level this is a fantastic
solution. But for the problems that you
are having, specifically the echo, nothing beats the PR40.
Bryan: Those are handy tips.
Fr. Robert: Yep. So that is for our
audio. Now we have one more piece of
feedback.
Bryan: That’s right. From
Fred. He asked, “Can anyone
recommend an SSD drive for a Linovo Y60P? I was also trying to determine if I could
have both the drives.” So, you recommend
Kingston Hyper X?
Fr. Robert: I also like to give a range. So, I’m big on the Kingston’s. I love the Kingston’s. It is what we’ve got in the gaming PC, it’s
what I’ve got in my personal PC and laptops. They are fast. I’ve found them to
be very durable. I’ve never lost a
Kingston drive. I stay away from all the
budget stuff. The budget stuff is kind
of crap.
Bryan: Once you’ve had a taste of the good stuff, it’s hard to go back.
Fr. Robert: It is like buying laptops. People
buy a $300 laptop and then they wonder why it’s not as good as a $2000
laptop. Because it is
a $300 laptop. If you buy a $60
SSD, you are going to run into issues with it. But if you get a decent SSD, Intel, Kingston, Samsung all make fantastic
SSD’s. As a matter of fact the Samsung
one would be the 840Pro. You can get a
240 GB Kingston Hyper X3K, for about $140. You could get the comparable Samsung for about $180 which again is why I
like Kingston because it tends to be a bit better on the price. But you had a specific question and that is,
you want to be able to keep both drives. I am assuming that you want to keep your rotating drive but maybe you
want to replace something to get an SSD in there as well. Which, luckily we have a way to do that.
Bryan: That’s right. With
an optical HDD Caddy.
Fr. Robert: Exactly. Now we covered this on
Know How awhile back. Probably like
Episode 70 some. Way back there. A very easy way for you to
do this. Now on your computer
you’ve got something like this. This is
an optical drive. I checked out the
specs for that Linovo, and it does have a optical drive that can be removed. Now the cool thing about this is that you can
remove the header from the optical drive and attach it to the Caddy. Now that will keep the nice slender lines of
your laptop but it will allow you to do is to take out your hard drive, put it
in the caddy, take your new SSD and put it where the hard drive was. That means you are going to boot off the SSD
and you are going to have your hard drive where your optical drive used to
be. Now, this does mean that you are not
going to have an optical drive in your computer. Some people are not going to lke that. Personally, I don’t care.
Bryan: There’s not a lot of things I miss about not having an
optical drive anymore.
Fr. Robert: And
you can buy an interface for your old optical drive for about $12 that will
give this a USB interface so you could just plug into your computer when you need it. When you
consider what you do, what are you going to need on your laptop more? More space or an optical
drive.
Bryan: More
space.
Fr. Robert: Yeah. But it is personal.
Bryan: I
guess you could always swap it out when you need to if you are planning on
bringing a bunch of DVD’s with you somewhere.
Fr. Robert: I
don’t know if this is true on the Linovo but on a lot
of laptops the optical drive is held in by a single screw. So if you remove that screw you can actually
pull out the caddy or the optical drive and then slide what you need back
in.
Bryan: Just
don’t put your OS on it I guess.
Fr. Robert: Yeah. Don’t do that. But don’t hot swap. Shut it down and then switch over. But it is SATA which means that it will auto-detect
when it boots up.
Bryan: Pretty cool. I would prefer
having an extra hard drive for myself. Especially an SSD.
Fr. Robert: I’m a big fan of that. Now, when
we come back we are going to be talking a little bit about a way to download videos
off of YouTube that they can’t block. We’ve been running into this. They keep blocking our favorite tools.
Bryan: They are trying.
Fr. Robert: Without further ado, hit that button. In the last segment we went all egghead to
explain how LiPo packs work and how to intelligently
choose voltage capacity and weight. This
time we are climbing down from the Ivory towers to show you how to charge them
without blowing yourself up. When we did
project lunch box using Nicad and Nickel metal
battery packs the charging and discharging process was relatively straight
forward. Plug in the charger, plug
battery into charger, rock out. LiPo packs take a little more thought and effort because of
their unique chemistry and construction. Remember that they are balanced. So the charger can monitor the state of charge or SOS of each cell. That gives you a safer higher capacity and
longer living pack. But to do this, we
need a balanced charger. We chose an Imex B6 LiPro balanced charger or
probably a clone, mostly because it was less than $20. This unit is almost identical to all Turnigy style chargers in design and operation. So the following procedure should work for
your budget unit. The first step is to
power on your charger, many of the less expensive chargers don’t have an AC
adaptor but they will run on any DC power source between 11 and 18 volts as
long as it provides enough amps. If you
have an old ATX power supply, you can easily turn it into a high quality 12
volt power source with more than enough amps using the tip I gave in Episode
78 of Know How. The first time you power
on you’ll see a screen that says Program Select. This allows you to select what type of
battery you’ll be charging. Use the
increment and decrement keys to scroll to LiPo and
hit start. The screen will change and
display battery chemistry, mode, charge rate and voltage. Use the increment and decrement keys to
scroll through the available modes. You
should see charge, balance, fast charge, storage, and discharge. Select balance and hit start. The charge rate should not start
flashing. This is where you select how
fast you want to charge your LiPo pack. The higher the amperage the
faster the charge. But it is not
as simple as turning the charger to 11. You need to know the safe charging rate of your pack. That number isn’t usually on the label, so
you have to find it in the specs. Our Turnigy 2200 LiPo pack is rated
for a max charge of 4C, while our 1000 ml amp pack is rated for 2C. Using the same formula that we used to find
the maximum discharge rate in the last segment we know the 2200 has a max
charge rate of 2.2 amps times 4C or 8.8 amps. And our 1000 has a max charge rate of 1 amp times 2 C or 2 amps. The charge rate will effect the time it takes to charge a pack. For
example a 1C charge might take 45 to 60 minutes, 2C 35 to 45 minutes, 3C 15 to
20 minutes, 4C 10 to 15 minutes and 5C charge 5 – 10 minutes. The natural tendency is to choose the faster
charge rate so we can get back in the air. But slower chargers typically mean a
longer life span for your pack and cells that have an SOC that are better
match. Which leads to
better performance. Personally,
since I keep a number of packs in spare I prefer to charge at 1C to maximize my
pack life. Using the increment and
decrement keys set the charger to your preferred charge rate then hit
start. The pack type will start to
flash. As we learned in the last segment the serially connected cells determine
the voltage of the pack. And this is the
only metric that your charger needs. Make sure to get this right because under volting or over volting can seriously damage your battery,
your charger, your stuff, your house, your puppy, your cat, the space time continuem and of course you. While we’re on the subject of not dying, make
sure you have a decent LiPo battery safety bag. These pouches are designed to protect LiPo packs and contain a runaway reaction. You can also use a clay pot filled with sand
to increase your safety margin. Once you
have the right charge voltage, hit start and the screen should now display all
the chosen values. Give it a glance to
make sure everything is set properly. Now let’s connect the battery to the charger. Your charger should’ve come with a series of leads , look for the one with the banana plug on one end and
a deans plug on the other. This is the
charging lead. Connect it to the charger
output via the two banana plug sockets marked as positive and negative. The red
lead goes in the positive, the black into the negative. Now find the lead that has a deans plug on one side and the appropriate connector on your
battery for the other. This is the
adaptor lead. Connect the adaptor lead
to the charging lead and then connect your battery’s discharge plug to the
adaptor lead. Make sure to do it in this
order. Even smaller LiPo packs have enough current to kill you. If you connect the battery to the adaptor and charging leads before you
connect the charging leads to the output on the charger you risk shorting the
banana leads with enough power to weld them together. And cause an out of control reaction that
will probably set the pack on fire. Now,
connect the balancing leads to the proper socket on the charger. Make sure all your connections are properly
seated. Then long press the start button. The charger will check the battery pack and give you a report on what it
detects. R refers to what the charger
has detected while S refers to what you have selected. If the report matches what you selected then
you can press start again and the charging cycle will begin with the parameters
that you gave the charger. The display
will show how long the charge cycle has been running and a counter will tell
you how many ml amp hours have been supplied to the battery pack. While charging, you can use the increment and
decrement keys to switch to a display of the current voltage in each individual
cell in your pack. The
targeted end voltage, the safety cutoffs and other parameters. Full is when the SOC gets to 4.2 volts. Once the cells have reached their target
voltage, the charger should alert you to the end of the charge cycle and
automatically stop supplying power to the pack. Your LiPo pack is now ready to use.
Fr. Robert: Now, a proper battery charging is absolutely vital if you’re going to be
doing any sort of…
Bryan: Thanks for putting the fear of battery in me.
Fr. Robert: It is a little bit of fun because more likely than not you are not going
to have and event, but if you do you want to be
prepared. You do have a witches brew of chemistry inside these plastic bags. So you’ve got to treat them with respect.
Bryan: And
the fact that you are strapping them to a device that is going to be flying
around and could possibly run into a building or something pierce the battery.
Fr. Robert: I
actually already had that happen to me with one pack. It was a 1000 ml amp pack, it was a hard
impact on that 250 series and I had taken the landing skiffs off. And so most of the impact
went into the battery pack. It
looked fine and I had it disassembled and about 30 minutes later it actually
started smoking. Now, luckily it was
mostly discharged so there wasn’t a lot of power in there to feed the flames
but it was a little scary thinking imagine if you had
finished flying and you had thrown everything into the trunk of your car and
suddenly there is smoke pouring out of the back of your car. So treat these with respect and the first
part is to make sure that you are going to charge them properly.
Bryan: Yeah, and if you see one starting to deform…
Fr. Robert: That is the weirdest thing. I’ve
seen people who’ve they’ve got a pack that is puffed up.
Bryan: It’s got a bulge.
Fr. Robert: It’s going to supply power until you die. Don’t risk it. There are tutorials on YouTube about taking a
pack with three cells and if only one is puffed up you could de-solder it and
put in a new cell. You could do
that. DON’T! It’s not worth it.
Bryan: Yeah and then have a big office fire.
Fr. Robert: Remember there is a lot of power in these things. A lot of discharge. Especially if you’ve got
one of the larger packs. You
don’t really want to be messing around with it unless you have some sort of
background with being an electrician or an EE major. Play it safe.
Bryan: Treat them with respect. Take
care of them.
Fr. Robert: And just have a really good understanding of what they can and can’t do.
Bryan: Like most things, just take precautions and play it safe. But they are not inherently dangerous.
Fr. Robert: But again, I wouldn’t put them in your pocket. Use common sense.
Bryan: I just like to carry them around.
Fr. Robert: I do want to give our audience a little bit of a take-away. Because we’ve been doing
piece by piece. This is the
batteries and the battery charger. This
is what I would suggest if you’re just starting to build a 250 class
trainer. This is what I would consider a
trainers pack. This is a Turnigy 3S1P 2200 ml amp, 25 – 35 C LiPo pack. This is a nice pack, it is nice
and light. Not that expensive. It will cost you about $9 to $10. This will give you 15 – 20 minutes of flight
depending on how you fly your 250. The
reason why I call that a training pack is because it does supply a decent
amount of discharge current. But it’s
not a racing pack. It is a little bit
heavy and it has been optimized for flight time, not for speed. Once you start to get a little bit of skill
this is what I would consider a racing pack. This is a tiny little pack about the size of my 1000 ml amp. But this will provide you 1400 ml amp power
and 40 – 80 C of discharge. In other
words it could give all of its power in a huge massive burst. Which, if you are racing
quads this is what you want. That
is going to run somewhere in the vicinity of $14 - $18, based on where you buy
it. But you’ve got a range of batteries
to choose from and you can charge them with this. This is a $20 LiPro battery I found on Amazon. You can get
them for about $20 on Ebay as well. This is probably a clone, but it works just
fine. There are some people in the chat
room saying why can’t they just make these simple? They do have super simple chargers that you
just plug in and it goes. Those tend to
be a bit more expensive and they don’t give you the fine control. What I like about this, I can choose to
charge it at a rate that is very low. The no muss, no fuss charges they charge at one rate. They are selectable between 1 and 3 different
rates. I can go all the way down to .1
amps and just trickle charge my batteries when I really want them at their
peak. Because remember the idea is to
match the state of charge of all the cells in the pack.
Bryan: What kind of life span do you think a lot of these have?
Fr. Robert: Your typical Lithium poly life cycle, so you are looking at 1000 charges
on the outside. But for people who are
flying it is probably going to download before it hits the end of its life
cycle. Just keep an eye on it. If it starts puffing up you’ve damaged it and
dispose of it properly.
Bryan: It’s like a recycling center or something like that?
Fr. Robert: Those are hard to find but they are worth it. Please don’t throw it in the garbage it will
end up in the trash compacter somewhere and some poor soul is going to have a LiPo explode in his face. That is not good. But speaking of
things that we don’t do, you know what we don’t do?
Bryan: Break things and then not take them apart?
Fr. Robert: Exactly. Every time we break something here on the
show we have to take it apart. And if we
take it apart, we want to take it apart properly right?
Bryan: So
we can fix it.
Fr. Robert: That’s
why we have iFixit on the show. Now, what is iFixIt? There are a lot of people think it is a
company that sells us tools. They do
sell us tools. But it is way more than
that. iFixit is a repository for knowledge for people who
want to do DIY or maker projects. Open
the brand new iFixit protect tool kit. This is what we’ve got. The hotness that is
currently in the Brick House. You
see iFixit.com is a free online repair manual for everything. It is not just these wonderful tools. You can fix it and iFixit makes it easy with more than 10,000 repair guides for everything from
electronics like your smart phone, your tablet, game console, home appliances,
clothing, even your bike. They also have
fool proof instructions to fix all your stuff. So if you’ve ever shattered your iPhone screen, or need to repair the
red ring of death from xbox or swap the battery on
your Galaxy S3, iFixit has got you covered with
parts, tools, and repair guides. iFixit also makes the most
trustworthy repair tools for consumer electronics including this. This is the protect tool kit. This is their new and improved version. It has got 70 tools to assist you with any
mod malfunction or misfortune that comes your way. The toolkit is the gold standard for
electronics work from garage hackers to the CIA and FBI. But more importantly, their unique tools are
used by repair technicians everywhere, including here in the Brick House. This includes iFixit’s 54 bit driver kit with 54 standard specialty and security bits. That includes Philips bits, pentalope bits, and of course straight bits and torque and
torque security bits for things like computers, game consoles and
controllers. The
tri-wing bits, the very hard to find ones for video consoles, the triangular
bit which McDonald’s uses for their toys. It’s also got a swivel top precision driver
to get in those hard to reach places and a flex extension that will let you get
into those tight corners. They give you
an ESD safe precision tweezer set for delicate
manipulation. They give you an
anti-static wrist wrap to keep your devices safe from accidental static
discharge, nylon spongers, metal spongers, plastic opener tools for prying and
scraping. It is lightweight, it is
compact and it’s got this durable tool roll that makes it usable for on the
go. Now it is only $64.95 and it is
backed by a lifetime warranty so you know it is going to be quality because
they are going to replace it if you break it. Hobbyists and home DIY fixers alike use this Protect Toolkit for
doorknobs, eye glasses, cabinet doors, sink fixtures and more. If you are looking for a great addition to
your artist or hobbyist tool kit, folks look no further. Best of all there are 1000’s of free iFixit guides to put your tools to use. This is my favorite part. This is a magnetic pad. This is what we use when we are disassembling
something. It gives you a way to label
individual quadrants so you can put gadgets and gizmos and then put yourself a note so you know
where they go. If you ever disassembled
something and you had a couple of extra screws at the end this is what you need
to make sure you are not going to get a broken device when what you should be
doing is reveling in your DIY greatness. Now with ifixit you can fix it yourself and iFixit can help. iFixit.com/twit for more than 10,000 free step by step
guides. iFixit also sells every part and tool that you will
ever need. Enter the code Know How at
checkout and you’ll save $10 off every purchase of $50 or more. iFixit.com/twit. And we thank iFixit for their support of Know How.
Fr. Robert: Bryan, I want to get to one last quick bit here. Now we have been doing a lot of segments on
downloading for YouTube. Most of them
have centered around YouTube center which was a great
tool, it was Chrome, Firefox, Opera. The
idea is just to give you a little extra button for downloading it in any format
that you wanted. The problem is Google aint big on that.
Bryan: I can understand why but for my purposes I want to be able to download
the videos.
Fr. Robert: Their reason is they don’t want you to be able to skip ads and they also
don’t want you to be able to blatantly steal content. So I understand why they are doing it. But at the same time, it is like if you just
play this cat and mouse game it just means that they have to update the tool
every time you change something to break the interface so that it doesn’t work
anymore. That is what has been
happening. People just say, well I’ll
just download the next version, and the next version.
Bryan: And what ends up happening is we do a show about how to do it and then
someone comes back and tells us a couple weeks later, I tried this and can you
tell me another way.
Fr. Robert: I thought how about this. Why
don’t we show folks a different way of getting YouTube videos that is not as easy
as just clicking but it is a lot harder for YouTube to block. Because rather than taking advantage of the
YouTube interface it is actually looking at where the stream is coming
from. So this is what we are going to
do. The first thing you want to do is go
to the video you want to download. This
is on YouTube right now. This is our
review of the Quad Video Drone. There is
a URL right here, this is the URL you want. www.youtube.com and then that funky
combination of letters and numbers that determines my URL. This is not actually the video. That won’t get you to the video. What that gets you to is the landing page. The wrapper that YouTube has put around the
video so they can put things like ads and pre-roll and post-roll and the little
pop ups. We can actually use this to get
access to the actual video that YouTube is streaming underneath the
wrapper. The way we are going to do that
is use VLC. So you need to download
VLC. It is just the video land client. This is probably the best thing ever to have
on your computer.
Bryan: I love this program, just to have it. Not for downloading YouTube videos.
Fr. Robert: If VLC doesn’t play it, it is probably busted. They’ve got it for Windows, OSX, for Linux,
for Android, IOS, so you are going to find a version that works for your
device. Now once you’ve got VLC
downloaded you want to go into Media. You want to go ahead and open network stream. When we click that, this box is going to pop
up. Go ahead and post in the URL that
you just copies from the browser, so this will get me to that video view of the
quad copter. I hit play and it is going
to bring up VLC and VLC is going to go there and it is now playing the YouTube
video. It is pulling it from YouTube.
This is the fun part. I just go ahead
and drop over to tools, go down to codec information and it is going to pop up
this window, this right here. This
super, super long URL that is the direct path to the actual video. There is no layers on top of that, there is no wrapper, YouTube has added nothing to this. Now this is really long so what you want to
do is right click this field, select all and then copy. Now what we’ve done is we’ve given ourselves
a way to get the pure video without anything else that YouTube is doing to
it. Open a new browser, paste in what I
just put and look how long this is. It’s
a monster URL. You wouldn’t want to
manually copy that thing down. But if I
go this is now the raw video. There is
nothing attached to this and here is something that you can’t do with
YouTube. I can right click the video and
save it as. Now I am going to save this
to my desktop and what is happening is that it is being downloaded, like any
other download that you would do. When
this is done I will have a copy of the pure source, unadulterated. So what the user uploaded, that is what I’m
going to get.
Bryan: Will this automatically be the top quality the highest resolution that
they uploaded.
Fr. Robert: Yes, it should be. This is the
source video. This is the video upon
which all YouTube services are based. If
you get the source video then you’ve got what they uploaded. Which is nice. It is going to take a while to download. But it is going to download it in the MP4
version, which means I can do anything I want with it.
Bryan: I can see this being really handy for someone who knows they are going
into an area where they are not going to be able to go on YouTube but they want
to be able to bring their videos with them. Download it and be able to put it on your file.
Fr. Robert: We’ve got Web5189 saying this has got to be the worst way to download
YouTube ever. Just use video
downloader. We just talked about this. The problem with using any of those programs
is that when Google/YouTube changes the interface even a little bit it breaks
all of those plug-ins and you’ve got to get the next version of the
plugin. Unless they change their naming
for getting the raw video this is always going to work. Now Google could take some of the URL’s to
make it more difficult for you to do it. But it’s too much of a pain for them to do that. It is very easy for them to change one
element in the interface that breaks every single plug-in. Which just keeps happening.
Bryan: So this might seem round-about but you know it is going to work
reliably.
Fr. Robert: You are also going to get the raw unadulterated version of the
video. Because a lot of those downloads give you the low quality version. One caveat. What you will find is that a lot of videos,
especially the crappy ones, are using weird codacs.
Bryan: So when you download the source file, it won’t play.
Fr. Robert: It will play on VLC, but if you are planning on using it in final cut or
premiere, you’re going to have to convert it first. Which luckily we are going
to show you how on a future episode.
Bryan: Cool.
Fr. Robert: Yeah. So there you have it. Not so easy as using
a plug-in but I find that the end result is better. More complicated but it is going to work
every time.
Bryan: It is also why we make it so much easier for people to download our
videos, beyond just going on YouTube.
Fr. Robert: We are going to have all the links for this and the step by step. I am actually giving you step by step
instructions on how to make this work. It is going to be in the show notes, so don’t forget to go there. In fact, why don’t you tell them where they
are?
Bryan: Twit.tv/kh and not just the show notes but all
our prior episodes so you can keep up with those. And links to subscribe to
the video so you don’t have to go on YouTube and do a roundabout way of
downloading it. You can just do
it straight from our site.
Fr. Robert: Although you can do that if you really want to. We give you the high quality version, but if
you want to download from YouTube I don’t care.
Bryan: Anyway you want it, that’s the way you need it.
Fr. Robert: I
feel like I should be singing that. It
gets in my head. Don’t forget we also
have a Gplus community. You can find us at gplus.to/twitch or just go
in the google plus and search for know how. It is a huge community, very active group of
folks who like to do DIY and maker projects. So if you join, you’ll be able to ask questions and you’ll be able to
answer questions about things that are in your expertise. And you may notice that we pull from that
group a lot.
Bryan: More recently I’ve had to set aside more time to look at it because once
I get into the community it is radical. It’s like that’s a great question. I can answer that, but someone beat me to it.
Fr. Robert: I have a technique for that. I
just pretend like no one else has answered it. There are some of those guys are so fast. It’s like a question goes up and two seconds
later someone answered it. Don’t forget
you can also find us on Twitter. You’ll
find me @PadreSJ.
Bryan: And I’m @cranky_hippo. And you don’t just have to follow us, you can follow one of the men behind the scenes that
makes this all happen.
Fr. Robert: He is THE man behind the scene. Alex Gumple. He’s our TD. Do you have an
example of what people might find at your twitter feed.
Alex: Bryan you said 10 years ago you were playing Halo2.
Bryan: Oh no don’t show that. I’m Joe
Cool. The flash was really bright.
Fr. Robert: Don’t forget to follow Alex @anelf3.
Bryan: Don’t. Because you don’t want to
see any more of those pictures. I’ve
unfollowed him now.
Fr. Robert: Until next time, I’m Father Robert Ballecer.
Bryan: I’m Bryan Burnett.
Fr. Robert: And now that you know how…
Bryan: Go do it!