Coding 101 55 (Transcript)
Father Robert Ballecer: On this
episode of Coding 101 we continue with our embedded processor build.
Netcasts you love, from people you trust. This is TWIT!
Bandwidth for Coding 101 Is provided by CacheFly. At
cachefly.com.
This
episode of Coding 101 is brought to you by Lynda.com. Invest in yourself for
2015. Lynda.com has thousands of courses to help you learn new tech, business
and creative skills. For a free 10 day trail visit Lynda.com/c101. That’s
Lynda.com/c101.
Fr. Robert: Welcome to Coding 101. It’s the TWIT
show where we let you into the wonderful world of the code monkey. I’m Father
Robert Ballecer, the digital Jesuit and joining me is our guest co-host, Lou
Maresca. He’s a senior developer for Microsoft. Lou, thank you
again for coming back onto Coding 101.
Lou Maresca: Hey thanks
for having me back.
Fr. Robert: We had some fun last week. We were
talking with Mark Smith about embedded programming. Specifically how to use
something like an Arduino and take a real world problem and solve it through
the power of code. This week we’re going to go back into it but before we do
that, you’ve got some more interesting news about the internet of things. This time its privacy and security?
Lou: That’s right. I wanted to kind of go
over some of the items around IOT and private security. Kind
of what that means and why you should secure things. What you can do
personally to secure your stuff. If you think about it, there was a quote that
says “the internet of things takes IT to heart of the companies – into our
homes and into the health industry, so quite literally, to our hearts.” And if
you think about it, that’s basically, you’re securing data that’s coming from
your body. Data from wearables, tracking your body location, steps, heartrate,
blood pressure, GPS location, motion sensors, Bluetooth, Wi-Fi. And so if you
think about it, if you’re not securing that data successfully, if you’re not
securing your personal information successfully, it could leak out. And now
with more use of IOT and wearables, it becomes even more important.
Fr. Robert: You know, Lou, it’s interesting you
bring that up. We just covered a story on This Week in Enterprise Tech a few
weeks back about some gas stations. About 5,000 of them that
were using ATGs, automatic tank gauges. And it allows them to check what
the level of fuel is inside the massive storage tanks underneath fueling
stations. They found that 5,000 stations across the US had put those ATGs onto
the internet using a serial to IP device, and they hadn’t secured anything with
any passwords. So if you knew the IP address you could get into the network and
they basically gave you root access. You could mess with the gauge, you could
say it was full or it was empty. Or you could just take away control of the
pumping network altogether from the station .and I think of those kinds of
examples any time I hear of someone saying “IOT!” It’s like whoa, whoa, there’s the IOT and
then there’s the IOT that probably shouldn’t be on the internet. And the line
between them becomes really fine. Essentially what it comes down to is, did your programmer consider what would happen if this was
now open to the entire world?
Lou: Exactly right. I think one of the
problems too is people don’t realize that you’re wearing this device and it’s
integrated now with your life. And normally people go to their computer, its personal, maybe they use their gaming device, personal. They
can kind of restrict how much they use it. When you’re wearing a device on you,
it’s now part of you right. So now you have to make sure that you’re being cognizant
of the fact that you’re streaming sometimes large amounts of data, especially
about yourself, and it needs to be secured.
Fr. Robert: Let’s talk a little bit about the
approach that Microsoft is taking. And again, we all know that you work for
Microsoft, so we’re not trying to be a shill here, but you come from a very
unique experience, because Microsoft is trying to implement a philosophy for
security on the internet of things run through azure. It’s a 7 step process?
Lou: That’s right, they call it the secure
development life cycle and it’s not only for Azure, it’s for basically any type
of data you store on it. Not just for IOT, but for any type of data. And really
what it is, is just a development process that developers should be following
that basically helps you as a developer build more secure applications as well
as making sure that you have security and privacy around your data and that you’re
meeting compliancy requests as well as it can actually help reduce your costs
based off of specific processes that we follow. Again, like you said, it’s made
up of 7 phases. One is what they call response/release implementation design
requirements and training. And it includes training for developers and even
program managers around basic concepts and building secure software. How to protect that data and also responding to security and
privacy incidents. So it also talks about that. and really they have
built into their services a lot of layers, not only to help you transmit the
data securely from your IOT devices, but also to make sure once your data is
out there in the cloud, you’re securing it. And not only Azure is doing it,
Microsoft as well as Amazon is doing that too. They also have ways, tools, to
protect your data in transit, just like Microsoft Azure has rest services. They
also have ways to make sure that it’s secured on their services as well. They
have what they call identity and access management to make sure that they
control your access to your data. They use special things called security tokens which has built in encryption to store your
data. It has rotating keys. Also they have what’s called Amazon cognito for
securing your mobile infrastructure as well as you hardware security modules
for tamper resistant storage. So there’s a lot of extra security that these
services are doing now, not just Azure, but even Amazon and even Oracle
services that are doing for IOT devices and you want to make sure that you’re using
these services. If you decide to build your own you have to be cognizant of all
these things when you’re building them.
Fr. Robert: Alright. Lou, let’s talk a little bit
about what it means for a programmer, who as we spoke of in the last episode,
might be leaning towards the IOT as their next big project. And
hopefully, their next big meal ticket. If you are going to specialize in
programming for devices or programming for embedded processors that will be
part of the IOT, what are some of the things you need to be cognizant of? In
other words, what are the things that I should have in the back of my mind as I’m
creating the next interface for the device that’s going to be worn around my
wrist that will be reporting to my Facebook page or I’m going to be making the
next smoke alarm that’s going to be alerting some big data cloud so that they
know exactly what’s going on in my house? What would you like to give to the
next generation of IOT programmers?
Lou: There are some rules to follow and
there are a lot of articles out there. One thing I would suggest is make sure
that you’re not trying to collect personal data on the devices. Let the user go
to some service somewhere and enter that in where they can secure it. But on
the device themselves, you shouldn’t really collect any personally identifiable
information like their name, email address, directly on the device. If you’re
doing that then you risk yourself the fact that now you’re giving them data
about themselves like their heartrate and blood pressure and that kind of
stuff, but you’re also potentially leaking personal data.
Fr. Robert: Nice. Lou, we’re going to be having
more IOT Things as we go on. I’m sure this is going to be one of these topics that’s going to become synonymous with programming. Especially
when we start talking about programming of embedded devices, which we’ll be
covering. Now when we come back we’ve got Mark Smith. He’s going to be coming
back to show you how to build that clock that we showed you last week. We’re
going to give you all the steps you need to take Arduino in its raw form, all
the parts, all the soldering, all the little bits of programming that you’re
going to need, to make it become that very cool analog clock/watch/thing. Which, by the way, is not connected to the internet. But
before we do that, let’s thank the sponsor of this episode of Coding 101, now
when you think of knowledge, when you think of learning, of where you go on the
internet to get new skills, or to refresh your old ones, where do you go? If
you watch TWIT, you know that you go to Lynda.com. It’s the one stop shop for
everything you need to know about everything on the internet. Now what is
Lynda.com?
A repository for knowledge. Both of new knowledge and knowledge that you just need a
refresher course on. Lynda.com is an easy and affordable way to help you
learn. You can instantly stream thousands of courses created by experts on
software, web development, graphic design, and more. Lynda.com works directly
with industry experts and software companies to provide timely training, often
the same day you get the new releases on the new versions on the street. You’ll
find new courses on Lynda. So you’re always up to speed. All courses are
produced at the highest quality. Which means it’s not going to be like a
YouTube video with shaky video or bad lighting or bad audio. They take all that
away because they don’t want you to focus on the production, they want you to focus on the knowledge. They include tools like searchable
transcripts, playlists and certificates of course completion, which you can
publish to your LinkedIn profile. Which is great if you’re a
professional in the field and you want your future employers to know what
you’re doing. Whether you’re a beginner or advanced, Lynda has courses
for all experience levels, which means they’re going to be able to give you
that reference that place to go back to when you get stumped by one of our
assignments. You can learn while you’re on the go with the Lynda.com apps for
iOS and Android and they’ve got classes for all experience levels. One low
monthly price of $25 gives you unlimited access to over 100,000 video
tutorials, plus premium plan members can download project files and practice
along with the instructor. If you’ve got an annual plan, you can download the
courses to watch offline. Making it the ultimate source of
information. Whether you’re completely new to coding or you want to
learn a new programming language, or just sharpen your development skills,
Lynda.com is the perfect place to go. They’ve got you covered. They’ve got new
programming courses right now including the Programming the Internet of Things
with iOS, Building a Note taking app for iOS 8, and Building Android and iOS
apps with Dreamweaver CC and Phone Gap. For any software you rely on, Lynda.com
can help you stay current with all software updates and learn the ins and outs
to be more efficient and productive. Right now we’ve got a special offer for
all of you to access the courses free for 10 days. Visit Lynda.com/c101 to try
Lynda.com free for 10 days. That’s Lynda.com/c101. Lynda.com/c101. And we thank Lynda for their support of Coding 101. Now let’s get straight into
this video. Remember, you need to have watched last week’s episode in order to
understand, but without farther ado, here is Mark Smith. I’m back here with my
code warrior, Mark Smith, from DefCon lore if you know it. You’re going to find
him in the hardware hacking village. Now last week we left the folks with a
basic introduction to what embedded processors look like. What the Arduino
looks like. We gave them links so hopefully they bought the components that we
see before us. And hopefully they’ve got them in their possession. If they
didn’t want to build one of these clocks, they don’t have to, but we’re now
going to give them a tutorial on how to start putting things together. So could
you explain to me the components we’ve got here on this towel right now?
Mark Smith: Sure. First, I wanted to go over the
Arduino a little bit. And what it has and what its inputs and outputs are and
what we can do with them. You’ll notice over here that there are some analog
inputs that the Arduino actually has an analog to digital converter built in to
it. And so you can read analog voltages. We’re not going to be using those
today but that’s something that’s available. Over here is a power section where
you can get various different voltages and ground and other things if you need
those for the rest of your circuit. At the top is a whole bunch of numbered
inputs and outputs. And these are their digital inputs and outputs.
Fr. Robert: Let’s take a step back there because
there are some people who wonder about the difference between analog and
digital input. And you know, really quickly, digital means on or off. It only
has two states. Whereas analog, you can have how many different values?
Mark: On the Arduino- well, analog in theory
is an infinite number. But on the Arduino it uses an 8 bit analog value. So between 0-255. 256 different values.
Fr. Robert: And of course our audience knows how to
do that, because we went through the binary episodes early in the first module
of Coding 101. But why would I use digital vs. analog or analog vs. digital? Let’s
think back to what you gave us last week. You were talking about figuring out
something that you wanted to solve. Figuring out a problem
that you wanted to find a solution for. Figuring out something that you
wanted done in your life, when would I say that’s going to need analog, or
that’s going to need digital?
Mark: So it depends entirely on what you’re
trying to do. If you have a light switch on the wall that’s not a dimmer
switch, it’s either on or off. That is a digital output. So if you want one of
those simple on or off light switches that would be a digital output. Whereas
if you want a dimmer switch where it allows you to turn it up a quarter of the
way, half of the way, three quarters of the way or whatever, that would be more
like an analog output. And you would use what’s called a PWM output. Or a pulse
width modulated. I’m not going to go into the details of what PWM is or how it
works, just know that that’s how you get an analog output from a digital
system.
Fr. Robert: Right. And actually we’ll be talking
about that in Know How. This is some great time for some crossover because
servos on modern quad copters will all be digital. But they use PWM to
approximate analog. It’s like you said, analog is technically infinite. But an
approximation of analog is not. It would be limited by how many values you can create
with the PWM values you have.
Mark: Yes. So the Arduino is not actually
capable of outputting an analog voltage, but it is capable of outputting a
digital voltage and turning it off and on fast enough so that the average
voltage is an analog value. And that’s what PWM is doing. You’ll notice that some
of the numbers have little dashes in front of them. Those specify which one of
these outputs are capable of producing a PWM signal.
So the tildes are the ones that can produce a PWM signal. The ones without are
just digital only. Over here you also see a TX and RX. Pin 0 and 1 are used for
the serial output and input. And we will be looking at that a little bit later
with our project. So that’s what’s on the Arduino and then there are various
other connectors. There’s a USB connecter there that’s used for programming
and/or powering it. If you don’t want to have it hooked up to USB you can just
power it through a normal 2.1mm barrel plug like all of your appliances come
with. And then there are these random 6 pin headers that are used for if you
brick the Arduino chip and you need to reprogram it from the ground up. If the boot
loader is broken you need to be able to just completely grab it by the brain
stem and have it do something completely new, that’s where you would program
it. And then that one over there is used to program the serial converter.
Fr. Robert: You told them to buy this so hopefully
they have one of these, but you also told them to get this protoboard.
Mark: The proto board is a- these are what
are called shields. So Arduino has the concept of a shield. The layout of this
board is very well defined. The spacing of these pins relative to these pins,
how many there are, what signal is on each pin, all of that information,
including all the way down to these mounting holes over here, is all very well
defined by the Arduino community. By the folks that make the Arduino. And so it’s
very easy for someone to say alright, I’m going to make another board that has
these long pins on them that I can just put right on top of the Arduino like
so, plug it straight in, and now It looks like one unit.
Fr. Robert: And you can stack these. I’ve seen
Arduino boards with like 5 different shields on top of them. Ending
with like an LCD display.
Mark: And so these are called shields. And
they are kind of a standardized way of making a component that will fit onto an
Arduino. This particular shield is a proto shield. And so it’s got a bunch of
these holes on top that we can push the wires into that we showed you last
week. This particular shield is one that I got because it was cheap. It ended
up doing some things that I didn’t like so this is one that I would actually
not recommend. The one in the show notes from last week is the one that I do
recommend.
Fr. Robert: This doesn’t fit exactly, there are some unused pins that you can tell on the bottom.
Mark: So this board was meant to fit on a
newer Arduino. Some of the newer ones added a couple of pins over there and
they added a couple of pins over here as well. So there are some differences. But
this is going to work just fine. It means that I won’t be able to use the
buttons that are included on the board over here. I can’t use those, I have to add my own buttons. But we’ll do that. And
then the other thing that e had you guys buy is this and it is not a shield, it
is not specifically formatted to fit on an Arduino, but it is a real time
clock. It is a DS3231mumblemumblechip. Something, I don’t remember.
Fr. Robert: Now we do have to stop here. Because a
real time clock, RTC, you always see RTC. If you’re doing any sort of embedded
programming, in fact, any programming whatsoever, if you look far enough back
in the library, there will be a reference to the real time clock. Why is a real
time clock so important in programming?
Mark: So any time that you care about timing,
and timing meaning, how fast or slow does something happen, or when does it
happen relative to something else, or in our case, what the literal time is,
you need to have a precise clock. The Arduino itself has a clock that’s built
into it, it’s that little metal canister right there. That
is a 15 megahertz clock. And its 16 megahertz ish. It’s
not very precise. It’s a quartz crystal.
Fr. Robert: They just figured out that when you
compress it, it’s going to vibrate a certain number of times per second and
that’s what gives you your timing.
Mark: Exactly. But it’s not very precise. And
so if you rely on that to count the time, it’ll be slow or fast or it’ll change
over time, they’re not very well heat compensated. For a microprocessor that’s
just doing stuff, it doesn’t really matter. But if you care about the timing,
like in your case for the quad copters, I need to be able to spin those fans at
a very precise speed right. And I need to set that servo at a very precise
value. And that case, a real time clock really matters. In our case, we’re
trying to tell the time. And I want to know what time it is and I don’t want my
clock to drift over time. And so I want a very precise clock.
Fr. Robert: The old-schoolers among us will know this problem, back early in the IBM PC days, when we didn’t
really use RTCs, it was just the speed of the CPU. You just assumed it was
going to be running at a certain speed. So I used to have video games, way old
school video games, that you would upgrade and suddenly everything is running
double speed. And that’s why you had the turbo button on the front of the case
because you’re like, no I gotta slow this thing down. And once they realized,
oh, there is going to be a lot of different applications where you’re probably
going to be using this over time which means the hardware is going to improve,
they needed a way to make sure that the timing would always be the same. And
that’s why we started using an RTC.
Mark: By the way, I think you and I just
dated ourselves. We remember turbo buttons and I was able to bring out the
clock speed of the original PC.
Fr. Robert: I still have one of those. I love that. The little front panel. Now why is this time clock so
precise vs. just the crystal on the Arduino?
Mark: So the chip on here is very
specifically designed to have a very precise clock on it. It is a primary
designed component. More importantly, this particular one is even temperature
compensated. So one of the problems with clocks is that when
they get warm or cold, they will speed up or slow down. And so one thing
you can do is you can compensate for the temperature and speed up or slow down
your clock accordingly. Some of them are temperature controlled where it will
actually have a little heater element on there and make sure it stays at a
current temperature. Or some are compensated, where it doesn’t actually change
the temperature, but it will measure the temperature and then adjust the clock
accordingly.
Fr. Robert: We’ve got the RTC, can you show us how we put these together? So I need the shield on top of the
Arduino, and then I have to somehow interface the real time clock with the
shield.
Mark: Yes. So the real time clock uses a
protocol called I squared C. or IIC. It is a serial bus. You see over here
where it says SCL and SDA? That stands for serial clock and serial data. Those
are where the actual data is between the real time clock and the Arduino. And
then VCC is your power source and ground is your negative power source. So
those 4 pins are all you need to populate this real time clock to be able to
get the data into and out of it. Then we have similar pins over on the other
side. This particular RTC module has them on both sides for convenience. There
are 2 other rpins on top here. The 32k is a very precise 32 kilohertz output.
That you can use to drive other counters and whatever else you need a very
precise clock for. We’re not going to be using that. And then the SQW, I’m not
entirely sure what that it is. I think that’s a pulse per second. Again, we’re
not using that. All we care about right now are the power and the serial clock
and serial data pins. We’re going to be using the IIC bus out of this. On the
Arduino Uno, IIC is pins a5 and a4. That’s just one of the standards that
Arduino created when they developed this board. However, be aware that newer
versions of the Arduino, specifically the Arduino Leonardo, which is a similar
form factor to this, put the IIC on a different pin. They put the signals on a
different pin. If you’re going to be using an Arduino Leonardo or one of the
other ones, make sure you know which pins your IIC are.
Fr. Robert: No matter what device you’re using, you
have to look at it and make sure that it’s going to match up with the pins you
think they are.
Mark: Exactly. If you look at the pins on the
real time clock there, I can actually put the RTC into the Arduino directly
like that. We’re not using the 32k, we’re not using the square wave, but if you
put them in like that, that puts the serial clock and serial data in the
correct pins and then I just need to configure the Arduino to give a positive
voltage on the VCC and a zero voltage on the ground.
Fr. Robert: But of course we’re not going to be
plugging the RTC directly into the Arduino because we want to go through the
proto boards and add components.
Mark: So we’ll go ahead and add the proto
board. Just gently squeeze it on, make sure all your pins are lined up. I’ve
got a couple extra hanging over there.
Fr. Robert: If you buy the one in the link, you won’t.
It’ll line up perfectly.
Mark: So we’ve got to add that in and again,
we’ve got a couple of extra pins hanging off over here. So we plug that into
the proto board. And we still have the little power light lit up. And I will
show you once we get to the code how that works. In fact, I think now’s a
perfect time to get to the code.
Fr. Robert: Yeah, let’s go ahead and take a look at
the code, now we do have to say, it’s not going to be as simple as turning on
your IDE. Because you’ve added a component. The RTC is
something very specific that not every Arduino developer is going to be using,
so we need a library. And everyone who has watched Coding 101 knows what
libraries are. They’re basically just code that someone else wrote that you can
import and use.
Mark: Correct. so we’re going to be loading-
actually we’re not going to be doing it on the show, because its dependent on
what operating system you’re running and where you get the libraries and all
that. But it is a very simple process, there are lots of tutorials on YouTube
and-
Fr. Robert: You learn how to do it once and that’s
it.
Mark: So in this particular case, you could,
in theory, write your own code that talks IIC to the real time clock and talks
the protocol that the real time clock is expecting and calls the right
functions and pulls out the right data and all that. You could, or you could
just import the library that the people who made this have already written, and
then you just call RTC.get and you get it all. So that’s what I’ve done on my
code here. I’ve included the DS1307RTC. So the 1307 was one of the more common
RTC chips. There are several other chips that implement the same protocol. And
so this chip is one of them. So you just load the DS13RTC library. It depends
on another library called Time. So we’ll be using some of those functions as
well. And that’s all linked to in the show notes. Links to these libraries and
where and how to get them.
Fr. Robert: SO a quick programmers note, anyone who
has watched any of our modules, has seen includes before. It works exactly the
same way. What you’re telling the developer environment to do here is to look
for the library, that’s after the include statement, and it will now allow you
to use all the functions that were written inside that library. So we’ve got a
bunch of define statements, what’s going on here?
Mark: There are several places where I want
to know what pin I need to apply power to. And I could write A3 in all of those
places, I got a pin mode which tells it whether it’s going to be an input or
output pin, and then I’ve got a digital write that’s going to say what value do
I want to write to this pin. And then in some other cases later we’ll be using
pins a lot more often in the code. But I could write A3 in every single one of
those places. But then if I ever decided to change it, let’s say I want to port
this code to work on a Leonardo, where the pin is on a different pin, I could
go through all of my code and look for all of the places where I wrote A3 and
hope I caught them all. Or I could do a global search and replace and hope that
I didn’t catch something that was just literally the string A3 but not used in
this context. All of that is kind of messy and a pain
in the butt and blah blah blah. So instead what we do is we define a string,
and that’s what the #define is doing. And we’re saying the string RTC VCC. That
is an arbitrary string that I have given to this and every time the compiler
sees RTC_VCC I want to put A3 in its place. It is literally a string
substitution. And it happens at compile time not at run time.
Fr. Robert: So what this means is that if I were to
say move this over to a Leonardo and the Leonardo has different pins, rather
than having to redefine again, all the different pins in the code, I just go up
here, I say no, no, no, just change RTC_VCC to a 6. And boom, I’m done.
Mark: So yes, you can just change the pin
definition in one place, hit recompile, and it propagates all through the rest
of the code. So we have defined the pins that we’re going to be using here.
Then you remember from last week’s episode, we talked about the set up
function.
Fr. Robert: There are 2 things we need in every
single sketch, and that is the set up and the loop.
Mark: And there’s the loop. So what are we
going to do? Well, we want to apply power to the RTC, so I’ve defined which
pins are the VCC in the ground and I’m going to make them output pins. And then
I’m going to digital write a HIGH to the VCC pin which will output a high
voltage. Either a 3.3 or a 5, I can’t remember on this one. And then I’m going
to write a LOW to the ground pin. And so now I’ve just created 2 power pins. As
long as whatever you’re powering draws less current than what the Arduino is capable
of sourcing, which in this case it is, then this is a way of cheating. And this
saved me from having to put the RTC on the bread board and then run a bunch of
wires to it. It’s just kind of a cheat that I did. But it works. So we have
power to the RTC. In those 4 lines. And the next thing
we want to do is set up a serial console for debugging output. So we can see what’s
going on in my code. The actual final product isn’t going to use this. But it’s
helpful for our development process while we’re writing the code and figuring
out what it’s doing.
Fr. Robert: It gives you visibility to what’s
actually happening.
Mark: Exactly. So we’re going to set up the
serial port at that rate, 115200, and then we’re going to wait for the serial
port to initialize. And then once the serial port is initialized we will delay
by a 5th of a second just because. We’re going to print out “hello
world”, which is just a way of letting you know that we’ve got connectivity,
things are working, we’ve booted up, and we’re ready to go. Then
the loop. Again, remember from last week that loop just gets called over
and over and over again. And so we need to do whatever we’re going to do in
this time. So TM elements is a data type. That is
defined in time.h. And what this is, is an object that
has a bunch of different time elements. So you’ll see time.hour, time.minute,
time.second. So if you load a time into the TM variable, and we’re doing that
with the RTC read here, then we can use that to get out all of the internal
elements of that time. So it’s a grouping of data that all serves the same
purpose that we’re going to try and get and pull different bits and pieces out
of it. So RTC. Remember what I told you about, we have
a library that we use for reading things. That is right there, this line is how
we read something from the RTC. That is a heck of a lot easier than writing IIC
protocol code right? Someone else did all the complexity for me, all I have to
do is RTC.read, give it a time element, object, and it will populate that time
element’s object with the current value from the RTC. Super
easy. So now after this point, the TM has all of the current time in it.
Now you’ll notice that we have that wrapped in an if statement. The RTC.read function returns either a true or a false. Depending on whether it was able to successfully get a value from
the RTC. And we’ll look at what happens there a little bit later. For
right now let’s assume that it returns a true which means, yep, I got data. And
it returns the data in a TM value. What do we do? Right now we’re just trying
to make it simple, make sure we can read from the thing, so we printed to the
serial port. We print out the hour, a colon, minute, colon, second. You’ll
notice that I’m not putting any leading zeros in here because I’m trying to
keep the code simple. So it’s not going to look like a perfect clock on the
serial port but its close enough. And that’s it. And then when we get to the
end of the loop, it goes around and does the same thing.
Fr. Robert: Now the nice thing about this is the if statement, the if/else, that is our error checking.
So if the clock has initialized properly and if it has powered up properly, and
if it is giving us data, it will get that nice little unit from the RTC, which
we can then strip down and display just what we want. But then the else
statement says if I don’t hear from the clock, display this error message. Go
ahead and go back. So if we were to pull the clock…
Mark: We get a false from the RTC. The RTC
says there was a problem. Then we need to go figure out exactly what that
problem is. And so the else for there, and then we do another if. If
RTC.chipPresent, which is another function of the RTC object, says alright, I
was able to detect a chip, but it’s not giving me the data I want. So if it
says if the chip is present, then print out this error message. Which is “RTC
is present, but error reading from it. Trying again”. And the last one is it’s not there. And then we delay one second and that’s the
bottom of loop. And it just goes back and does it over and over again.
Fr. Robert: We’ve seen this several times
especially on C Sharp where, yeah, ultimately, your loop should be as short as
possible. If you’re doing it the right way, it’s not going to be pages and
pages, because you’re just pulling from libraries and saying okay, I want this
function, I want this structure, I want this data, I’m done. Now show us how I would take that sketch and put it up.
Mark: Okay. So on the Arduino there is that
button which is verify. Which just basically means compile
the code and make sure it compiles. So let’s do that. And it just goes
through and it compiled the code. Done. That was easy.
It didn’t print out any error messages.
Fr. Robert: And actually can you go ahead and add
an error? Let’s show them what that looks like when it doesn’t compile
properly.
Mark: There we go. So let’s go up and verify. Error compiling. So whenever we see
the orange bar there, it says error compiling, and then FU was not declared in
the scope. Well, that’s true. I did not declare fu.
Fr. Robert: It has no idea what you’re talking
about and it doesn’t want to upload that because that’s bad code.
Mark: Exactly. So let’s remove our fu, there
we go. And we will go ahead and verify. There are also keyboard shortcuts for
this. Control R for verify. And control U for upload.
So we verified our code, our code works. Let’s go ahead and upload it. And
that’s what that arrow there does. Upload using programmer. Before we get here,
you need to tell the Arduino IDE what board you’re using. We are using an
Arduino Uno here. Because the hardware is a little bit different, it needs to
know how to compile it for each of the different Arduinos. So we need to tell
it it’s an Arduino Uno. And then you need to tell it on what serial port it is.
It’s USB but it looks like a serial port. So you’ll notice over here that it
found the Arduino Uno on --- . So we select that, now
we’re ready to program it. So let’s go ahead and do that. It’ll build it again,
and now it is currently uploading over the serial port. And it says done
uploading. So our program reads from the RTC and outputs to the serial port. So
now we need to hook up to the serial port and see if we see anything. Luckily
Arduino helps us with that as well. Go to tools a serial monitor. Let’s bring
up the serial monitor. Look at that.
Fr. Robert: So hello world, that was in the initial
statement. So that’s the set up. And then right below it, we’re seeing the
output from the loop. Fantastic. And that’s it. So
this has allowed us to take input from the RTC, using the library, get the
right data, and then push out just the pieces that we want. So that’s not actually
outputting everything that’s coming out of the RTC. Its
selecting hours and minutes and seconds. Now this is very cool. But
we’re not going to leave it here right? We do want to go one step farther. We
are running out of time for this module but if you want to go ahead and show
some of the components you’re going to drop on this board.
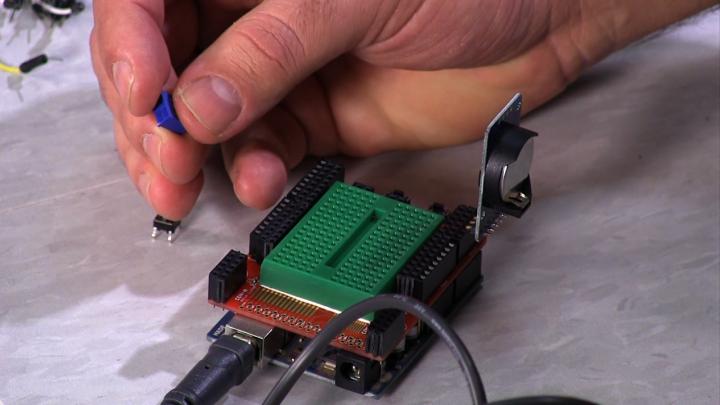
Mark: So right here is a tiny switch. A little push button. We’re going to be using push buttons
because every clock, you need to be able to set the clock right? The RTC
doesn’t come necessarily programmed for your time zone or anything else. So you
need to be able to set it. Similarly, in the next module, we’re going to be
outputting analog voltages. And analog voltages often need to be calibrated.
And so we have these variable resisters, it’s called a potentiometer. So you
turn that little brass screw head at the top there and you can set a value
between 0 and 10k ohms very precisely. And then we will use that to calibrate
our meters so that they output the right thing.
Fr. Robert: If you’ve followed our links, you’ve
got all of these components ready to go. If not, you still have a chance. We’re
going to put the links again in this week’s show notes. If you just saw this
project, and you said oh yeah, I want to do that. And hopefully you have
because you’ve realized this is not magic. There are some people who get
completely discouraged when they first get one of these units because they
realize, I don’t know how to make this do anything. Mark just gave you a very
easy program to make. Something that you should be able to do on your own and
when we get to next week and we start pushing this out to other devices, you
can expand your skill set. Mark, if you could give them a quick tease of what they’re
going to see next week, just so they can wet their beaks, what are they going
to do?
Mark: Next week I think we have some buttons
we’re going to be able to set the time on the clock. And if we have time we
might actually hook up some analog panel meters to these things and make it
look like a clock.
Fr. Robert: Fantastic. That’s Mark Smith, from
DefCon. Where can people find you if they want to see some of the work that you
create?
Mark: I spend most of my time on Twitter. @smittyhalibut.
Fr. Robert: Thanks for being our code warrior, we will see you again next week when we take this
to the next limit. Level. Thing. Back to you, padre.
Once again,
we thank Mark Smith for dropping the knowledge about embedded processors. Next
we’re going to get more into the nitty gritty. We actually ran out of time, but
before we’re done in 2 more episodes we will show you all the steps you need to
be able to build your own analog clock out of an Arduino. I should note that
starting next week we’re also going to be having segments on Know How. So make
sure that you watch know how because we’re going to show you how to de-solder
some of the meters and we’re going to take you through the step by step on the
hardware so you’ll get more of the programming on Coding 101 but you’ll get the
hardware knowledge on Know How. Make sure that you get that cross thingee
because that’s where it’s going to happen. Now let’s jump back over to Lou.
Lou, one of the things I really like about playing with embedded processors is
it gets me back to being able to feel things. I like to see what I’ve created.
Its great finishing a program and having it do what I expected it to do. But there’s
something else about actually being able to assemble bits and pieces.
Lou: Yeah, I love that. I do that daily with
my son and it’s a great experience to be able to put stuff together and see
what it comes out to and seeing his face light up when it moves. It’s just
amazing.
Fr. Robert: One of the topics that Mark touched on
was the shields for Arduino. And I’ve got to say, since he played with the
hardware, I have been looking through all the shields that are available and it’s
amazing. One of the projects that I’ve played with is getting a GSM shield,
basically a cell phone shield, that you can drop on
top of an Arduino. I use the Arduino to be able to control my quad copter and
then I also had the ability to contact my Arduino through a cell phone signal.
So yeah, the options really get unlimited once you start stacking those things
together. One thing I would suggest is you don’t stack
so many Arduino shields that you get an Arduino sandwich that it really doesn’t
work well. You start running over your amperage. Have you had much luck playing
with embedded hardware and software?
Lou: Yeah. In fact we attempted to build an
alarm system with the GSM module that allowed us to, if there was an alarm that
went off we could make a phone call or send a piece of data, SMS or whatnot. So
we actually tried that out. Problem is, I had some
battery problems, so we’re still working on it. That was one of our demo units
that we played with.
Lou: And we said this during the segment but
I think it’s worth repeating. Which is, we know that you can
go out and buy something that would probably do what you wanted to do for less
than its going to cost you for an Arduino. Because remember, it’s not
just about the hardware, it’s about your time and most of us, our time gets
kind of valuable. But again, it is a great way for you to get back to that
foundation of programming. This is something we talked about with Steve Gibson.
If people actually understand how things work, then they can fix them when they
break. Otherwise it’s just a throw away society. Lou, we’re going to be coming
back next week with more embedded programming knowledge, but could you tell the
folks where they can find you between now and then? Because
you are getting far more involved with the TWiT TV network. I think the
TWIT army needs to start following Lou Maresca.
Lou: I appreciate it. I love being on this
show, it’s awesome. On Twitter, @LouMM, and about me, Lou MM
as well. And all of my work during my day job is at crm.dynamics.com.
Soon we’re going to have a new site, LouSM.com.
Fr. Robert: Ladies and gentlemen, he is Lou
Maresca. He is no longer our code warrior, he is our
super special co-host. I like being able to say that again. We know that this
is a lot of information and we want to make it easy for you to follow along on
the projects. So we’re going to make sure that in our show notes we’ll have
links to the places you can buy the individual pieces as well as where you get
to download the Arduino IDE and a few helpful hint sites so if you want to move
ahead in the class, you can do that. But in order to get that information, drop
by our show notes page, at twit.tv/code. You can find our entire back catalogue
of episodes which is important because it’ll let you download entire modules if
you want to learn what we did in C Sharp or Perl or PHP, it’s all right there.
It also gives you a place where you can use that little dropdown menu to get
every episode of Coding 101 automatically downloaded into your device of
choice. We make it easy because we love you. Also, we do this show live every
week. Now it’s on Thursday at 1:30 pacific time. Starting in March, we’ll move
to 2:30 pacific time on Mondays. You can join us at live.twit.tv. And as long
as you’re watching live, jump into our chatroom at irc.twit.tv. I want to thank
everyone who makes this show possible. To Leo, to Lisa, to
Cranky Hippo, to Zach. Zach, can you tell the folks where they can find
you?
Zach Smith: Twitter at @eskimozach, and followers
are appreciated.
Fr. Robert: Follow Zach, @eskimozach,
follow him and one of his followers may win a brand new Arduino. May. Until next time, he’s Lou Maresca, I’m Robert Ballecer, end of line!