Know How... 143 (Transcript)
Net Casts you love, from people you
trust. This is Twit.
Bandwidth for Know How is brought to
you by cachefly.com.
This episode of Know How is brought
to you by iFixit. You can fix it and I fix it makes it easy with free step-by-step repair guides,
high quality replacement parts, and all the tools you will ever need. For $10 off your purchase of $50 or more go to iFixit.com/twit and into the code know-how check out.
And by Braintree. If you are working on a mobile app
and searching for the right payments API check out the Braintree v.zero SDK. One simple integration and you get every way to pay. To learn more and to try out the Sandbox go to braintreepayments.com/knowhow.
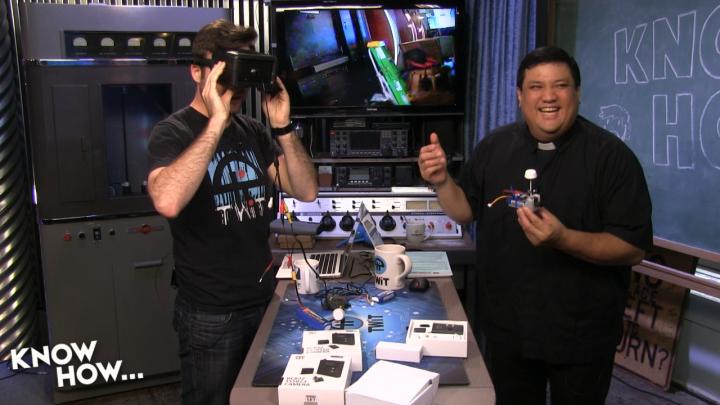
Today on Know How we are showing you
a wireless camera system, our future projects, and your questions our answers.
Father
Robert Ballecer: Welcome to Know How, it is the twit show where we play
with maracas.
Bryan
Burnett: Yeah, we
had these left over from last night. What is that called?
Fr.
Robert: Mobile
Focusing in San Francisco.
Bryan: Yeah, it is like a little mini CES.
Fr.
Robert: Well, mini,
mini, mini, mini…
Bryan: I've never been to CES so I don’t
know.
Fr.
Robert: You know who
has been to CES here? Everyone else on the Know How crew. Out of the three of us. Seriously, we are not here to
talk about maracas. We are here because we build, bend, break and upgrade. I’m
Father Robert Ballecer.
Bryan: And I’m Bryan Burnett.
Fr.
Robert: And for the
next minutes we are going to be showing you some of the projects that we have been
playing with. So you can take them home and geek out on your own.
Bryan: And this week you are looking at an
article about a remote surgeon?
Fr.
Robert: Yeah. It’s
the future right?
Bryan: Right. The idea is that somewhere a
really talented surgeon who can’t physically be somewhere, will remote in like
I do for my laptop to my desktop, and will perform surgery on someone with
robot hands.
Fr.
Robert: Hopefully
he doesn’t hit escape right before he is done. It has been the promise for it
while. This whole idea of tell us surgery. So you’ve got, in this particular
case, the Raven two. It is one of the high end ones, it
came out of the University of Washington. The idea is made got a surgeon who
has a stereoscopic camera mounted on top of a robotic system. And he has these
very fine manipulators that he can use. They don’t look like joysticks they
actually go over his fingers so that he can control with a really finite
precision what the arms are doing. Because as you can
imagine, you are going to need some precision with surgery. This was
promised to us. It is the kind of thing that in the future they would do. You
can have a really skilled surgeon who does his morning surgery in London, his
afternoon surgery in Washington and then in the evening he is in China.
Bryan: And he doesn’t even have to get his
hands messy.
Fr.
Robert: Absolutely.
Now, in this case he is tying knots. Imagine how hard it is to tie knots with
surgical thread from a remote distance. In this case he is just next to it.
This is just a demonstration. But there is no reason why he couldn’t be doing
this from the other side of the planet.
Bryan: I guess there is enough bandwidth? Because this would be going out over the Internet.
Fr.
Robert: Yes. That
is where our discussion comes in. This all happens over the Internet. The
original tele-surgery unit were kind of like dial-up.
And it was not good.
Bryan: You don’t want lag when you are
doing surgery.
Fr.
Robert: How awesome
would that be to gain consciousness in the middle of your surgery and hear the
dial-up tone?
Bryan: We are getting the doctor back on
the line. Hold on one second.
Fr.
Robert: You’ve got
surgery. So, there is an issue though. This is happening more and more. And
this is what I wanted to talk about.
Bryan: This is the broader scope of the
Internet of things.
Fr.
Robert: Anything
connected to the Internet. We didn’t call this the Internet of things when this
was first created. But it is an Internet of things. It goes on the Internet and
it talks to its base station and a have a communication so that the doctor can
see and he can control the arms on the other side. But even though the hardware
is brilliant, the software security is bomb. Because they
didn’t design it for that. They are now software engineers, they design
the hardware and then they designed the software to interface with the
hardware. But they never thought that some troll would attack a surgery machine
in the middle of surgery.
Bryan: And not really even that sophisticated
and attack.
Fr.
Robert: Exactly.
This doesn’t have to be someone hacking the matrix to get into the surgery
machine. This could just be someone spamming that IP address. They may not even
know what it is. They might be running a script that is just hitting a bunch of
different IP addresses looking for weaknesses. The problem is, because this
machine is not harded and because it doesn’t use
encryption of any kind, if you throw enough bad packets at it, it does what is
called an e-stop. It is a safety feature. It just means the machine will stop
whatever it is doing and wait to reestablish connection with the originator.
The problem is, if they keep spamming that poor it will never reconnect. I
think losing connectivity in the middle of the surgery is probably not a good
thing.
Bryan: That sounds really, really scary.
Fr.
Robert: It is
horrible.
Bryan: So from your experience in
enterprise, what would you do to stop something like that?
Fr.
Robert: The first
thing is you would never put this on the Internet. Not on encrypted traffic.
Have some sort of encryption so that people cannot see the traffic. The other
thing you could do with this is run what is called a man in the middle attack.
Which, there are two ways to do it for this machine. De-DOS it And then pretend like you are the host when it tries to
reconnect to you and then you have control of the machine, which is super bad.
Or, the other man in the middle attack is when you start injecting weird
packets into the stream. In the middle of the surgery the arm might just decide
to go whop. This is bad stuff.
Bryan: This is almost like a movie plot
now.
Fr.
Robert: It is. The
funny thing is, the researchers who discovered this
law are also from the University of Washington. So it is the same school that
developed the technology and now you have a different generation of engineers
saying this is cool tech, but this was a really bad idea. Don’t do this.
Bryan: Well, it is not just this that we
have talked about. It is cars too. Smart cars that drive
themselves. And then having that separate air gap
between the system that controls your breaks and the system that is connected
to the Internet that does all the entertainment system stuff.
Fr.
Robert: We are
seeing more and more of this. It really hit in the 1990s and early 2000’s. When
companies realized we don’t have to buy a private line. We don’t have to lease
a line. A really slow line. For
umpteen thousand dollars a month. We could just use the Internet. And it
was a cheap way to get connectivity to different branches, which is a great
idea because now it means anyone who has an Internet connection can do whatever
you want them to do. But something like this, it is a cool idea to be able to
do the surgery anywhere but on the flipside, would it ever really be safe? Even
with encrypted traffic, to put a machine that actually has its cause inside of
another human being, on the Internet.
Bryan: You know, I am sure there will be some failsafe. Maybe there will be a doctor on hand that
just pushes the machine out of the way and says I’m getting in there.
Fr.
Robert: If that
doctor had the skill to do the surgery he would have done it in the first
place. And, it is not just robotic doctors, it is not just cars, it is
everything that we are putting on the Internet right now. Everything you own
that has connection to the Internet. That is your laptop, your watch, your
bands, whatever it is you are doing. It is sensors that control everything from
traffic lights to power plants. All of these gadgets that were created at the
time when they didn’t really worry about security, are
now suddenly having to be exposed to a really insecure Internet.
Bryan: So we are having to change our minds.
Fr.
Robert: All right.
Let’s get away from robot docs who are trying to hack us. We have been reminded
by our TD that we may need to move on. All right, so what we have in front of
us is a wireless camera system. This particular one was designed for remote
control vehicles. Not necessarily quad copters. I have used this on boats, an
FPV lunchbox, this one I have set up for use on a quad
copter. There are a few things that you are going to need for any kind of
wireless system. This is sort of the starter kit. This one came with a kit that
I bought from Hobby King for $100, it included everything I need it. This is a
receiver and this is the thing that is going to receive your signal. It just
outputs to a screen or two goggles or whatever. This is a transmitter, so this
is the device that is going to take the video signal that it receives from the
camera and it is going to broadcast it at 5.8 GHz. It is a tiny little guy. And
of course you’ve got the camera unit and you’ve got antennas. On the other side
you are going to have to have some sort of display. This one is a super cheap
one. It is a quantum. This entire kit cost $100 versus like if I were to get a
Fat Shark where just the goggles could run me $300-$500.
Bryan: Fat Shark is one of the more
popular brands.
Fr.
Robert: It is a popular
brand. Fat Shark, I like Immersion rigs but those are mostly the transmitters. A
lot of this gear is interoperable with other gear from other manufacturers.
Bryan: Did you have to put this together
yourself?
Fr.
Robert: Yes.
Bryan: I was wondering why there is
glue showing on the sites and stuff.
Fr.
Robert: This is
literally something you can’t assemble on your own. This is the screen, I bought this one on eBay for four dollars. So this
is a screen that you would put in your car so you can look at the backup
camera. It is not great resolution but what they have done is created this faux
mold and if you look at the back it is a rearview mirror camera. That is
actually where you put the little ball. And then they give you this lens that
you can move back-and-forth to adjust it to your face.
Bryan: What is the resolution that the
camera is putting out anyway?
Fr.
Robert: It depends.
This camera is decent. It is putting out I think 600 lines of resolution.
Bryan: So you don’t really need a high
resolution screen.
Fr.
Robert: And, the
other problem is that high-resolution cameras would need high bandwidth. We
don’t need that.
Bryan: And this isn’t for recording
purposes. We just want to be able to see from the point of view of the craft.
Fr.
Robert: That is
actually a very good point because people think that when you see those videos
on YouTube that is what the pilot is seeing.
Bryan: I wish.
Fr.
Robert: Never. Unless the pilot has a cable going from the quad copter. He’s
got like a 50 foot HDMI cable and is just flying the quad copter around his
head. You can’t do that. Just the wireless bandwidth for that would be
enormous. Especially since you are moving. We are not
trying to give you the run down for all FPV systems right now. We are just
showing you the basics. If you are going to create your own you are going to
need something to receive the signal, you are going to need something to send a
signal and you are going to need something to create the signal. So that is it.
You need for basic parts to any wireless camera or FPV system.
Bryan: And this is all put together.
Fr.
Robert: Right. So I
3D printed a little pod here so that I could put these in. This is not a great
3-D print by the way, it is okay. But I will make it better. Let me show you
really quickly how this would work. I have got this going out to both these
goggles and to an up convertor that I installed on the back of the table. If
you connect that power, lets turn on receiver, the camera, and turn that one. There we go. So now, we are
broadcasting from this camera to the receiver. Go ahead and that these goggles
on. Use the slide on the side to adjust.
Bryan: All right. Here we go. I am
immersed. It is the future, Padre. Okay. I look as cool as I thought I did.
Fr.
Robert: Hold this
up because one of the things that we want to talk about when we are dealing
with these wireless systems is the polarization of the antenna. Notice that
both of these are in the same orientation. They are circular antennas. We are
going to explain in a little bit why we want to use circular antennas rather
than linear. I am going to go ahead and do a walk around. This is a higher power
transmitter. This is transmitting at 500 mW, which
technically in this configuration is illegal. We shouldn’t be doing this. A lot
of transmitters will come in at 200 or 250. I have even seen them down as
little as 50 mW. But most of the time, they are
transmitting line of sight. We are going through walls, we are going through
ceilings.
Bryan: Here in the studio we have a ton of
Wi-Fi signals and stuff. With that interfere with it at all?
Fr.
Robert: This is 5
GHz. We do run five and it won’t be running into that. These things will be
frequency hopping so that they will try to clear a way from any interference. But, for example this is where Burke spends most of his
day. Hi Burke. Hey, you know what? We haven’t had a chance to show the Know It
All’s what the Know Hole has been demoted to. There we go. So, the Know Hole is
sort of like the crack of no right now.
Bryan: It is pretty tiny now.
Fr.
Robert: So, it is
not too bad. Considering all the material that we are going
through right now. A transmitter like this actually has a decent amount
of punch.
Bryan: The video has been pretty solid.
There are a little hick up but we are going through
walls and stuff.
Fr.
Robert: The reason
why I am doing this is because we want people to see that what I am doing right
now is the equivalent to getting this thing 100 m away from you. But in line of sight. But you are not going to get super
steady video. You are going to get jitters, low resolution and breakup.
Bryan: A you know
what? I feel like this would be perfect for if I was flying FPV. I don’t need
it to be super sharp. This is way better than just trying to fly by sight.
Fr.
Robert: Right. Yes
and no. You will notice there is very limited depth of field.
Bryan: That is true. That tree is coming
up pretty fast.
Fr.
Robert: So like
right now I am next to this wall that I have no idea that is there. Now, let’s
talk about some practical things with wireless cameras. I want to start with
the antennas. Because antennas are important.
Bryan: Why are they round?
Fr.
Robert: Well, yes.
Let’s talk about this. These are circular polarized antennas. When you have a linear antennae you are basically sending out signals
360°. And 90° polarization. So, for example, if I have
two linear antennas like this they are receiving perfectly. Turn this antenna
like that, and now because of the way they are polarized the signals are only
intersecting at one point. That is not great. And I imagine when you’ve got a
quad copter your little circular antenna on the top, as you are yanking and
banking you are always going to be going in and out of the right plane of
polarization. That is not good. What you get with circular polarization is
rather than radiating out at 90°, you are going to get a signal that kind of
corkscrews away from the Santana. And you are going to intersect at many, many
more points and you are going to get much stronger reception.
Bryan: So these antennas are specifically
designed for things that are moving around.
Fr.
Robert: Let me show
you what they actually look like on the inside. Those are encased in plastic.
But if you didn’t encase them they look like this. They look like these little Cloverleaf. This is what they look like. Out of focus. Now, this is actually important because there
is left hand polarization and there is right-handed polarization. Depending on
how and in which direction you been these little
cloverleaf. The reason why that is important is because I could operate
multiple FPV systems, multiple wireless camera systems right next to each other
on the same frequency if I reverse the polarization. So, one is spinning one
way and the other is spending the other way and I can actually put them right
next to each other.
Bryan: They don't interfere with each
other?
Fr.
Robert: Very small
interference. But most of the time you will be able to burn through that. The
important part is that I can have multiple frequencies, multiple antennas and
have a front load of systems operating at the same time, which means I can have
an FPV race.
Bryan: That is our goal. We are going to do
in FPV race.
Fr.
Robert: We want to
be friendly to other FPV systems so that we have the ability to do things like
group FPV flights.
Bryan: That would be kind of cheap if you
started and your signal started interfering with someone else’s while you are
trying to race.
Fr.
Robert: That is one
of the things when I go to fly FPV, you actually have
a flight line. And anyone that is going to fly in that heat will be on that
flight line. You all test your FPV systems and you make sure they are not stepping
on each other. And you also are polite. So for example, if I am going to racing
with a bunch of other racers I am not going to use my super illegal 1 W
transmitter. Because it is going to be super noisy and it is going to blot out
the spectrum. There are no rules but there is politeness. Antennas are
important so consider the antenna that you are going to use. If this was just
going to be a spy cam and it was going to be stationary, then I could use a
linear antenna. And I could get great reception. So, what are you doing?
Bryan: Floor cam.
Fr.
Robert: Very nice. Another
thing about the actual ratio, the higher the ratio of the less likely it is to
interfere with someone else. So, in my FPV kit I keep a bunch of antennas
because if I am at a meet I can swap antennas. Remember they are a pair so you
have the same antenna on each end. To jump away from interference or just bad
signal. What you don’t want to do is you don’t want to create the perfect FPV
system and never intend to change anything. Because, I guarantee you that some
point, especially if you are flying with others…
Bryan: You need to calibrate it.
Fr.
Robert: Right.
Bryan: That makes sense. You were saying
this was running at 500?
Fr.
Robert: This was
running 5 GHz and it uses two things. It uses a frequency range within the 5 GHz
and it also uses channels with the most frequencies. So theoretically this
particular system, if I max it out, I think it can do 32 different systems even
if they are all using the same antenna. And actually, Wide Eye has a very good
point. There are FCC rules and it is not the strength of the transmitter. It is
what calls the EIRP. It is the amount of power that you actually radiate. Which is actually a combination of the transmitter plus the
antenna. But, again you don’t want to just blast out a bunch of random
RF into the sky because it will mess everybody up.
Bryan: Now that we know how these work,
I’m guessing you would strap this whole system to your quad right? Do you hook
into the quad copter battery?
Fr.
Robert: I do
sometimes. I prefer not to. It doesn’t draw that much power, but I don’t like
drawing from my main battery.
Bryan: So this will last probably for the
flight of 10 minutes?
Fr.
Robert: That will
last way more. I could run that for hours on that one battery.
Bryan: Because worst-case scenario you
were flying your FPV and then all of a sudden…
Fr.
Robert: That is the
thing. Remember the draw on the battery is constant. It is always going to be
drawing the same amount.
Bryan: Whereas on the quad it depends on
how much throttle you are giving it.
Fr.
Robert: Exactly.
And I don’t want to punch out so that would mean I would go full throttle on my
quad copter and then it would put the voltage down below what that needs and
then suddenly my FPV cuts out. A lot of people won’t do that because it adds
weight. Adding another battery adds weight. Even a battery is small is that can
take away from performance. But if I am just enjoying myself…
Bryan: If you have something like the 450
you should have more than enough battery to take care of it. Ok, cool.
Fr.
Robert: There we
go. What we are going to do right now, is we are going to step away from this.
We are going to be doing so much more. We just wanted to introduce you to this.
We are going to put it in the notes, places where you can buy gear. Don’t buy
any gear yet. It is expensive.
Bryan: You whetted my appetite.
Fr.
Robert: We want to
show you different types of FPV setups. We want to show you something from Fat
Shark, something from Father Sky, some Immersion rigs because they all operate
a little bit differently. They are not all completely compatible with one
another. So before you go off and buy $800 worth of FPV gear, relax. See what
the finer points are of setting up a wireless system.
Bryan: All right. I will cool my jets.
Fr.
Robert: There you
go. Speaking of cooling your jets. Something that your
jets could use is fixing. Now we here at Know How, one
of the things we do is tear things apart. It is part of our job and it is what
we do best. It is what we enjoy.
Bryan: We break and we upgrade.
Fr.
Robert: But you
have to have the right tools in order to do that. Which is
why we swear by iFixit toolkit. iFixit isn’t just a vendor of
toolkits, although the toolkit is great. In fact to this particular one we had
been using for the better part of 18 months.
Bryan: This toolkit has helped me take
apart my Game Boy, the last project I did. I have taken a part in Xbox, phones,
laptops, and just about everything.
Fr.
Robert: And the
reason why it is great is because it really includes everything. This is the
bit toolset which includes everything you need to disassemble anything. The security bits, and the try-wing bits, the specialty bits for
things like McDonald’s toys.
Bryan: And I replaced batteries on
McDonald’s toys for people.
Fr.
Robert: And it
really is the perfect complement to any project that you might be doing. Because, it is not just tool bits. It is not just driver
bits. It is also things like an antistatic strap so that you don’t destroy the
electronics you are trying to work on. That little bendy,
reach-y thing so that you can get around corners. Tweezers. But my personal favorite are these spongers. So, this
is the proper way to open something like a tight laptop case. Don’t be sticking
a knife or a flathead screwdriver into it.
Bryan: I needed one of those plastic
spongers when I did Shannon’s Nexus five. I didn’t want to scratch up the
screen.
Fr.
Robert: Exactly.
So, you have the right tools for the right job. That is exactly what iFixit is all about. It is not just tools, they also give
you repair guides for pretty much everything that you might need. They’ve got a full proof instructions to fix your iPhone screen, your
red ring of death on your Xbox, swap the battery in your galaxy X5. They’ve got
those repair kits on tap so that you are not just left guessing what you should
do next. Aside from this kit, it is backed by a lifetime warranty and it is
only $64.95. Which means you are going to get a kit which is going to stay with
you, or with the one you love if you are going to give it as a gift. Hobbyists
and home DIYers and fixers alike, use this ProTech toolkit for everything
from quad copters to computers, door knobs, eyeglasses, cabinet doors, sink
fixtures and more. And best of all, with those iFixit toolkits you can fix it and iFixit can help. Now,
with iFixit you can become the DIY maker that you
have always known you could be. Visit iFixit.com/twit for more than 10,000 free
step-by-step guides. I fix that also sells every part in tool that you will
need. Enter the code know-how at checkout and you will save $10 off any
purchase of $50 or more. Folks, we want to help you. And iFixit wants to help you too. Visit iFixit.com/twit and use the code Know How to save $10 at checkout. We thank iFixit for
their support of Know How. Bryan this is the part that you should’ve been
doing.
Bryan: I wasn’t sure if it was now or
later.
Fr.
Robert: We’ve got
Alex just riding us here.
Bryan: Next time, Alex. Just bring a
saddle out here on the set.
Fr.
Robert: Now folks,
what we wanted to do for this next segment is to show you some of the projects
that the two of us have been working on. To give you a better idea of what goes
on in the Know How. Because we show up every week with little
geeky things that we have been doing. Game boys, quad
copters and computers. But, I would say there are probably at least half
the stuff that we start doing doesn’t make it to the show. Either because it
doesn’t work, or we just decide this is just not something our audience is
going to like.
Bryan: Usually by the time we bring
something to the show, we have worked on it two or three times. So we take it
apart and put it back together several times.
Fr.
Robert: We have to
do that because if we don't do that, we can’t really tell you how works.
Bryan: The first time is to figure out how works, the second time is to make sure it still works
and the third time is to document and edit everything.
Fr.
Robert: Because,
especially when we do those pre-recorded videos that actually takes a lot of
time. It is the best way to show you the steps. So here are a few things that I
have been working on. This is so jank. It is falling
apart as I’m holding it. We have been playing with gimbals for a while. This is
a gamble that you would buy for something like a quad copter. This is actually
really inexpensive. That is not supposed to be happening. Okay. Let’s try to
power up sequence again. This is why, we have to do it
several times. Again, and again, and again. It’s going
to work this time. Oh, I know why. Because the sensor fell off. That sensor is
supposed to be bolted on, I guess my super special
sticky tape didn’t work so well.
Bryan: I can see why you didn’t bring this
project before.
Fr.
Robert: This is
attempt number one. It is using the super cheap gimbal which actually works
really well. But, I've customized the firmware but what I am also doing is
adding this little servo mechanism here so that I can change the angle on the
camera. This part is the only part that actually works really well. I have
already tested it but I need to put a bit more weight on the base and I’m
probably going to put his stand on either side so I can just put this on the
ground. But it is super smooth. You can get those shots just off the ground
where you are running and when you look at the video it just looks like butter.
And then what I decided was a big problem with GoPro cameras is you can
actually see what it is filming. You just kind of hope to get
the shot.
Bryan: From years of experience you just
kind of have an idea of what it is pointing at.
Fr.
Robert: So I have
added this. This is a CT five monitor that I have from Marshall. It is great
because it is professional quality. This looks really good and it is perfectly
color balanced. And this will be connected through this PVC to the go Pro
camera. So that I can actually see on top and adjusted for any angle I want.
While the go Pro is actually filming. Now, in the second mockup there are a
couple things I want to do. I do want to add those legs, I want to put all the
wiring internally and I want to add a battery compartment so that it is not
just strapped onto the bottom here. This will actually be integrated into the
PVC itself so that it is literally a thumbwheel. And I am also thinking about
adding an attachment so that I can change the orientation. I can either have
the camera at the top or at the bottom you just flip it.
Bryan: Depending on how you want to do
your motion.
Fr.
Robert: I am
probably going to get rid of this arm is because this arm really screws up the
back.
Bryan: I noticed earlier it didn’t seem
very stable.
Fr.
Robert: Not great.
The other thing that I have noticed about this is I made it really top heavy
with this monitor. So I am going to have to figure out a different balancing.
Either add weight to the bottom were just reduce
weight from the top.
Bryan: So, with all these components but
together how much do you think this has cost you? Minus the go Pro.
Fr.
Robert: Minus the
go Pro, with this monitor this is a $150 setup. It is not bad at all.
Bryan: There are stabilization sticks on
Amazon that I wanted to look at. It looks like it is going at an angle.
Fr.
Robert: I designed
it for that.
Bryan: They are like $300, the nice ones.
Fr.
Robert: If I took
the monitor away, including the gimble this is about
$50. Not bad. That is my firmware. So, this is attempt number one, I am going
to have to refine it in attempt number two. I am probably going to have four or
five different prototypes before I finally bring it on the show. Because, this
is a bit more involved. And you don’t want someone to assemble something and
then be $150 into it and say this is junk.
Bryan: It seems like you have harvested
some components that we have used on previous projects.
Fr.
Robert: And that is
one of the things that you want in your maker workshop. You want enough parts
so that you can put things together after you are done. Let’s go ahead and put
that aside. That is only one of the projects that we have going on. One of the other things that I wanted to show you with this. This one is going to be cool. Let’s put this on the floor. We’ve got so much junk on this table right now.
Bryan: It’s all slight someone was
supposed to clear it during the break.
Fr.
Robert: I know. I
don’t know who that could’ve been though. So one of the things that we have
been lamenting is when we do shots with this the props get in the way right?
Bryan: Yeah. The edges
of the camera.
Fr.
Robert: So, the
alternative was to put it at the bottom like a gamble. Were you could get
buttery smooth shots. But the problem is these landing legs don’t go down far
enough so you have to add landing legs and then you have the same problem.
Bryan: I’ve seen some of the landing legs
that you had and it is not an elegant solution.
Fr.
Robert: It is not.
So, what if we had a way where you could have landing legs that extended down
to here to keep the gimbal off the ground. But then once you got into the
flight they would just tuck away.
Bryan: Is it the new DJI that kind of
lifts up?
Fr.
Robert: So I picked
up these for five dollars apiece. At my local surplus store. Let me just show
you what is going to do. What we have here is a failure to communicate. What
we've got are these for and these will go on the four corners of the quad. And
I’ve got a simple servo trigger here. When I go all the way over to the other
side… so what you do is, you have a metal landing rod that is attached to each
of these and once you get in the air you retract it and…
Bryan: They fold in under here.
Fr.
Robert: Exactly. so you would have the landing gear out from here and then as
soon as you get airborne you would retract it and they would tuck in. And the
camera would no longer be able to see them.
Bryan: Could you do this remotely? I mean
you would have to right?
Fr.
Robert: This is
triggered by the receiver. So this is just a receiver cable. The cool thing
about these is that you are not going to have a problem with the landing gear
partially retracting. This only has two settings. There is all the way on one
side and all the way on the other side. Anything in the middle won’t trigger
it. So, it is actually super positive. They retract really quickly so you can
make yourself a nice set up and just make it clean.
Bryan: They don't feel that heavy either.
Fr.
Robert: Don’t put
these on the 250. You definitely want a 450 for this because this will add 20
g. By the time you have added the metal landing gear it is going to be a little
bit weighty.
Bryan: But this is going to be on a camera
system. So you are going to be going with something that is already kind of
weighty, you are going to be using a bigger battery.
Fr.
Robert: And to get
the landing gear out of the shot that is just priceless.
Bryan: Yeah, because there is nothing you
can do about that. It is not like you can edit them out.
Fr.
Robert: So that is
another project that I’m working on. This hasn’t even gone to the first mockup
stage. What I have done is I have actually printed up some 3-D printed housings for this to attach to these arms. Because right now I am basically just using zip ties. It’s
not very elegant. But you don't want one landing gear to collapse because then
there is no way to land.
Bryan: With your valuable camera on the
very bottom.
Fr.
Robert: Exactly. If
you have a $400 go Pro or a $500 go Pro strapped to a
gamble on the bottom of your quad copter you don’t want your quad copter
landing on it. And something else that I’m actually trying to do is I am trying
to tie these and to a more advanced flight controller. So that if it starts to
run low on battery it actually deploys the landing gear. So then if it has to
crash at least it is not going to crash with all the really expensive stuff. I
know. I am always thinking worst-case scenario.
Bryan: That is smart. I can't stop
thinking about…
Fr.
Robert: By the way,
these are PWM controlled. So you could trigger this from a Raspberry Pi or from
an Arduino.
Bryan: What other projects could we play
with? Maybe a door for the Know Hole?
Fr.
Robert: Something
else that I have been playing with is this. This is something that is going to
be used on FPV system. Not for a quad copter but for the lunchbox FPV. So, all
this is, is to servos I have been tied together by a little thing that I 3-D
printed.
Bryan: So for people who don’t remember
the lunchbox was our little monster truck remote control car that we did. How
long ago?
Fr.
Robert: That was a awhile. That was last year. One of the
early episodes with the two of us. So, what this allows us to do is this
is going to be tied to the RC system of the lunchbox and now little camera that
we had for the wireless system is actually going to attach to the top here and
I will have control via other channels to where it is panned and tilted to.
Bryan: Oh, that is neat.
Fr.
Robert: Because
this is going to solve that problem we had with those wireless cameras which is
lose a lot of your peripheral vision. So with this, I am actually going to have
a head tracking unit on my goggles so if I look to the left it is going to turn
to the left, if I look to the right it is going to turn to the right.
Bryan: That is awesome. So this will sit
on the very top shelf?
Fr.
Robert: This sits
on the top shelf of the lunchbox.
Bryan: You could put it on the inside of
the lunchbox. And then you would be like looking out the mirrors.
Fr.
Robert: Than I
would have Greg decorate the inside. The stereo, the cupholder. So that
is something else we are going to be working on. We have the gimble, we’ve got the landing gear, we’ve got that little FPV system. The last thing I want to show off is actually this.
We are going to be doing a bunch of projects that are going to be dealing with
Synology NAS’s. I don’t want to endorse just one company for one product but
Synology does really really well. And so, what we
have been doing is showing people how specifically to set up the best filesystems that they possibly can. This is more practical
stuff. We get a lot of questions about building a file server, which is great. But
I’ve got Free NAS boxes that I have turned off because these are more efficient
and they are actually faster.
Bryan: And how much is the cost compared?
Fr.
Robert: Not much.
This box is like $200. This is a two bay, ultrafast, 2 Gb Ethernet ports, I use this as a backup. It is a super-fast NAS that I use for
video editing.
Bryan: What kind of hard
drive to you have in it?
Fr.
Robert: This one I
believe I have three TB Reds.
Bryan: So in that last episode when we
recommended the Reds because they don't make a lot of heat and they last a long
time.
Fr.
Robert: And I
actually had this running in raid zero because I have a second one. I actually
have two of these and this one runs as a backup. I have been using one drive
for backup inside of the raid and so I just have two raids that act as a
backup. But, one of the big things about this is that it does security station
for free. People have been asking about connecting network cameras to their
network and then reporting the feed. Well this will let you do it out of the
box. It is not an add-on. And actually there was a little device I saw at Interom, the DS414 Slim which they are going to be sending
to us and we will be taking a look at him just a little bit. In fact, Alex why
don’t you go ahead and show them what I saw at Interom.
Fr.
Robert: I’m Father
Robert Ballecer, the Digital Jesuit here at Interom 2015 in Las Vegas. I am standing with Franklin who is
going to explain why your next NAS maybe Slim. Thank you
very much for talking to me. Now you released a product back in 2014 and it
completely passed my email box, I didn’t hear about it but I love it. Tell me
about the 414 Slim.
Franklin: So let’s take a look at
the new DS414 Slim. As you can see right here the DS 414 slam is a four bay, 2
1/2 inch solution. It uses four, 2 1/2 inch bays and you can use mechanicals or
SSD’s. We currently support up to 2 TB on this guy. It is a Synology NAS that
does the same great functionality. Retails under $400 and yes it is a four bay
solution. The fan only turns on when it needs to so if you use a pure SSD
environment it is very quiet. It is silent.
Fr.
Robert: I have been
toting around two and four Bay NAS’s when I really need to. When
I am doing an off-site project. But the idea that I can carry something
in my backpack and Synolgy NAS’s are already pretty
light that something this small, this slam with that much capacity and that
much redundancy that makes it just really nice. How have these been selling?
Franklin: These have been selling very good. We have a lot of customers who are interested in these
and some of them are in home environments and some and businesses. Even remote offices. Sometimes you get a project site, you
go to one site and set it up and get your network programmed into your project. Done. Close the site and move to the next. Bring it
back up, get everything going, close it and move on. We have a lot of customers
that use the war one for slam for that specific application because if you
deploy pure SSD’s it is read it. That is the key thing. It is rugged and you
don’t have to worry about dropping it or shaking it. These are probably damaged
mechanical drives from doing this. But with pure SSD environment you don’t have
to worry about mechanical problems.
Fr.
Robert: We are
definitely going to want to get a 414Slim on Before You Buy, but here is the
funny part. That is not even my favorite bit about this first look. Because
inside of every Synology NAS, is an operating system that is feature packed. I
want to talk about one of those features and that is the surveillance station.
It is with every single Synology NAS that you ship today. What does it do?
Franklin: So, Synology surveillance station
basically turns your Synology NAS into a network video recorder. I am going to
take a little demonstration right here. This is what you normally see whereas
with Synology DSM, but I have already installed the Synology surveillance
station app so I am going to tap right here and I am going to load surveillance
station and is already loaded right here. Jump into surveillance station and
turn on my live view. I've got a camera right here and this is the live view
from that camera, it is getting loaded. I can do tap around, so basically with
Synology surveillance station it turns everything into a network video
recorder, but this on your network and you have a network video recorder. So
you can record. We are compatible with over 3000 different ID cameras from over
80 different brands. We have PTZ support, we have it where you can record high
definition cameras, standard, up to 30 frames per second. We got it all. And
also we have notification built-in. So if you turn on motion recording you can
get an alert that someone has stripped a certain area of your door perimeter
and you can get the alert on your phone. We also have a time view management so
you can view multiple streams concurrently and you can track what has happened.
How about we also have it where if I am wearing a hat and I am walking around
in the frame ring a hat you can set up a surveillance station where it starts
searching all the video where is the guy with the hat. You can figure out how
many times I have been in your building. It is great for the home, great for
businesses and if you want network video recording, we got it.
Fr.
Robert: I was
wrong. This is not just for Before You Buy, we are also going to have to show
this on Know How because I know there has been a lot of people asking about
DDR’s and this kind of capability. Well, maybe you could just get it when you
get your next NAS. Franklin, thank you so much for talking to us. If they want
to find out more about Synology where do they go?
Franklin: So for any of our customers who are
interested and want to know more about Synology products please check out the
website synology.com and you can click on surveillance station and you will see everything I have
talked about right here. If you are interested in the DS 414 slim just kick on
the product link.
Fr.
Robert: I was absolutely exhausted after
that interview. It was the beginning of the conference and he was…
Bryan: Super excited?
Fr.
Robert: You know
how you get carb load before a bicycle race? I think he had done that with
coffee. That was the third take and I kept saying dude, you've got to slow
down.
Bryan: He was just really excited.
Fr.
Robert: Really
excited. I did want to let him on later for Enterprise Tech and he was so much
slower. I do like those Synology’s and they are sending us the 414. I do want
to show people what you can do with it. All of Synology’s NAS’s, a couple
people in the chat room had it dead on, they can be a
little bit pricey. You can get cheaper NAS’s but the quality of the bill, the
operating system and what they include in the box. It blows everyone else away.
Bryan: But what you are saying during the
break is that it is pocket-size. Very big pocket-size. But that is something you could pick up and take with you.
Fr.
Robert: And it is
dead silent. It is so quiet. And actually, we are going to be loading them up
with these. We’ve got these savages from Kingston. Not only is it going to be
superfast, but it is going to basically be indestructible. It is not like a
hard drive where you put enough shop to it it is
going to disintegrate. These are not.
Bryan: Or if you drop it or something. You
don’t have to worry about it.
Fr.
Robert: So, we have
that to look forward to as well. Now we are going to be jumping into a little
bit of feedback. I know the episode is running a little bit long. Isn’t it
strange how we always seem to pack a bit too much?
Bryan: It is just because we have so much
knowledge that we are trying to get out.
Fr.
Robert: But before
we do that, let’s go ahead and take a moment to thank the second sponsor of
this episode of Know How. And it is Braintree. now if
you don’t know what Braintree is, you are going to know soon enough because it
is the easiest way to add payments to your website. Now,
Bryan. I’m a much older person than you.
Bryan: Not that much older.
Fr.
Robert: Yeah. Like
20 years older.
Bryan: But you don’t act that much older
is what I was going to say.
Fr.
Robert: Okay, I’m
immature but age wise I am. I come from a time before people figured out how to
make money on the inter-web thing. And actually when we started adding
payments, when we started adding ways to give donations or maybe to pay for
services and products it was all sort of well, you make your own solution and
hopefully it doesn’t get compromised.
Bryan: Sort of a patchwork system?
Fr.
Robert: Yeah, the
very first e-commerce system I ever created it took me like three months just
to come up with it. It had never been done before.
Bryan: I’m sure at the time you just
wanted to focus on the stuff that you liked.
Fr.
Robert: I would
work a little on the e-commerce system and then go back to doing something that
was fun. Because it is a nightmare. The way my
original system worked was you could accept payment securely but there actually
had to be someone to verify each transaction on to the financial network. It
was not good. Well there is an easy way to do it, Bryan.
Bryan: And that is Braintree. And it
sounds like it is pretty simple to implement.
Fr.
Robert: Ten lines
of code. That is it. 10 lines of code and you can add the Braintree API to
pretty much anything. If you want to put it into an app, put it onto a website,
accept donations, except payments for services, Braintree has got it all.
Bryan: And it will do different currency
exchange rates.
Fr.
Robert: Absolutely.
You could use credit cards you could use Vitmo, you
could use BitCoin, pretty much any way to pay
Braintree is going to let you do it.
Bryan: Cool. Kevin Rose was on screensaver
last week and he was saying one of the last things he was doing at Google ventures
was trying to get Braintree but they couldn’t.
Fr.
Robert: It is one
of these things that it does change what you can do. Especially if you are an
independent app developer and you want to add payments, you don’t have to go
through what I did. And develop three months of code exhaustively. And then
figure out where the weaknesses are going to be. You can count on Braintree to
offer you secure transactions in your mode of choice. Now, the Braintree v.zero SDK makes it easy for you to offer those mobile
payments. You can start accepting PayPal, Apple pay, BitCoin, Vitmo, cards and more all with that single
integration, that 10 lines of code. It is simple, it
is secure and developers they’ve got you. You not going to have to worry about integrating like I did. With Braintree you can have it
done in minutes, in fact I wish I had this back in my day. Now the Braintree
code supports android, iOS, and JavaScript clients. And their SDK comes in
seven languages. .net, .js, java,
pearl, python, and ruby. It Is elegant code
with clear documentation and as I said before it is just ten lines of code. Braintree
gives you an easy way to accept multiple pavement types with
one integration. Quick, knowledgeable developers support. If you have
any questions you can start accepting Apple pay, PayPal, BitCoin, Vitmo, credit cards and whatever is next. All with a single integration. Trust Braintree. With that v.zero SDK, one small snippet of code and you are up and
running in less than 10 minutes. To learn more and to get your first $50,000 in
transactions completely free, think about that a few seconds what they are
offering you, go to braintreepayments.com/knowhow. And we thank
Braintree for their support of Know How.
Bryan: Now I just need to make an app. So
I can use it.
Fr.
Robert: Jeff
Needles has an app. All right we are going to do a little bit of feedback
because we do value your support and we want to make sure we answer some of your
questions. What have we got for the first one Bryan?
Bryan: So our first feedback question is,
“So I'm thinking about a new project making a plex server. I'm thinking that considering that I have the budget, I would get a
bunch of SSD drives for the media storage since the would not be a lot of writes to the drives (maybe using a
WD black drive for the temp drive). Since 1tb ssd drives are available, but expensive, and I can put a ton of them in my old
Victrola cabinet, it would be a good long term solution to media storage since
I won't be writing very often. Chances are a lot of sectors would only be
written to once, maybe twice. What are your thoughts? Looking for second
opinions…”
Fr.
Robert: Chris I
love the project. You are going to get a lot of hate from people who think you
shouldn’t tear apart that cabinet. It is kind of a classic. But I’m betting it
is not working anymore and it doesn’t look like it is in great shape. So you
are actually refinishing it. I understand what you are saying. Some people on
the thread have already said this is stupid why would you use SSD for media. I know exactly why. They are fast and no power. What he
wants to do is create a big chunk of storage. He says cost is no obstacle.
Bryan: The man has a Victrola, obviously cost is not an issue.
Fr.
Robert: Exactly. So
he can put a bunch of these in that cabinet, not generate a bunch of heat and
here is the best part. Remember what wears down SSD’s.
Bryan: It is the read and writing.
Fr.
Robert: Just the
writing. Because reading does nothing. What wears down
the SSD’s are the writes. It is a media server which means you’re just loading
up a bunch of DVDs or whatever else.
Bryan: And that information is just
staying there. And then you are just reading it.
Fr.
Robert: It writes once
and then it just stays. So as long as you are not over writing files and
deleting stuff you don’t have to worry about wearing down the SSD’s. In fact,
you don’t even have to go with something like the Savage. I would use this for
high performance application.
Bryan: I want to try to have a gaming.
Fr.
Robert: Actually we
are doing a project with these. I should have mentioned this and future
projects. We are redoing the desktop, the power desktop. Remember that
benchmarks that we did?
Bryan: Wasn’t the conclusion SSD?
Fr.
Robert: It was
always SSD. But we are now doing one where people have asked specifically, not
benchmarks show was something like Adobe Premiere. What is the best way to make
a video editing machine. So we are going to be showing
what a high-performance SSD’s, video cards, CPU’s and memory can do for that. I
actually don’t know how this is going to turn out. But, back
to this thing. You can go with low end SSD’s, not the super budget ones.
Not the fastest on the market because it is still going to be faster than your
network interface. And, I would say yes do this. This sounds like a fun project and when you finish it make sure to send us pictures.
Because I would love to see what kind of Frankenstein’s monster you create.
Bryan: I would definitely like to check
that out too. So we move onto the next feedback? This one comes from Eric Ellsinger. “Gone buy a new soldering iron
before my first real quad build and saw that they sell a 25W and a 40W
version, I'm guessing the 25W will be enough? Or should I get the 40W?” Hmmmm, that’s a tough question.
Fr.
Robert: Okay, so
here’s the thing. Here is a 40 W and here’s a 25 W. They are exactly the same
price and these are both kind of junk.
Bryan: Most of the soldering irons that we
have been using our junk.
Fr.
Robert: I have one
really good soldering iron and I don’t use it that often because I don’t want
people to think that you need to go and buy an $800 soldering station to do the
projects that we do. You have seen the close-ups of my tips. They are garbage
tips. Here is the thing about 25 W versus 40 W. 25 will work for most all
applications, especially the ones that we do. Simple
soldering. But what 40 what does is it gives you the ability to advance
a tiny bit. Let me explain this. For example, when I am soldering connectors I
need to transfer enough heat into that connector in order to melt the solder
but not melt the surrounding plastic. It is not great to use a 25 W because a
25 W is going to need too much contact with that metal before it heats it to
the point where it will melt solder. So, what you want in that case is you want
really quick heating, which means a 40 W or above, but when you are using
higher power irons it also means you are transferring a lot more heat. So you
do have to be quick.
Bryan: So I guess that comes with
practice?
Fr.
Robert: It comes
with practice. And what I say is, these are so cheap.
This one was five dollars and this one was maybe $10. These are so cheap why
not pick up both, start with the 25 W and figure out when you need to start
going up to more and if you feel like you've got a little bit of extra money,
why not buy one of the 80 W Welder station that actually has the variable
temperatures.
Bryan: And then you can dial it in.
Fr.
Robert: Right. But
it is practice. Practice, practice, practice. You are
going to find that most cases 25 works just fine. When
you start working with fine components where you have to be really worried
about spreading too much heat, you probably are going to want something with a
little higher wattage. But you need the practice so that you can do it really
quickly because you can’t just stick it on the component and wait because you
will destroy stuff.
Bryan: Okay, cool. Soldering is a fine art
that I am still trying to get the hang up. But I love doing it.
Fr.
Robert: I am bad at
soldering but I love it.
Bryan: Once you put everything together…
Fr.
Robert: I like that
high that I get when I am breathing it.
Bryan: You know what? I was like how bad can it really be? It’s pretty awful. So
final feedback. I’m getting dizzy from spending. This comes from Eddie
Hughes. Just sit still We’ve got video for this. “Anyone
know why my 450 class yaws so much? It is constantly turning clockwise and is
hard to control. I have no yaw control on my transmitter. I am using the APM
2.6 flight controller but everything else except the landing skids are stock
from the know how list. I have re-calibrated my
accelerometer, compass, and esc's a bunch of times as well as auto-trimmed and
auto-tuned but nothing seems to work. I tried different flight
modes, (loiter, althold, acro,
sport, drift, etc...) but nothing allows me to regain my yaw control on my
transmitter. In the video I had RTL engaged and this was the result. Any help
is appreciated!”
Fr.
Robert: First of
all, Eddie I feel your pain. He actually gave us permission to use this. I
don’t want to make fun of him. This actually does happen. The first time I put
the 450 up I was having the exact same problem.
Bryan: I'm glad he sent us the video. Because I would probably just tell him to lay off the stick.
Fr.
Robert: Most of the
time when you have yawing, it is going to be trim. So you just have to go and
change it. This was incredible yaw. It didn't seem like he was fool over on the
stick and it didn’t stop. So obviously there was something else wrong. What I
actually asked him to do was to do me a favor and take a picture of your quad
and post it so that I could look at it. This is what he sent me. It looks like
a standard quad but what I noticed almost immediately is that if you look at
the rotation of the propellers, and remember this is upside down so the bottom
right hand corner is number one in the bottom left is number two, the top left
is number three and top right is number. Remember number one and number three
should be rotating in the same direction number two and number four should be
rotating in the same direction. And that is not the case. In this case he
actually flipped the top two. Number one is actually spinning counterclockwise
and number two is spinning clockwise.
Bryan: That is not a bad fix then. It’s
not like he has to replace hardware.
Fr.
Robert: All he had
to do was swap the leads on the motors. And then flip the propellers. But it
was amazing and so this is why wanted to bring this up. What was amazing is
that the thing was actually flying at all.
Bryan: So you should be impressed with
yourself, Eddie.
Fr.
Robert: He had the
two clockwise on this site and the two counterclockwise on that side. How is
that even going up?
Bryan: Based in our reality of physics, we
are not sure how this works.
Fr.
Robert: He said he
had flipped it and he is flying great now. That is what we want. Especially when you run into trouble, post, post, post.
Bryan: Video helps to and pictures also.
Cool.
Fr.
Robert: That is all
the time we have for this episode of Know How, in fact we have gone way over.
Next week we do need to do the in-depth segment on this FPV. We are going to
show you exactly how this FPV system works, How to install one and how to
assemble the kit. And, I believe we are also going to be doing a little
something something on a network question.
Bryan: Alex was suggesting that we have
these on our heads for the next show and then we just do the whole show like
this. Are you cool with that? He’ll do the switching.
Fr.
Robert: Anyway, we
know this was a lot of material. Make sure to go to our show page that you can
find where, Bryan?
Bryan: That is at twit.tv/kh. All our previous episodes are there too. Definitely
check out the detailed show notes because Padre will have all his links and you
do the price out so everything is listed.
Fr.
Robert: I do the
price out, but please do not buy the FPV stuff yet. I know people want to jump
out there and buy it that you don’t want to buy the wrong gear. Find where your
comfort zone is going to be, we are going to show you that over the next couple
of episodes and then buy the right stuff.
Bryan: Cool. And that is not the only
place you can find us online.
Fr.
Robert: You can
find us on our Google plus page. Go to Google plus and look for the Know How group.
We’ve got over 8500 members. Seriously, aside from maybe the All About Android community we’ve got the most active group in
twit.
Bryan: It is super active. And we get
videos. We get crash videos.
Fr.
Robert: Folks, I do
like your feedback and please keep writing. I am a grumpy pants sometimes but I really do like hearing from you and we pool a lot of our
segments straight from that group. So please go in, ask questions, post
pictures of your projects and we will get as much as we can on the show.
Bryan: Absolutely. And there is also
twitter.
Fr.
Robert: You can
find me on twitter @PadreSJ.
Bryan: And I’m @cranky_hippo.
Fr.
Robert: And our TD is @anelf3. until next time,
I’m Father Robert Ballecer.
Bryan: And I’m Bryan Burnett.
Fr.
Robert: And now
that it is raining…
Bryan: Go, get some water! Go do it!