Know How... 142 (Transcript)
Net Casts you love from people you trust. This is Twit! Bandwidth for Know How is brought to you by cachefly.com.
This episode of Know How his brought to you by Smart Things. Smart Things lets you monitor, control, automate your home from wherever you are using your smart phone. Right now Smart Things is offering Know How listeners 10% off any home security or solution kit. And you get free shipping in the United States when you go to smart things.com/twit and use the offer code twit at checkout.
And by lynda.com. The online learning platform with over 3000 on-demand video courses to help you strengthen your business, technology, and creative skills. For a free 10 day trial visit lynda.com/know-how.
On a sleepless addition of Know How, it is camera basics 101, your questions our answers, and the start of the Know How 250 FPV quad copter.
Father Robert Ballecer: Welcome to Know How, it is the Twit show where we build, bend, break, and upgrade. I’m father Robert Ballecer.
Bryan Burnett: And I’m Bryan Burnett.
Fr. Robert: And for the next 45, 50, 80 minutes. We are going to be doing some stuff. Speaking of that stuff, it is all about the projects that we have been playing with for the last couple of weeks. We bring it to you and hopefully you take it home to geek out on yourself.
Bryan: Or we go on the Google plus network and check out the questions that you guys have and see some of the projects.
Fr. Robert: We will be doing a lot of that. Either way, please keep posting all of your videos and pictures of the crashes. They have been glorious.
Bryan: I am impressed. I did not know a lot of those frames could snap like that.
Fr. Robert: Like that FPV 250 frame, the little fiberglass one. That thing can take a beating. Both of us have smashed it into the ground at full speed and I see people who have broken them in half and I think how hard and what did you hit to do that?
Bryan: Where are you flying these quad copters? In some sort of Hunger Games-esque arena or something?
Fr. Robert: Please keep posting those. In posting those videos and showing people that you are going to crash, it makes people feel better. I'm not saying that to be snarky, people will crash, if you are flying quad copters you will crash. And you learn every single time you crash.
Bryan: And we all get a few smiles out of it.
Fr. Robert: I have posted pictures of some of my devastating hits. I have lost props and motors. Although I have never snapped a frame. Wow. Speaking of props, we’ve got to give props to Newburg Renewable Energy Technology, actually this is semi-new. We covered this on Know How a year ago.
Bryan: This is where you use sunlight mixed in some sort of fashion to make renewable fuel.
Fr. Robert: Back then it was called solar tech. It was a project they were going to run in the Mohave Desert. Quite simply, you use concentrated light, a reflector system to get light into one area and that increases the heat and the pressure in that area and then you pump in carbon dioxide and oxygen. And water vapor. That is it. And in a multi-step process what happens is you get a basic chain of combustible molecules. Which, back in the solar jet you could turn into jet fuel. Well there is a new thing that people are doing. This is a four step process and has been developed. This was done in science alert magazine and they are calling theirs a blue crude process.
Bryan: So something like synthetic diesel?
Fr. Robert: Yeah. And what it does is that it generates a renewable energy source that could be solar, solar thermal, wind or whatever. It just needs power. So you don’t need a big solar collector you just see a lot of electricity. That power is used to split water into H2 and O2. If electrolysis. You pass power through water and it cracks the molecules. The O2 gets invented and the H2 is passed into a high-pressure reactor and it is mixed with CO2. Where undergoes a two-step process. The CO2 becomes carbon monoxide so from carbon dioxide to carbon mono oxide. And the H2 and the released oxygen atom form water. So the bi-products of the first step is water and carbon monoxide. You then add more hydrogen and it forms a blue crude which is a liquid energy carrier. Now that blue crude can be refined into multiple fuels. Diesel, but the thing is you can make that out of air. So you take the things added air, you put a lot of power into them and you get something you can burn in a diesel vehicle.
Bryan: And, so does this mixture burn pretty as efficiently and cleanly?
Fr. Robert: Super efficiently. Because it doesn’t have all that other stuff that comes with refining. When you think about the refinement process essentially you take crude oil, you boil it and heated up. That is why you have these huge stacks. And the gases start to condense at different temperatures as they rise up the tower. And those different temperatures allow you to collect different types of fuel. Everything from heavy oils to gasoline to diesel to at the top you get things like alcohol. But all that stuff is still in there. It is a chemical potpourri. With the blue crude it is just CO2 and the carbon monoxide and the H2. That is it. Very cool. It burns more efficiently than regular diesel by 70% efficient. It doesn’t have near any of the particulate that you would have in diesel, which are the bad things. That is the soot that comes out.
Bryan: The contaminants, the black stuff that you see shoot out of the giant diesel tailpipe.
Fr. Robert: Essentially this would lead you with carbon dioxide water is the byproduct out of a diesel burning blue crude.
Bryan: Cool. I am just hoping they can scale of this to a wide enough range that most of us can take advantage of it.
Fr. Robert: Yeah. That is the issue right now. They have been able to make small reactors so this is not theoretical. They have actually done it. They need to be able to scale it up and be able to scale it up safely. And they need a big enough power source. But here’s the thing. Blue crude is a super stable way to store energy. So rather than taking excess energy out of a wind farm or a solar farm and trying to push it onto the grid or putting it in a lithium ion battery, you could use that excess capacity to make blue crude. Because that is power that would otherwise be wasted. Now, blue crude can now be burned to make power when you are not getting things from renewable energy.
Bryan: If the sun is not out or it is dark outside or something like that.
Fr. Robert: This is cool tech. I think it is one of these things that we are going to start looking at because honestly we haven’t seen a great advancement in battery technology for years.
Bryan: It has been a steady evolution and I’m sure it is going to get better in the future, but until then we kind of have to take little baby steps and have them work in junction with each other.
Fr. Robert: Actually, Virtual in the chat room has a very good question, he asked you specifically how does it compare with reclaimed frying oil, which is great. I know Patrick’s truck runs on old frying oil, it is bio diesel, that has the side effect of smelling like french fries.
Bryan: You know when Patrick is coming into the studio.
Fr. Robert: But, so here’s the thing. That sort of fuel is great because you are using something that would otherwise be thrown away. But that is a very finite resource. There are so many friars that are going to give you their oil. Whereas, blue crude any time you have and access of electricity you can make diesel fuel.
Bryan: That sounds like a much more common than trying to drive around all the restaurants in town. Especially if it got really popular.
Fr. Robert: When I was living in Berkeley I actually converted a vehicle to run on fryer oil. And it was so jank and we had bought a $400 truck, rusted to heck but the engine was still working. Basically the entire payload area was made of barrels so that you could dump fryer oil and it would filter it. There was a little bit of a chemical concoction that we used to make it a little bit better for the engine. But you had to mix it with regular diesel because otherwise it would turn to sludge in the morning. Very cool, but the second week we were working out and it actually took more fuel to drive to the places to get the fryer oil.
Bryan: Because you have to go out of your way to get to those places.
Fr. Robert: It was fine, but. It was a great experiment to play with that kind of tech. But it wasn’t really feasible.
Bryan: I looked into it for myself because my mom’s car that she was getting rid of was an old Mercedes diesel. But you had to switch over all the hoses and everything to take it.
Fr. Robert: All the seals in the pump would have to be replaced. Trying to run either biodiesel or some sort of biodiesel fryer oil combination really mucks up a lot of those pumps. It is not great.
Bryan: But, we are all about alternative energies and the things that they can do.
Fr. Robert: Speaking of alternatives, we’ve got a user who wants to talk about an alternative way to wire his house. Bryan, what is this all about?
Bryan: This comes from Luke. He says, “Hello Know How community, I was wondering if I could use this existing phone line I think it is Cat 5 to convert this phone jack to an ethernet jack. Any help is appreciated.” Hmmm.
Fr. Robert: I flip back and forth between these two pictures. Thank you for sending us those pictures it really helps us. It looks like this is relatively new wire so I am betting this is not Cat 3. This looks like Cat 5, especially since it has four pairs. It might even be Cat 5E, this might be getting raided and it is definitely riser rated because it has a little my line in there. So, you've got some decent cable in here. I am betting that you would be able to use this for gigabit ethernet. You could actually look at our episode on premise wiring that we did just a couple of weeks back and it would show you how to terminate this into Keystone jacks so that you can run a solid ethernet signal to it. There is one little problem though.
Bryan: What is the catch?
Fr. Robert: Here is the catch. Even though the cable could probably be used with a keystone jack and it probably could run a solid gigabit ethernet signal over it. If it was used for eighth online they probably went from room to room and just punched in serially. They probably didn’t run a run from the termination box to every room. They disclaim from room A to room B to room C, etc.
Bryan: Oh, I see what you are saying. Because for a phone line it doesn’t matter.
Fr. Robert: It doesn’t matter.
Bryan: But if you are running broadband…
Fr. Robert: It totally matters. You can't tie and serially. Actually there are people in the comment section that were saying just splice them. But you can’t do that it just doesn’t work. Well you could. But you would get like 10 Mb per second. A gigabit is going to require all four pairs and there are a couple of options here. Because this is probably Cat 5, and is probably riser rated, the first thing you could do is terminate. So as a wire comes in, terminate and then on the other side put a jack and then plug this into the jack and that is a way to splice it. You are going to lose a little bit of the signal but not as bad as using electrical tape. That is one possibility. The other possibility is look at where the wire is coming from. If there is only one wire then it means they probably ran it serially. If you see one wire for every room in the house then you shouldn’t have a problem. You should be able to just put a keystone jack on each side use a patch panel on the far end, use the keystones inside your rooms and you should have a straight Ethernet network. That would be your best bet. There is another option. It is kind of expensive but very very cool. If they are run serially, you could use something like this. These are intelli-jacks. I love these things. Essentially these are managed switches. You know how we talked about the differences between a dumb switch and a smart switch? These are smart switches. So I can do VLans on these, I can set up multiple networks. These are really nice. they can be a little bit pricey. The last time I checked this was like $400. But, if you go onto eBay and look for intelli-jacks, I think this is the MJ2001 and this is the MJ1000, you can probably find this, this is the 100 megabit per second version. I've seen them as low as $25-$40 each.
Bryan: Okay. That is not as bad as I thought. Usually when you are talking about enterprise hardware or network stuff it is like prepare yourself for $1000 baseline.
Fr. Robert: But the cool thing about using something like this is it is power over ethernet, so you could pass in power from the starting point and then you could just daisy chain the power. Actually this one I think you can daisy chain up to four units before runs out of power. But you could have one line in and then you have the next line to one of the ports to go to the other room and then you have three ports inside that wall. Which is not bad. If you want to go the cheap route, buy yourself a bunch of $20 which is that then you are going to have a bunch of wires coming in and out.
Bryan: Is not going to be very elegant.
Fr. Robert: One last option. I am full of options. The difficult part of premise wiring is getting it into the rooms through the walls. If they have already done not and yes it is all cereal and if you want a nice layout, what you can do is you better do it right the first time, you tie on some fish tape, yank it back and then you can yank forward an actual wire.
Bryan: So you are using the old wiring to wire it the way you want it.
Fr. Robert: If you are going to do that make sure you plan ahead of time because there is nothing worse than you are pulling back and it suddenly becomes a lot easier to pull back and you realize you have snapped the fish tape. And now you have nothing.
Bryan: That would be heartbreaking.
Fr. Robert: That has never happened to me. I never do premise wiring when I am tired because you take shortcuts when you are tired. And you just don’t want to do that. I’m done! All right we have another one. Let’s move off of networking for a bit and someone has a question about storage.
Bryan: It sounds like Jeffrey needs a new drive. “ I have a Buffalo 500 GB single hard drive NAS box, the Samsung hard drive has finally crashed with a click of death and I want to put the Western digital hard disk inside and was wanting to know which would be best. The WD Red, the black or the green.” We talked about the red, we talked about the green and I prefer the black.
Fr. Robert: That is because each of them has their special talent. The Reds are fantastic NAS, that is what they are designed for. They are inexpensive and they run incredibly cool. They are designed to be run in raids, right? The greens are supposed to be the economical one. They give you a lot of storage for not that much money, they also run cool but they tend to be slow. They are not real fast. Blacks, are the ones that you run for desktop. They are crazy fast just like that fire truck that just went by, and that is why you like them. You use them in desktops, video editing, they are not as fast as an SSD that they give you a lot of oomph.
Bryan: And you can usually get them for a pretty decent size capacity versus the price. I have been able to pick up 640 GB and terabyte ones for around $100.
Fr. Robert: Not bad at all. So here is the red, the WD Red right now on Amazon you can get a 3 TB version for about $120. Which is not bad. Per terabyte that is a good price. But compare that to the green. For a 3 TB drive the green is $100. It is less expensive. But the black, if you want a 3 TB is going to be $180. So you are definitely going to be increasing your costs with the black. The black is faster but it also runs hot. People ask us all the time what is the best drive? You can’t tell until you know the application. Thankfully Jeff has told us the application. What he wants is a NAS box. But, it is a particular type of NAS box. This is a Buffalo 500 GB NAS, so it is network attached back it is single drive. The red is not designed for single drive. It does not do well in single drive. Red is designed for a raid. Whatever it is going to be. That is where he shines. Because one of the things that they have done with the red is they have removed some of the sub processing routines that are for redundant error checking because in a raid the raid is doing that. So the drive itself doesn’t have to do that.
Bryan: So what you are saying is that it could fail and it would be the end.
Fr. Robert: Not the end but I have actually tested this and I was using a read and something funky happened and I had an unexpected power down and what had happened was the index started pulling to the wrong file so I would have the name of a file but it was to a different video. But that can actually happen with a red. Because it is always assuming that something else is doing the error checking. I would also not put a black in there. A black is expensive, you are talking about twice as much and it is hot. It runs hot. The black is not designed for raids.
Bryan: The black is something that I would recommend for a home PC because when you are doing video editing, games and reading and writing a lot to that drive. So I want it to be quick. And it is in a big case with a lot of space. But it sounds like the middle is the Goldilocks.
Fr. Robert: The green, is not the fastest drive it runs at 5400 RPM versus the black is 7200 RPM, that it does run cool which is what you want in a NAS because remember you are sticking with this in an enclosure. It is not going to have a lot of ventilation. It gives you a lot of space for not that much money and since you are hooking up to a NAS, it is probably a backup. You are not expecting that much speed out of it. The green is your sweet spot. One caveat though, check with Buffalo, check the support site and find out what is the largest drive it can support. Not all NAS’s are updated with the latest drivers or the latest bio software. So they don’t all support the newest drives. So that might actually decide what size you get.
Bryan: Definitely check the compatibility on that one. And then we have another question. From Addie. He needs a new soldering station. “ It is time to replace my no longer in business soldering station. I can’t get tips anymore. I can spend $500 for a killer station, I can get one for under $200 and I don’t need an SMD/SMT. and I have a couple suggestions on people and one is a Weller, Hakko, Metcal, and an Edsyn.”
Fr. Robert: I am not an expert in soldering, in fact my soldering is horrible. They look really be.
Bryan: But that is for demonstration purposes to show people that you don’t necessarily need to have the best to do some of the projects that we have been doing.
Fr. Robert: I didn’t want my projects to be telling people know to do this quite copter project I have to buy a $4000 soldering station. Mine are $20 or $30 ones. But I did speak to an expert, the person I trust is Smitty. He swears by Metcal. What he says, is it is more expensive that he would rather have a used Metcal off of eBay than a brand-new Weller or Hakko.
Bryan: His is one that he built himself. It is a little bit of a custom job. I’m sure he has tons of them though.
Fr. Robert: We don't have a really good answer for you for this. Because we only sought her occasionally. But I did want to throw this out in the show because I do want people in the Google plus group to give your recommendations. We’ve actually had some really good recommendations already, in fact there is one multipurpose station has a soldering iron and a heat gun that I am going to take a look at. It is like $80. Probably not the best quality that it might be exactly what I am looking for.
Bryan: Yeah because the one I have been using for my projects is in the $20 one I got off of Amazon just to see what it was like.
Fr. Robert: I have a RadioShack soldering iron from like 1986 and I am still using it. It is horrible but it works.
Bryan: I guess it really comes down to how much you are going to be soldering. Because you will probably want to do the investment ahead of time. It sounds like Eddie had a decent one and he used it to the point where he means to get a new one, so he might as well do that and get a nice one up front.
Fr. Robert: I used to really like Wellers, that was my thing and then when Smitty was here he was like “Oh, you use a Weller”? That was like ouch.
Bryan: Jeez. I trust Smitty’s opinion and I’ve seen him solder, he’s got like hands that don’t shake at all and stuff.
Fr. Robert: So go ahead and jump into the group and tell us what your suggestions are. We will spread them in a future episode of Know How. Let’s do one last one.
Bryan: One last one. This one comes from Ben. He has cellular ethernet question. “ Does anyone know the good GSM to ethernet modem, something that I can hook up to my own router not a Wi-Fi hotspot that creates its own network. Obviously I could just buy a hot spot and pick it up with an AP acting as a client, and hope that into my router. But that is obviously less than ideal and less reliable.”
Fr. Robert: Ben, good question. And the answer is yeah. There are a lot of options here. Some of my favorite, I told the story about this, this was an old GSM cellular modem.
Bryan: A 1994 or something like that?
Fr. Robert: This is really old. I use this a lot. This was an old D-Link. This is a DIR450 and it allowed me to plug this end and I could use this as a cellular to ethernet router. Which was nice. The nice thing about this is that I think it sold for $27. Very inexpensive. Going up the chain a little bit we had something like this. This is a Sonic Wall TZ270. This was an enterprise class router. This was designed for small to medium businesses. The thing is, it had multiple broadband options. It had a LAN and I could set several of these for using DSL or cable modems. And then I also had this fork in the side so I could put it in that card so that if I lost all my wire connections it would switch over to the wireless. Which was kind of nice. This was my failsafe. Now, this is old. I think this was released in 1996. They don’t sell these anymore. But, what they do sell is things like this. This is a NetGear Mobile 3G plus. Now, like the TZ170, it is designed to use for DSL but also has its USB port and into that USB port I could plug 3G, or 4G. And it will do the backup. If I didn’t have a DSL plugged in there this actually just acts like a 3G or 4G router. Now, these are all options and they will run you anywhere from $27 all the way up to the most to spend several is probably the TZ in the $300 or $400 range. But for my money, there is no better buy then what is called the Cradle Point. They specialize in this. This is what they make and… hey, Alex. Let’s go ahead and show them what it does.
Fr. Robert: I am Father Robert Ballecer, the Digital Jesuit, here at CES 2014 showstoppers TV. I am standing with Dan, the vice president of business development for Cradle Point. Thank you very much for talking to us.
Dan: Thank you very much Robert.
Fr. Robert: Now you’ve got a hatchet. There is a good reason why you have a hatchet and it doesn’t have anything to do with violence against people. It is to show you why redundant, external paths are important. In other words, multiple LANs. If you run a small business, a home business, or even a small branch with a large business, you need to have multiple paths to the outside. If your business is on the Internet and you get disconnected, you are dead. Dan, tell me what Cradle Point does to guarantee that we always stay connected?
Dan: We are very good at 4G LTE. We have network equipment that uses the wireless Internet from Verizon, AT&T as a fail over for wired Internet like cable and DSL or T1 lines. And so, if it goes out we are able to cut over. So many businesses use cloud-based apps or Google apps, large businesses use their own apps. We keep it going. You need that network Access it is your Achilles’ heel.
Fr. Robert: There are a lot of with products that provide multiple LAN functionality,,, but with that one of the things I have noticed they are not always seamless and how they switch over. In fact, one of the products that I bench tested last year took a full three minutes before I started getting a regular flow of traffic. You can't have that. Especially if your business is online, you cannot lose connectivity. Now, could you show me in a creative way what it looks like when you lose your connection?
Dan: Well, typically the first thing you see is a large Internet connection that breaks. And then the second thing that happens, if you don’t have a Cradle Point solution is you have no Internet access. If you have Cradle Point, I just flipped over in this case to Verizon 4G LTE and I didn’t even notice that I lost Internet.
Fr. Robert: If they want to find out more about Cradle Point, and about your solutions about what you could maybe do for them, where should they go?
Dan: Go to cradlepoint.com and we would be happy to talk about it.
Fr. Robert: Dan, thank you very much for talking to us. Thank you for showing off your tech and thank you for CES 2014.
Fr. Robert: Surprisingly there weren’t a lot of people crowded around the Cradle Point booth.
Bryan: I was going to say, was your review compromised at all because of the hatchet?
Fr. Robert: I was like, what are you going to do with that?
Bryan: This is a great product. A really good product.
Fr. Robert: Actually, it was quite a good demonstration because he cut the line and there was nothing. it switched over immediately. That is actually really hard to do.
Bryan: Yeah, that is neat. And as you had mentioned, we were going to talk about this because people in our chat room were saying “Cradle Point”.
Fr. Robert: Cradle Point is what you want if you are going to do wireless cellular solutions. There is no one better than Cradle Point. They do it better than everybody else. And the nice thing about those solutions is a package multiple options in there so you can use three or four different hardline broadband options. You could use USB, a hard wired card inside the Cradle Point itself, so basically any way you want to connect to can connect. If you use one of these buses in the bay area that has Wi-Fi access, more likely than not it is probably a Cradle Point router providing that.
Bryan: That is pretty cool. And it is pretty smart too.
Fr. Robert: It is smart. And speaking of things that are smart. You know what I want? I want a smart house. Now at CES this year the Smart house, the automated house, the connected house was all the rage. You’ve seen it right Bryan? You want to have your doodads, your electronics connected.
Bryan: I want to walk into my house, have the lights turn on, play some classical music and then start working on my android.
Fr. Robert: That was the promise of the Smart house way back when. And we kind of got there. The problem that we have had over the last decade is that there have been a lot of different competing solutions. Vendor X wants you to buy everything from them, vendor Y wants you to buy everything from them. But what happens when some of the items you want are from vendor X and some are from vendor Y? And you want to tie them together. It just wasn't a really good way to do that. That is what Smart Things did, they were voted the best buy, best smart house option at CES 2015. It is really easy to see why. Because what they allowed you to do was to tie together not only the options that they have, the tools that they have and the sensors that they have, but the sensors, tools, items, automation, gizmos from pretty much every major manufacturer out there.
Bryan: This is the brain right?
Fr. Robert: That is the brain. That is the hub. So this is the thing that lies connected to your house, connected to your broadband option and it allows you to go in with your smart phone, your tablet, basically your android or iOS device and control everything that is connected to it. It is not just things like the motion sensor or the smart power outlet so you can control power, it is not just moisture sensors so you can find out whether or not there is water in your basement or a temperature and humidity sensor. It also includes things like this. That is the thing I like. That makes it so that my house knows when I come home. And because it can run on IFTT it allows me to say when I am home, turn the lights on, open the doors, turn the music on to the station that I like. Maybe take a picture so that I can verify later on that I was entering by myself. These are the kind of things that you can do when you have a true smart home.
Bryan: This is the open and close one.
Fr. Robert: You have to use that for your security. Now, it is not just the sensors and the gizmos and gadgets from Smart Things. You can use it with your Nest thermometer, you can use it with your Drop Cam, you could use it with your Sonos Wi-Fi audio system. And that is the idea behind Smart Things, which is take everything you have and make it work together. Now, this is what we want you to do. We want you to try what CNET called the best home automation system at CES 2015. And that means going over to Smart Things, trying out their system. See if maybe you want to be able to control your house from your android, your iOS device. You can use it from home automation you can use it for security you can use it for energy-saving, you can use it for water detection. The only important thing is that you do use it. Smart Things have no required monthly fee and can start at just $189. Smart Things is an affordable way to create your smart home. And just for our twit audience Smart Things is offering you a chance to save even more. You can get 10% off any home security or solution kit, and you get free shipping in the United States when you go to smartthings.com/twit and use the offer code twit. Smart Things, a smart home for you today. And we thank Smart Things for their support of Know How.
Fr. Robert: Bryan, Let’s get into some camera knowledge.
Bryan: Yes. Because when we started talking about this, this geeky now that we occasionally do. You were very much more from the old-school side of photography. Whereas I didn’t have my first digital single lens camera until I started working here. One of the first shows I started working on was This Week In Photography which got made in love with it.
Fr. Robert: Here are some toys for you to play with.
Bryan: Toys? These kind of look like surgical equipment.
Fr. Robert: That actually harkens back to the time that we are going to be talking a little bit about. Believe it or not that was the equivalent of a remote shutter. This is the technology that is going to baffle you. So you had a shutter button right? And you were going to press it. The shutter button on an old camera had a little mounting hole that you could screw this into an so you could stand off from the camera and press it and trigger the shutter. This was high-tech back then. Don’t be laughing.
Bryan: The first thing that came into my mind was like Wiley coyote.
Fr. Robert: Actually I was trying to find a bunch of stuff that I threw out. I am really sad that I did. There was a little thing that use the same mounting hole but it look like a little piece of metal and there was a switch that you could wind and it was o’clock. And that was how you would time the camera to take a picture 10 seconds from now. It would tick-tock and when it hit zero it would shoot out a little rod. So, we do want to talk about some basic camera knowledge. Because believe it or not, knowing where we came from in terms of cameras and film actually brings us really well into the new era of digital photography and digital videography. Specifically, I want to talk about light. In the old days there were three ways that we could harness light to make an image. There was the film that we would use. Because the film could have different levels of sensitivity to light. I used to call it the ASA, they called it the ISO and before that it was called the DIN. It was a rating system that would determine how quickly the emulsion on the film would react to light.
Bryan: It is fascinating. It just seems like a lot of work.
Fr. Robert: Photoshop kind of killed all this. But it was good. There was the film and then there was actually allowing the light to get to the film. And there were two mechanisms inside of the camera that allowed you to control that. One was called the aperture and the shutter. The aperture was how wide the whole was that allowed light to come through and the shutter was the mechanism that actually, in the old, was actually a mirror that in its normal position the light reflected from the lens up into the mirror and then up into another mirror and then when you pushed a button you would actually lose sight of it for a second because the mirror would flip from the eye piece and go back into the film.
Bryan: You can actually see it in this.
Fr. Robert: Look at this camera. How about that.
Bryan: Insight here you can see that little reflective piece. That is the mirror that you can see into the eye piece back here.
Fr. Robert: And that is the regular position. That is why there is that mechanical noise when you push that button it will flip that mirror and the light stops going into the eyepiece and it goes down into the film. In this case it goes to the sensor. I don’t think it is going to trigger without the lens. My old mechanical would but the new ones are smart. Okay, so those are the three different ways to get light into a camera to manipulate it. Now, you needed a certain amount of light in order to properly form an image. Too much light and you’ve got a blown out picture. Too little light and it was all black. In fact I've got some old negatives and this is what photography and videography used to look like. So, this was actually a piece of cellophane, a plastic that had a light sensitive emulsion on it. And what would happen, is that in a place at the light hit, it would remove those pieces when you developed it. If it didn’t hit it would be dark.
Bryan: Hence the negative.
Father Bryan: Exactly. And that is how we played with photography. Let’s go ahead and talk about iso. That is the film sensitivity that we have been talking about. You used to be able to buy film that had different levels of sensitivity. Typically, we would have 100, 200, 400, 800, 1600. The higher you went, the more sensitive it was too light.
Bryan: This all depended on what you wanted to shoot.
Fr. Robert: Correct. If you had a lot of light you would actually shoot the lowest speed film that you could. Because, while a faster speed film would be able to shoot in lower light conditions, as you get into the faster films what would happen is those little silver particles would tend to clump together. And you would get what is called grain. This is what a grainy picture looks like. That is because all those little pieces clumped together and rather than getting a nice smooth transition between the pixels, you would get this grainy image.
Bryan: I've always heard it described as noise when you have the ISO really high and you are taking pictures in the dark.
Fr. Robert: Right. And we will actually talk about that because that is how we transition to the digital age. The room with the ISO was to use the lowest possible that you could get away with that if you were shooting in low light you would use faster and faster films.
Bryan: Faster films, slower shutter speed?
Fr. Robert: Will talk about that. You are getting ahead of us. This is just ISO. Remember that slower films look good and have a lot of detail. A lot of contrast. But they are not so light-sensitive. Faster films are more light-sensitive but you will start losing details, getting graining and losing contrast. So we go from that to let’s talk about the mechanics. The first part was aperture. Aperture is… let’s just show you. So the aperture is actually a mechanical device inside the lens or inside the camera that actually allows you to vary the amount of light that makes it through the lens.
Bryan: So that is a lot of light that is not…
Fr. Robert: this is a 2 to a 16 f-stop and that tells you the rating. So we rate the rating in f-stops, we start at 1.4, 2, 2.8, 4, 5.6, 8, 11, 16, 22 and 32. Every time we go up one we are actually doubling the amount of light that makes it through. So F1.4 is that and F32 is that. So we keep decreasing the amount of light that makes it through. Now we are not just doing this for fun, changing the f-stop actually changes the quality of the photo because it changes what is called the depth of field. When I use a F1.4 it allows a lot of light through. But it means that only the thing that is in the focus plane will be in focus. Everything else will be out of focus.
Bryan: So that is good for portraits probably.
Fr. Robert: This is using a very small aperture. So that only the theme that is in focus is in focus. So if you use F16, you are going to have things that are in focus in the foreground and in the background in addition to the actual image. We use this a lot whenever we do reviews for Before You Buy. Both of us like playing with finite focus.
Bryan: I like to do that because it also helps you pull the viewers view to the thing that you are talking about on a product.
Fr. Robert: Someone in the chat room is saying that he used to have a lens that was F1, so that is so much light that it allows in, but those lenses were crazy expensive.
Bryan: I think I had a 50 mm lens that it would go down to 2 or 1.8 or something and now when was still a couple hundred dollars. And if you wanted the nicer cannon lens with the DL glass they would start to get into the thousand dollar range.
Fr. Robert: Exactly. These can get kind of pricey.
Bryan: The glass never changes. The bodies always get better but the glass doesn’t change.
Fr. Robert: That is what people say. Which is why you used to be either a Nikon guy or a Canon guy. Because you had invested so much into your lens you weren’t going to switch. You could change out the body, but the lens are forever. Now let's move on to the last thing. Aperture allows a light of light or a small amount of light to come through. And if you were a lowering in light of light, then it has no depth of field. If you allow very little light it has a huge depth of field. The last part was shutter. Now we talk about shutter this way. It is the thing that you can hear in your camera. The click. The moment at which it would allow light through. In the old film camera it would allow light the room onto emotion and the DSLR’s it allows light onto the sensor. Now you are still using a mechanical solution. You still have a lens that pops up and down. A lot of cameras like the mirror-less ones are actually all using electronic shutters. The light is always hitting the sensor but it only takes a picture when you push the shutter. And a lot of people don’t like that. Because this is the more pure way to do it and it actually does look better. Now, so the shutter was a mechanism that allowed you to allow light and just for a measured amount of time. Typically that time was measured in a fraction of a second. So 1 was 1 second but then you would have 160th of a second. 1/2000th is a 1/2000th of a second. The faster it goes, so the smaller that ratio, means it is allowing less light in. Now the reason why you would want that is because the less light you allowed again, the faster it could take a picture. Freeze motion.
Bryan: Because if anything is moving while you take a photo you will get that blur.
Fr. Robert: Right. So 1/60th is about the transition space. 1/60th You are going to get a little bit of blur. If you have fast motion you really want 1/125th. Anything below 1/60th is a long exposure.
Bryan: That is when you start to need a tripod. Right?
Fr. Robert: I would never not use a tripod if I was going to be shooting 1/60 or below. So those were different ways that we could control light. We can control it with film, the aperture or the shutter. So, is this the time when you ask why do we care?
Bryan: Yeah, right?
Fr. Robert: Who cares. We don’t use those anymore. In fact this is another relic from my time. This was a bulk film wanted her. I know you don’t know what this is. But, if you open this up. Actually there is still film in there. This is a roll of black and white that I had from back in 1998. It has been a while. And what you would do, is you would put your film canister in there and you could wind it full of film and the little counter would tell you how many feet you have wound onto the spool. I know it looks weird that you can save so much money this way. It also meant I could do custom winds.
Bryan: Right. I’m just trying to eat quite that to what it is now. It is like having a bigger SD card. And you just keep putting your stuff on.
Fr. Robert: But you’ve got to remember that one of the things I would do is that I would not wind as many shots because I wanted to be able to change the speed of my film. It wasn’t as easy as changing a button. I had to take the film out of the camera and of course that would destroy it. So you would have to wind it which would mean you would lose a lot of film. So rather than rolling spools that had 24 or 32 shots, I would roll schools that had 10 shots. And then that would allow me to flip speeds when I needed to.
Bryan: I’m glad I didn’t have to deal with that. I definitely have my appreciation for film. I never did a dark room stuff. Because, what ends up happening is actually the first digital camera I used was Alex’s and I just took pictures of everything. I didn’t know what I was doing I was just taking pictures. I feel like it took me a lot longer to learn how to set up a shot. And then after I did the photo show with Leo and he was talking about it all, you get appreciation about it. And you can take a ton of pictures with your SD card but if you want to be able to set up a shot the way you want it and get it right without having that…
Fr. Robert: The tendency right now is to shoot a bunch of shots and then you take the ones that are not crap. The way that my generation was because this was so cumbersome you wouldn’t take it unless you knew it was a shot you wanted.
Bryan: Because you were wasting film.
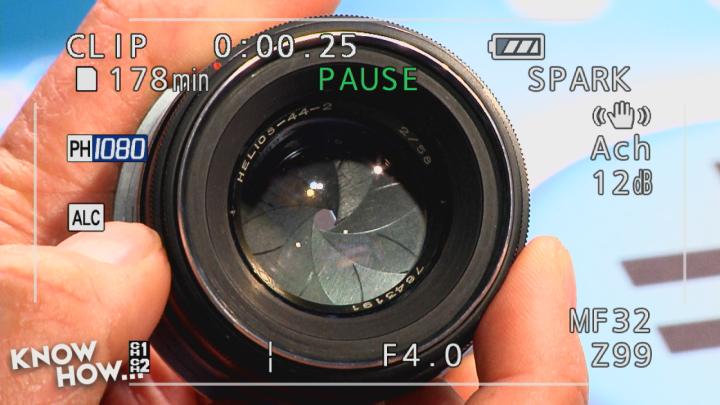
Fr. Robert: Remember I used to manually develop all my stuff. And that took forever. Now it is 20 seconds to download it and get it into Photoshop. It was a couple of hours when I wanted to do a darkroom session. But, let’s get past that. And talk about this. So this is actually a modern camera. This is a Panasonic AGHM C150. It is what I have been using in my studio for the past six years or so. All my review pictures are shot with the Panasonic. Believe it or not, even though this is a modern camera and it is completely electric, it has all the analogs to the three things that we talked about.
Bryan: The shutter, aperture, iso.
Fr. Robert: Which is weird, because this doesn’t have any film in it. Except it does. This is called the gain control. So I can flip a switch here and notice how it ups my gain? Now the cool thing is that this is what the regular shot would look like, but if I increase my gain I can increase the amount of information that makes it to the lens. As you notice, it is making the shot look not so great. It is actually adding grain to my shot. I lose detail, I lose contrast, I am going to lose a little bit of the definition. It just doesn’t look as good. And it is a very good analog. I always try to shoot with 0 dB of gain because gain is bad. But if it is a lowlight situation I have to. The other thing I can do is control my aperture. Notice that little number f2.4? That is actually my stop. It actually goes all the way down to F1. So this is completely open. There is nothing in the way of the light coming into the sensor at all. But then I can increase that and you will notice every time I go up a stop it is actually halving the amount of light that a comes into the lens. On this one I can go all the way up to f16, which is closed and not really usable. So f11 is the last usable stop on this particular camera.
Bryan: That is something you use if you are in broad daylight?
Fr. Robert: In broad daylight. But, let me show you that depth of field thing that I was talking about. I’ve gone it this keyboard and I am going to set this for a very fine depth of field. At open basically the only being that is going to be in focus is the thing that I am focused on. I’ve got to toy with this because I don’t want it to be overblown. So I am going to put on a neutral density shutter and now you will notice, see how I can transition between what is and focus on the far side of the keyboard. Let’s go to the near side and this is a shot that both of us like to use a lot. And that is very finite depth of field. Now let me swap it and go back open as much as possible. Now I am at F11 and no matter what I am focusing on, everything is in focus. That is a very deep depth of field. It is useful, but if you are trying to be kind of artistic a lot of people don’t use extreme depth of field.
Bryan: That is like what you see in movies more often. Everything is in focus.
Fr. Robert: Which is what a lot of people don’t like the look of. Now the last bit is the shutter. Which is strange because this doesn’t have a shutter. There is no mechanical shutter in there. But what it does have is the electrical version of a shutter. I can press this button and now it is imitating a shutter. Remember what I said about motion blur? See how it is blurring all your motion? All this stuff is coming together because I am shooting so slowly, now that allows me to get a lot of light so that I can get way more like that I normally would. But it also means that if something is moving I am going to blurt it out. However, I could jack this all the way up to 1/500 or so. And now, moves your hands quickly and nothing is going to blur because it’s shooting so quickly. We’ve got Mr. Leo Laporte here and…
Bryan: He’s going so fast it’s hard to capture on the camera.
Fr. Robert: He is moving so quickly. So, now you see I’ve got all of those things in my brand-new electrical…
Bryan: Without all the physical mechanical systems. That is cool.
Fr. Robert: The important thing here is that there is an inner relation here. I do need a certain amount of light to get the sensor in order to get a full on picture. So I can toy with all three of those to get the right amount. If I want a very finite depth of field because I want to do that cool focus here and focus of their trick, it means that I need to have my aperture all the way open which means I either need to close down my shutter a little bit or it means that I have to use some sort of density filter so that I tap out the amount of light.
Bryan: Which you have built-in right?
Fr. Robert: Or if I want to go the other way around and have a huge depth of field it means I have to throw a whole lot more light on their war I've got to use a slower shutter or I have to raise the gain. So these are all things that you can do to toy with your images.
Bryan: And it all depends on what you are shooting. If you are shooting something stationary and you want to get that depth of field you have the lower like f2 or something like that. That when I am shooting sports or something that is moving very quickly, I want the…
Fr. Robert: With sports you are going to want a high shutter speed. We are going to be doing a couple more series on this. I know this was a lot of information but this was all the basics. These three basics we are going to combine in different situations. We are going to take it outdoors, downstairs, do indoor shots and outdoor shots, lowlight shots.
Bryan: You may have told me that a couple days of go to film something. And I didn't really get to it.
Fr. Robert: But we are going to show you, because the best way for you to figure out what your equipment is capable of doing is to actually go do it. Speaking of knowing what your equipment is capable of doing I’m glad that we've got the next sponsor of this episode of Know How because they will show you exactly what your equipment is capable of doing. Here at Know How we are all about knowledge. We are all about the knowledge hole. We’ve got to fill in the gaps because we can only give you so much. But if you want to know more about photography, videography, you've got to go someplace online that can give you that information. That can fill in the gaps in your knowledge hole. Which is why we’ve got lynda.com. lynda.com is the one Stop shop, the repository of knowledge on the Internet and right now we want you to go there because they've got a series of videos on basic photography and basic videography. In fact, Alex is going to show you some of the material that they can give you. If you want to know how to set up your camera, if you want to know how to frame your shot, if you want to know how to like what you are doing, that is what lynda.com is for.
Bryan: And learn how to use a new DSLR. Or a video camera, or a GoPro or any equipment that you may be interested in you can find on Lynda.
Fr. Robert: And it is not just photography. lynda.com Is for problem solvers, for the curious, for people to want to make things happen. Maybe you want to take better photos, maybe you do want to redesign your website, or master Excel. Or maybe show off your Photoshop skills because you don’t want to be like me in a dark room for eight hours to get one single frame. lynda.com Has everything you need to feed your curious mind. Some of the new Lynda verses that I recommend are Getting Started With Video Production and Editing, Final Cut Pro 10, 10.2 Essential Training, Essential Training for Developing Android Apps an Up and Running With Light Room 6. There are also new installments of Code Clinic covering C, R, Swift and Java Script. With a lynda.com membership you can watch and learn from top experts who are passionate about learning. Stream thousands of video courses on demand and learn on your own schedule. You can learn at your own pace. Courses are structured so that you can watch them from start to finish or consume them in bite-size pieces. You can browse each course transcript. This is the part that I really like. Rather than having to fast-forward through a bunch of video you can search for a particular question that you have and lynda.com will take you directly to the video and the part of the video that makes sense. You can take notes as you go and you can refer to the layer or you can download those tutorials and wants them on the go. Including on your android or your iOS device. You can create and save playlists, courses that you like so that you can send them to your friends and say hey you know what I think you would benefit from a video production course. Now here’s what we want you to do. We want you to learn something. Your lynda.com membership gives you unlimited access to training on hundreds of topics, all for one flat rate. Whether you are looking to become an expert, you are passionate about a hobby, or you just want to learn something new, we want you to visit lynda.com/knowhow and sign up for your free 10 day trial. We thank lynda.com for their support of Know How.
Fr. Robert: Bryan, magically all this quad copter staff has appeared on our table. That is kind of strange. We have been playing a lot with this. This is the Hobby King FPV250.
Bryan: Not just us though. A lot of people. A lot of broken parts.
Fr. Robert: A lot of broken parts. In fact, a lot of people have ordered these to the point where Hobby King it doesn’t really have them anymore. They kind of out of stock them. This whole project is brought to us by a single question from Eric. What did he say?
Bryan: He asked about twit episode 122 and 250 FPV: “Hi guys. I've been wanting to build a 250 FPV quad, and now that spring is arriving I'd really like to do this and take advantage of the better weather. The FPV 250 kit you recommended looks great, but it's been on back order at Hobby King forever. Can you recommend another kit from anther vendor? Also, did you make specific hardware recommendations for the few items you must still buy/add, like controllers and xmit/receivers?"
Fr. Robert: Yes. And the answer is yes, yes, and no. We are not going to suggest another kit because we are past the kit stage. The reason why we asked you to buy the FPV 250 was because everything was in the box except for the controller and the transmitter. And, it didn’t require any soldering. But I think the Know it All’s are past that point. So what we want to do is we want to start a project where we are going to be building not the Hobby King 250 but this is the Know How 250. This is our own brand of 250. Hobby King was not bad, it is a good trainer. But we want to give you something with a bit more oomph with a bit more capability and believe it or not it is going to be about the same price or even cheaper than the Hobby King.
Bryan: And you get to build it yourself.
Fr. Robert: You get to build it yourself. Now, there is a couple of parts here and we are going to put this part list on the website so you don’t have to write it down now. You can check the show notes. You are going to start with the same frame. This is that FPV 250 frame with extension. I am going to recommend a lot of these parts from Ready To Fly Quads. I actually had a conversation with Paul Baxter, and remember we get no advertising from ready to fly quite. They give us nothing. I just really like what they do. Sometimes people have complained that it takes a while to get the workers. I understand that but it is a small operation. It is the same FPV 250 kit, in fact judging from what we have seen on our Google plus group you might want to get a couple of these.
Bryan: I guess so. Depending on your flying characteristics, have you tried flying a Syma and if you have destroyed that then you might need a couple extra frames if you are doing this project.
Fr. Robert: What I like about the kit that comes on ready to fly quads is that it actually includes this. This is the long frame. This bolts on to the standard fiberglass 250. And it gives me the ability to put things like FPV cameras and all that, and the transmitters that I need. It gives me more real estate and I am going to have so much more power in this build that I don’t really have to worry about adding a little bit of extra weight. So that is going to be my frame. My motors are these. These are 2208’s also from ready to fly quads. What I like about these is they provide a crazy amount of thrust. So with the same props that they use on the FPV 250 from Hobby King that would generate may be 500 g of thrust for all four motors. This can generate about 700 g of thrust per motor. It is so powerful. Just so you know there is a whole lot of power here.
Bryan: And you are adding a whole bunch of stuff to your weight. Camera, transmitter and stuff like that so you are going to need the power.
Fr. Robert: And as far as the electronic speed controller, I would recommend my favorite and these are from ready to fly quads, the F30 Fire the red series, they are $10 a pop. They are not that expensive. You could go ahead and get yourself to 12 amp and you could probably get away with it. That one of the things I want to do with this design is I want to make these parts reusable.
Bryan: You are going to be upgrading down the road you want to have something that you can use.
Fr. Robert: Exactly. And at that price you might as well get the 30. And you have so much spare power on this craft that a tiny bit of extra weight that these are going to add over a 12 amp controller is marginal. Go ahead and get yourself the more capable ones. Now we also need a flight controller. We have been using the KK 2.1.5 because it is nice and easy. I would now suggest that you go with something a bit more advanced. This right here is the Flip 1.5. Now one of the things that this can do is hybrid self level. Which means if you want to flip your quad without having to go to full manual this is a really good way to do it.
Bryan: That looks really cool too. Is that a breakout board?
Fr. Robert: There is a little breakout board there. I have added altitude control and I have also added this which allows me to hook it up to a Bluetooth module so I can actually set the settings from my phone. Which is very cool. We are going to show you how to do that. Go a little more advanced controller than the 2.1.5. You also are going to need a distribution board. You can see at insight here. Power distribution board is just a little piece of copper that has some soldering points that you can distribute power to everything in your craft that needs power. And along with that you are going to need a male XD60, you are going to need 12gauge wire and you are going to also need a bunch of 5x3 Gemfan nylon props and bullets. I would suggest the 3.5 mm bullets just because we want this to be reusable. You could probably get away with a 2 mm but if I ever want to reuse these parts for a bigger craft you want the bullets to match. Now, all of that is going to be on the website. But here is the cool thing. The Hobby King would run you about $103. But then it was always out of stock so you had to buy it international which added about $16 in shipping. And it did not include a flight controllers so minimum that was about $22 so the Hobby King kit was $140 give or take. This kit, shipped because ready to fly wives is a flat rate shipping of $4.50, is about $153. So $140 versus $150 this is a far more capable craft. And if you actually went ahead and downgraded these to an 1806 motor, and downgraded the ESC to 12 amp, this is actually about $18 cheaper than a Hobby King.
Bryan: That is cool.
Fr. Robert: The difference is that this is going to require soldering and this is not a complete kit. You do need to follow instructions because you are not going to have everything in one nice box. I spoke with Paul Baxter and he did say that he has all of these parts that I put on the list available now. So, like we did with the Alien X build we are going to give you a couple of weeks before we start building this because we want people who want to get a very nice agile 250 to have time to order the parts so they will be ready for the build. Now, the cool thing about this is we are doing FPV. So FPV will go in here. We are going to show you razing, we are going to show you acro. We are going to be building GPS in this baby so that you can do things like position and hold. So if you want to get to our advanced build, now is the time to do it. Get ready. Now, Bryan, I’m afraid we have gone way over time. Sorry about that. Now, folks this was a lot of information. Everything from your questions to the information about photography, videography to the build. So of course you need to go to our show notes page.
Bryan: Those live at twit.tv/KH and you can also subscribe to the audio version. But we have subscribe links for video versions, HD, SD and all our past episodes. So, like you said if you are going to start this project you are going to want to go to the show page and follow the episodes that we have.
Fr. Robert: Also don't forget that we've got a Google plus group. Just go to Google plus and look for know-how. Subscribe and you can submit your projects. We love hearing from you we love hearing your questions and we love to see what you have done with the projects that we have given to you. So if you are a novice, an expert, jump in and be a part of the community. It is over 8500 members strong.
Bryan: Show us your pictures and show us how you have done on your projects.
Fr. Robert: Of course G plus is not the only place to find us.
Bryan: You can also find us on Twitter. I’m @cranky_hippo.
Fr. Robert: And I’m @padreSJ. And our TD, Alex Gumple, can be found @anelf3. Make sure you follow him and tell him how much you love the fact that he likes cutting our shows short. Although we went really long.
Bryan: What is another 10 minutes to this show.
Fr. Robert: Next week we are going to be into-ing you to the FPV hardware and we want to show you what is going to be going into this because you are going to have to buy that too. I believe we are also doing a few things with networking. If you want to prove that your ISP is giving you bad service, I am going to give you a way to do it. Until then I’m Father Robert Ballecer.
Bryan: And I’m Bryan Burnett.
Fr. Robert: And now that you know how…
Bryan: Go do it!