Know How... 127 (Transcript)
Net casts you love from people you
trust. This is Twit! Bandwidth for Know-How is brought to you by cachefly.com.
This episode of Know-How is brought
to you by iFixit. You can fix it and iFixit makes it easy with free step-by-step repair guides,
high quality replacement parts and all the tools that you will ever need. For
$10 off your purchase of $50 or more, go to iFixit.com/twit and enter the code know-how at
checkout.
And by ITProTV. Are you looking to upgrade your IT
skills or prepare for certification? ITProTV offers
engaging and informative tutorials screened to your Roku computer or mobile
device. For a free seven day trial and 30% off the lifetime of your account, go
to itPro.tv/knowhow and use the code KnowHow30.
Today, lasers make metal better,
your questions and our answers, and we are going to take a look at all your quad
copter questions. Know How is next.
Father
Robert Ballecer: Welcome to know how; it is the Twit show where we built,
bend, break, and upgrade. I’m Father Robert Ballecer,
the digital Jesuit and I'm sorry Cranky Hippo is out today. Or is he?
Bryan
Burnett: I was
sitting in my bedroom with my laptop and I was playing TitanFall…
Fr.
Robert: Exactly.
See he is here. It is the magic of science folks. Seriously Cranky Hippo is off
on the East Coast doing some sort of secret mission for God knows who. But he
will be back next week. He is here in spirit. Actually we’ve got a fill in for
Cranky Hippo, I'd like you to meet cranky Patrick. He
will be playing the part of Cranky Hippo today. But before we get to that,
we’ve got a little news item here. If you have ever used metal for building
anything you know that moisture is the enemy of metal because it makes it rest.
Even if you’ve got corrosion resistant metal, something like stainless steel
with a very low carbon content, eventually at some point unless it is pure with
absolutely no carbon it is going to start to corrode. It is very simple and any
time you have an atmospheric condition that has moisture you are going to start
to get oxides. It is different for different types of metal. For example, when
you get aluminum rust it will form a protective layer around the metal. That is
why it is actually pretty good for corrosion. It will not oxidize any further
then that protective layer. The same thing goes for copper. The something like
steel will continue through that until it rests completely out. In fact, take a
look at the red planet Mars. That is why it is red because it is actually
rested until everything has turned into some sort of oxide material. Now, in
the past we’ve used coatings. We’ve tried to keep the moisture out and either
some sort of chemical coating that bonds with the surface of the metal or many
of us use some sort of polymer to block it out from the atmosphere. But if the
chemical coating wears off with a protective layer gets breached you have the
same problem. But a researcher over again Rochester New York has figured out a
way to use lasers to make metal hydrophobic. Otherwise it is going to repel
water. There is a very cool picture right there of the metal in action. What he
has done, is he has used intense, very short pulses of high intensity laser to
change the structure of the surface of the metal. The way it works is, you look
at the surface of a very smooth metal and are a microscope and you will see
that the surface looks a little chaotic. That actually tracks the water and the
moisture. But if you use this laser, Paul set a couple million times you can
make the surface of the metal structured and as a structured surface it will
repel water. Now there are some ridiculously cool applications for this.
Imagine a metal that doesn’t rust under any circumstance or imagine a car, a
building, a plane that has a property that lets water roll right off of it. Or,
I’m thinking what if you created a boat with a hole that was actually
hydrophobic? You would actually reduce the friction because the water wouldn't
have that surface tension that clings to the side of the boat and slows it
down. The same thing goes for a plane. Even though this looks cool and even
though I would love to have material sciences that use this, they do admit that
there are a couple of problems that at the moment make it impractical. Now to make this one inch square piece of metal hydrophobic, it
required about an hour of laser time. That actually used more power than
the entire North American grid uses. It takes a lot of power in order to do
that! Now that they are working on that they should be able to get the process
down so that it uses a fraction of the amount of power and they only have to pulse
the laser once every couple of seconds. When they do eventually get that
process down, let’s just say it is going to be awesome.
Fr.
Robert: Let’s go
ahead and jump into the first segment of the show. We are going to be answering
a couple of the questions that you had in our Google plus group. We wanted to
do this last week but unfortunately we ran out of time. We were only able to
cover about two or three different feedback items. So I want to do a few more.
I promised that we wouldn't do any quad copter segments. We wouldn’t do any
builds until late February. But, a number of questions in the group have
centered around quad copters so we are going to answer
a few of them. The easiest one to do is about the Syma X5. We’ve then telling our audience that this is a great trainer, something to
learn how to fly. In fact Leo Laporte went ahead and
bought one for himself and we are going to be teaching
him how to fly next week. But we have a question from Jim Malley,
I’m going to go ahead and go to Cranky Patrick and could you go ahead and tell
us what Jim wants.
Patrick Delahanty: Jim said, “So I got this one quad force video drone and now I would like to get
a few extra batteries for it. I remember Father Robert mentioning them one time
but I’m unable to find that info. Any help is greatly appreciated. Thanks.”
Fr.
Robert: Actually
this is a very good question because a lot of people have found out that the
quad force or the CMax5 which is essentially the same quad copter, even though it is fun and incredibly easy to fly the battery doesn’t last very
long. Most of us get between five and eight minutes with the stock battery. You
could get a replacement but the question is where you going to get it from? The
first place I would recommend is a website called banggood.com. This is a five pack of 600 mill amp hour
batteries plus a charger. I've actually given away one of these. These are
incredibly inexpensive, one thing and that is the charger. This little charging
cable is not the highest great design I have ever seen. Is a little bit on the janky side in the included USB charger doesn’t always work
perfectly. But for $18 for a five pack it ain’t bad.
If you have got the cash, I would actually recommend something like this. This
is the upgrade package from Amazon. It comes with a much better charger, it can
only charge for at a time but these fit a little bit better into the being. Any
of these upgrade packets when you go to 600 mA you will probably have to remove
the door off of your Syma or your quad force. That is
okay because you are actually reducing weight. And it is snug enough to fit in
there but you will kind of have to bend the bar on the battery bay for your
quad copter in order to make it fit. Go ahead and buy yourself a four or five
pack because that means you can always have one charging while you are flying. Which means, you could essentially fly indefinitely if you’ve got
one of those ugly USB chargers. Patrick what do we have next?
Patrick: Benjamin wrote and said, “On
Episode 122 Padre was talking about using different channels when accessing the
same SSID from multiple routers. My experience with multiple routers using the
same SSID, when router A and router B are on separate channels, devices connected
to router A can’t see devices on router B, so separate channels didn’t work
when it came to sharing files. Therefore if you want to share files over the
network then use the same channel, if you don’t need to share files then don’t
use the same channel.
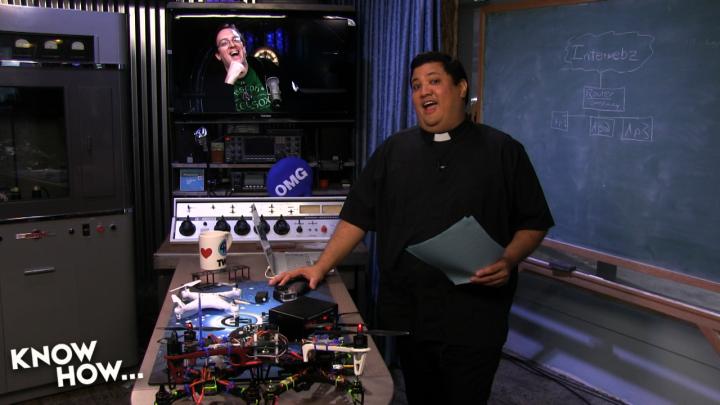
Fr.
Robert: Thank you
Patrick. This is actually a very good question. We get this a lot. I get a lot
of emails about this. It is based on a misunderstanding of what channels are.
There are a lot of people that think when you say a channel, I set my wireless
AP for a specific channel then I am creating a different network. That is
absolutely not the case. The best way to think of channels is wireless cables.
That is all it is. It has nothing to do with the network. In other words, if I says something for channel 1 it is not separate inherently
from the network on channel 6 or separate from the network on channel 11. Those
are all the same network as long as I set up the routers that are broadcasting
those channels correctly. I understand what you are having Benjamin, what it is
you have actually natted your nat. Let me explain
what that means. This is what a typical multi-router setup looks like. You’ve
got the Internet, you got your router which for most of you is also going to be
your default gateway, and then you’ve got a couple different APs which for many
of you is also going to be a router that you have
turned off the routing function. The problem is, that
many people try to plug these in without turning off the nat or without turning off the router function. I will explain that in a little bit
but first let me explain what a flat network is. When we look at something like
this, we have what is called a routable address. That is the address that is
facing the Internet. For example if you do a trace route on your network, we
are going to do an episode segment specifically on now so we can go
step-by-step but I’m just going to give you the general overview right now. It
would look like 68.78.2.5 or something like that. It means that it is an
address that can be reached in the real world. On the other side of the router
there is a non-network addressable address and that would be something like
192.168.0.1. That means nothing to a computer out in the real world but it
means everything to a computer on the inside world. What we want, for your home
network is a network that is flat. It is all using that same IP address range.
So for example, I can make this 192.168.10.X and that X is any value between
one and 254. What you want to do when you are planning out your network is you
want to come up with an addressing scheme that will stay constant for your
network. For example, the way that I typically do it is 192.168.10.1 will be my
gateway. That is the piece of equipment that is connected to the outside world.
In other words any time a piece of equipment wants to connect to the Internet
it has to go through that 192.168.10.1. I then reserve everything between
192.168.10.2 and 192.168.10.104 what I will call system reserve servers.
Between that will be the APs, a Slingbox, consoles,
or anything that I want to give a static IP address to you so that I will
always know where it is. That includes network security cameras, media servers, my flex box. Now the nice thing about doing it that
way is you know that any time you are going to have a server or an AP that you
want to address, it is going to be in that lower preserve range. Now the way
that I reserve that range is that inside of my router I have the option to set
the range that my DHCP server in my default gateway will be handing off to any
device that wants to connect to my network. I can tell it to only use
192.168.10.101 - 200. It means those 100 addresses between 101 and 200 will be
handed out automatically to devices that just want to connect wirelessly or
wired. Here is the key. None of these AP one, AP two, AP three which is
probably just routers with DHCP and Nat turned off can be doing the same thing.
And, you need to be connected to the LAN port not the WAN port of each of these
routers. If you are connected to the WAN what you were doing is you are
actually segmenting off each of these connections from the main network. You
are natting a nat. That is no good. It is exactly
what Benjamin did and that is why he could not connect from devices connected
from this AP to this AP to this AP. That is why it seemed as if those channels
were different networks. Patrick, have you ever run into this problem?
Patrick: Not that I recall. But my network
is pretty simple.
Fr.
Robert: Normally it
is simple unless you start adding more routers and more APs. Again, we are
going to do this in So if this kind of has you freaked
out no problem. This is a general overview because we get this question all the
time. That is enough network babble for now. Patrick, we are going back to quad
copters right?
Patrick: Barry has a big problem. His feet
keep falling off. He writes, “Thanks to Quad building episodes I’ve got the
confidence to move out from toys to a kit. I bought the FPV 250 kit that was
featured on the show and my question is, what is a
great way to attach the feet to the frame? I’ve tried CA, plastic epoxy, and
hot glue. Nothing sticks. According to the frame description it is made from
nylon and there is nothing much that will stick to nylon. What have you found
that works?”
Fr.
Robert: This is
actually a great question because we get this all the time. This is the 250 kit
that I suggested. These are the Nylon feet. These things are always popping
off. I understand. We have suggested hot glue, we suggested crazy glue, some people have used little screws that they countersink
into the feet. Nothing seems to work. The best solution that I have found is to
use these little zip ties. There are a couple different ways that you can do it
that I always use it in collaboration with a little bit of glue. This is
actually key. If you use crazy glue, that is CA. This
is kicker which will allow the glue to set faster. This is key because the CA tends to just kind of stay liquid around the feet and you don’t
get a really good bond. You basically just create a layer of crud. If you use a
little bit of character, it will set the glue that much faster. But even then,
what people find out is that a hard-hit will snap the connection between the glue
and the surface of the feet and then the next time you take off the vibration
makes it drop-off. The worst-case scenario is that you are up in the air 100
feet and the foot drops off and it’s gone. And you have no idea where it can
be, especially if you are flying over something a lot. If you use the zip ties,
and I typically get something like this. This is a jar of zip ties from
Michael’s. It is just a hobby store and I bought them for like five dollars for
this entire thing. I can get a bunch of different colors. But the key is that a smaller type of zip tie. That keeps the weight down,
because I don’t want to use a solution that is going to dramatically increase
the amount of weight that they have to put on my quad. This is a standard
straight up loop through. I am using two different ties and I am going to
essentially go underneath the amount down through this part of the leg and back
up the other side. This is incredibly strong. I can do really hard hits and it
will keep the foot in. There is another way to do it and that is the double
loop. This is using just two wire ties. But it takes both sides and goes down
through the foot and back up. Some people prefer this method because they think
it gives a bit more strength. But I am not sure about that. It also comes down
to looks. How do you want your foot to look? I typically do a little bit of
each. Other people have tried fishing line and that works just fine. Some
people have used that tape and I would very much suggest you not do that
because that tape will leave an adhesive mark that is very difficult to get
out. And after a lot of vibration that tape will just fall
apart. So go ahead and try that. Another person in the chat room says
where do I buy extra feet if I do lose the feet? Unfortunately you don’t. The
nice thing is that these frames are very inexpensive, you could pick one up for
about eight dollars. For eight dollars you get a frame plus four of the feet.
What I would sit just is to go ahead and buy one or two frames and not only
will they give you the extra fee but it will also give you the frame. Something
that cranky hippo has done is that he has actually installed posts at the four
corners of the frame. So he's gotten rid of the plastic feet and he has little aluminum
tubes that stick out and become his feet. So be a imaginative, you don’t have to use the nylon feet
but if you do this is a really good way for you to make sure that they don’t
pop off.
Fr.
Robert: Now,
Patrick I am going to go ahead and ask you if you could grab me the iFixit tools off my desk and bring them back here. Because, it is time for us to go ahead and take a pause to think
the first sponsor of this episode of Know-How. You know them. IFixit is the place to go whenever you need something for
makers, for DIYers. They are the one-stop shop, that
fantastic toolkit that gives you pretty much everything you need to modify, to
work with, and to change the gear that you already have. They are also not just
about tools, they are not just about that IFixit kit. They've also got repair guides, DIY guides, and
pretty much the step-by-step instructions to open up the electronics that you
want to open up. This is the iFixit tool roll. You
know it, you'll love it. You’ve seen it over and over on the Twit TV network
and we swear by it. Most of the projects that we do,
especially the ones that we have been doing on quad copters are using some iFixit tools. Either the magnetic project mat pad or
definitely this tool roll which includes all of the bits that we need, all the
little drivers, all the little specialty bits that you
won’t find anywhere else. The tweezers, the spongers, the things that get our
electronics opened up correctly. But, that is not what I fix it is all about.
They’ve also got specific pieces to repair the devices that you know and love. here are a couple of their new repair kits. This one is for
an iPhone, if you want to replace the battery they have now got a specific kit
that will give you all the tools you need just for that repair. They have
realized that some people don’t want to buy the entire toolkit they want to buy
a specialty kit. Their specialty toolkits are just like this. They will give
you the drivers that you need to be able to open the case, they will give you
the sponger that will open up the case without having to destroy the finish,
and they will give you little things like suction cups. Now you could go out
and buy each of these bits and pieces individually and then sometimes you are
going to make a mistake and you will have to rebut the tool. Or, you could buy
from iFixit. IFixit will
not just give you the tools and the replacement parts, but they will give you
step-by-step instructions in order to do it right. Now, these kits come with
all the tools that you need to fix it right away which would include the pentalope drivers for proprietary screws, those spongers, the replacement adhesives. And replacement
parts. This is not the stuff that you find on eBay that maybe will kind
of work, but maybe will make your case bolts out. Or maybe kind of works but
doesn’t quite hold the charge. iFixit stands behind the replacement parts and that is really what makes them
different. IFixit offers the best tools and repair
parts and they have the best step-by-step guides to show you exactly how to fix
the device that you are working on. In fact they have comprehensive repair
guides for every single iPhone, iPad, Mac computer plus a growing list of
android devices. And these repair guides are free. No purchase is necessary. IFixit makes DIY fun, easy, and affordable. Here is what we
want you to do. We know that you are geeks. We know that you are a DIY freaks. We know that you are makers. So head on over
to iFixit.com/twit for all the tools, parts, and kits that you need to fix all your broken stuff.
Enter the code know-how at checkout and you will save $10 off any purchase of
$50 or more. IFixit.com/twit and use the offer code know-how at checkout. We thank IFixit for their support of Know how. Isn’t that right, Bryan, don’t you love IFixit? Alex, you have failed me.
Bryan: No, it’s me.
Fr.
Robert: After that
little bit from cranky hippo, I’m doing that on purpose because you know. We
did want to take another stop by CES 2015. This time to take
a look at some of the 3-D printers from XYZ printing. So without further
ado, Alex press that magic button.
Fr.
Robert: We have all
seen 3-D printing but one of the missing elements has been making a 3-D printer
that works again and again and again. It is a secret that the folks here at XYZ
printing have figured out. This printer right here, the DaVinci 1.0 is the hottest selling 3-D printer on the planet. You can currently buy
this at Amazon, unlike a lot of kits where you have to find some esoteric shop.
They went from the DaVinci 1.02 the DaVinci 2.0 which is a dual printer. It has two different
heads. To this one, which is Internet connected. So for those people who don’t
really want to have to design things, you can go through the Internet to find a
design you want to print. Now if that is all that they had, XYZ would still be
tops in my book, especially at that price point and at this quality. But they
are increasing the state of the 3-D printing arts by using this. This is the DaVinci 1.0 AIO, the all in one. This is a 3-D scanner.
That means that for those people who really don’t want to have to design their
own objects, you can put something into the scanning bed, it will take all the
measurements and burn it into a standard format and then you can 3-D print it.
Now here is the best part. You could use this 3-D scanner to take an object
that you want to improve, scan it, modify it. Let’s
say you wanted to add a handle or a mounting post and then print it up on a 3-D
printer. That is real innovation because that means I can take the object from
my daily life and make them that much better. Now, they are not just going to
sit back on their laurels with a great 3-D printer and a great 3-D scanner.
They have decided that they need something that everyone can afford. That
everyone can use. They want the leverage, the experience they had in being one
of the biggest electronics manufacturing firms on the planet and give you a
product that is durable, easy to use, and cheap enough for you to buy. And that
is what this is. This is the DaVinci Junior. This is
a $349 3-D printer. It is not just that it is inexpensive. It is that it is
durable. It comes in its own case so it is going to keep everything nice and
clean. And the head is removable. If you every jam, or you have a feed problem
you can actually remove the head from the assembly without having to
disassemble the entire printer. That is entirely different than some of the 3-D
printers that we played with in the past. It also comes with a one-year
warranty. If you try to buy a one year warranty on some of the other 3-D
printer boxes it would actually cost more than the DaVinci itself. This is not just a $349 printer. It is a statement from XYZ saying,
everybody come. Start with the DaVinci Junior, start
with the $349 printer and see if your hand is good at designing 3-D objects.
Then add a laser scanner. And if you are still progressing, why not go up to
one of the big boys? If you want to start in 3-D art, you've got to give it a
try at XYZ.
Fr.
Robert: We are back
at the XYZ booth to show you another piece of technology. Now this is the Noble
1.0. It is a $1499 printer. You are probably saying wait a minute. They have
that DaVinci for $349 and they have larger printers
for $600, why would I want to pay $1500 for this? Well in a word, perfection.
This is the granular kind of quality that you are going to get with this. The
reason why it does that is because it is a stereo lithography machine. In other
words it doesn’t use a printhead. It is using a
series of layers and this resin. It is a photosensitive resin to create the
image. It slowly lifts the head out of the resin and adds layers and layers and
layers to the item. The finished product is this. You can get extremely small
particles. You can get superfine detail. And it just means that you are going
to get a part that is far more tolerant of really close precision movement. Now
this is a different type of 3-D printing. This is not squirting plastic onto a
platform or two ahead. This is actually building the article from the ground up
with laser light. Now if you are into more precise 3-D printing, XYZ is making
it cheap with the Noble.
Fr.
Robert: 3-D
printing isn’t all about utility. We know that. You’ve got to have the desire
to create, the desire to build. And if you are a parent you probably want your
kids to have that desire. XYZ is making it easier with this new series of
robots. Imagine this. They sell you a kit that includes the servo, the
controllers and the wiring, the chips that will allow you to create a robot.
But then they give you the files to 3-D print the frame, the structure and
everything that turns the robot into a robot. This is a fantastic possibility
for you to give your kids a love for learning. At $300 per pop it means they
are going to learn everything from micro controllers, to servos, to how
structures move and work, to 3-D printing. And in the end they get a finished
package that is their customized master of disaster.
Fr.
Robert: And you
thought 3-D printing was only about plastic. Shame on you. Here at XYZ they've also got the 3-D food printer. You heard me right. Food printer. Now take this same technology that you would
use in a 3-D printer with the head but instead of squirting ABS plastic, it is
squirting edibles. They have cartridges for dough, they’ve got cartridges for
chocolate and you can have the most intricate patterns being piled up one on
top of the other to create cookies beyond compare. To create sweets that are sweet. And just to geek out. The thing that I
really like about something like this is that it is taking 3-D printing into a
space where we didn’t think it was going to go. And isn’t that what we want at
CES? We want to be shown something that we haven’t seen before. And if you are
going to take a 3-D printer technology that has grown over the last three or
four years and give me something that I can eat, then I am all for it. Here at
XYZ Yum Yum Yum.
Fr.
Robert: Over the
years I have come to realize that I do tech pretty well. Growing things? Not so
much. To say that I have a black thumb would be an understatement. I kill
everything that gross. Of course maybe that won’t be the case now that you've
got XYZ and their green cube. This device is a self-contained hydroponics farm.
The only thing you have to do is add water and power. It will give your plant
the right light, the right humidity, the right temperature and make sure that
it stays watered so that you get a customized growing profile. Now I know that
this is a niche product. This is going to be something that people are going to
say why do I need a hydroponics farm in my house? Better for $399 why wouldn’t
you? Go ahead and give it a try. See what you can grow. What kind of herbs.
What kind of vegetables. And maybe you can find a difference in taste. I know
some people swear by organic and this is Uber organic. This is organic grown in
your living room. I wonder what else I can grow.
Fr.
Robert: Oh, so
subtle. So subtle indeed. The folks over at XYZ
printing are going to be sending us a few care packages from CES. We actually
do want to use their da Vinci Junior. The idea was to give you something that
is affordable, something that can replicate the same thing over and over again.
We wanted to do the 3-D printing on know-how way back but we just couldn’t
decide on a 3-D printer. They were too expensive and the ones that were
affordable just didn’t work right enough times. I think we finally have a price
point that most of you can afford and software that most of you can run. So
this should be an exciting time for no help. Also I want XYZ to send me one of
those green growing cubes. Because, why not? Now when we come back we are going
to be jumping straight back into your feedback. We’ve got a lot more questions
that we want to have answered. But before we do that, one of the things I get
asked all the time is how do I get into enterprise IT? It is actually the way
that I thought into the twit TV network. If you remember way back, this is more
than two years ago. Leo Laporte asked me to come on
this network because I did enterprise IT. He wanted an enterprise IT show. It is kind of difficult to get into the game. I
understand that. The language is kind of daunting. And you have to be exposed
to millions and millions of dollars’ worth of equipment. And there is not
really an apprenticeship that you can jump into unless you know someone in IT.
So for many people who want to try out enterprise IT, it is just not really an
option. Unless of course you check out ITProTV. Now what is ITProTV. Think of it as Twit for people who want to get into
enterprise networking. And enterprise class troubleshooting. It is a one stop shop for you to find topics on everything from desktop
security to how to set up servers to what you need in order to pass the
certifications that you want to put on your profiles so that prospective
employers know what you can and cannot do. Now ITProTV offers you hundreds of hours of course material. 30 hours being added each and
every week. Their library includes video courses on Microsoft, Cisco, Apple, APlus, CCNA Security PLUS, and MCSACISSP Power Shell and
Linux Plus. They cover those topics with aplomb. In other words they had
experts, people who have actually done this in the field. These are not just
textbook learners. These are people that know what does and does not work in
the field. The shows are streamed to live and are available on demand worldwide
to your Roku, your computer and your mobile device. And you could interact with
host during the show on topic specific web-based Q&A’s. If this sounds
familiar, if this sounds a little bit like Twit, that is because they are fans
of Twit TV. The folks over at ITProTV use the same tricastor, the same cameras, the same teaching methodologies as we do. Because they love what Leo Laporte has created. So if you
know Twit, if you learn from Twit, you will be able to learn from ITProTV. I know there are going to be some of you out there
saying but I've already started a certification or maybe I’m following a book.
That is fine. Even if you are already studying with the book or enrolled in the
certification class, this is a fantastic way to supplement all the things that
you are already learning. Plus, you will be able to progress at your own pace.
They include practice exams so that you can see where you are. And if you are
ready to take the certification exam and my personal favorite is the virtual
sandbox that you get through your subscription. It gives you hands-on practice.
You get to take a look at the enterprise. For those millions of dollars’ worth
of equipment that you just can’t buy on your own. You get this all for one low
monthly price which includes daily update and new features. It is comparable to
the cost of a study guide and much cheaper than going to an IT boot camp. Here
is what we want you to do. If you are even a tiny bit curious that the world of
IT might be for you, check out ITPro.TV/KnowHow to
upgrade your brain With the most popular IT
certification recognized by employers. You are going to get a free seven day
trial when you sign-up using our offer code which will allow you to check out
their courses through lifestream and more.
Subscriptions are normally $57 a month or $570 for the entire year that we have
a special offer because they are fans of twit. If you sign up now and use the
code know-how 30, you will receive 30% off your subscription for the lifetime
of your account. That is less than $40 a month or $399 for the entire year.
Once you reach your 13th month they will reproduce your subscription rate even
further. Bringing your costs down to 2495 per month or $249
for the entire year. That is ITPro.TV/KnowHow.
And use the code KnowHow 30 to try it free for 7 days
and save 30%. And we thank ITProTV for their support
of Know How.
Fr.
Robert: Let’s get
back into it. We’ve got a little bit more time and let’s go ahead and answer
some more of your questions. Cranky Patrick what is next?
Patrick: We have got a message from Bob who
asks, “So I have some server motherboards and other computer components that
need to be properly stored because they are backup parts for servers at my
parents company that I work at and I don’t want to just throw them in a drawer
with only an antistatic bag to protect them. Any
suggestions?”
Fr.
Robert: First of
all Bob, kudos to you. This is actually a problem that a lot of people have
expressed. This exact same question has been asked three times in the Google
plus group in the last six weeks. I probably get one email every week saying
something along the same lines. Which is, I bought three of x
part because will I need to be able to use this for the next five years and I’m
not going to be able to buy a replacement part in the next 18 months. So kudos to you for thinking ahead when you’ve got a dedicated
platform. Something that you are not really worried about performance
but longevity it always helps to buy some spare parts when you first start out.
Now, I am going to tell you something that goes a bit beyond the scope of your
question. But if you are going to do this, for example when I buy server
motherboards you have to test all of the server motherboards before you put
them in the storage. There is nothing quite like getting a backed up and then
finding out three years from now when the warranty is dead that the backup
actually came dead on arrival. So test it before you store it. Now let’s go
ahead and talk about storage. In your post you talked about using Ziploc bags,
I use Ziploc bags for non-static sensitive components. But if it is at all
static sensitive, that means that it has a chip in it
don’t use a Ziploc bag. They are not great static collectors but they can’t
conduct static electricity and that is a bad thing. In fact, you are much
better off using something like this. This is a standard antistatic bag. Just
go online, you can find so much of this. It will have nice mylar coating which essentially keeps all the static
electricity on the outside of the bat. It is not going to conduct through. Plus
get a few sheets of this nice soft foam. Whatever component you are going to
put, either a motherboard or video card or network card go ahead and stick it
on the surface first so that it is not going to have those pointy edges poking
through the bad. And then put it into your antistatic bag. Once it is in there,
seal it and you’ve got your first layer of protection. That layer of protection
is not protecting it from impact, it is just going to
keep it from getting fried by a static discharge. Now, this is not enough. Do
not take this and drop it into a drawer because you are going to forget what it
is and if you are planning to have this for multiple years you are probably
going to start piling stuff on top of it and that is just going to break it. Which means, you need something like this. This is a sample
container. I think we got these for like $10 for four of them. They are not
that expensive. But the nice thing about it is you can put several sets of
components inside of them. For example I’ve got one downstairs that actually
stacks up five motherboards. All those motherboards I have labeled exactly what
they are. Once you have them all stacked up you can put the cover on it, seal
it and now you can put it on a bakers rack along with a label here saying
motherboards. This is going to keep it completely safe. It doesn’t matter what
hits it unless it actually cracks through the plastic you are going to have a
nice impact proof module for the future. One of the things that I actually do
is I will waste space inside the box and I will say this is for server five and
it will have the two motherboards, the four network cards and maybe some
replacement memory. That is just my way of organizing it. There is one last bit
that you may want to consider. This is really good for you equipment nerds who
have a lot of equipment that you purchase. Most of those boxes come with this.
This is a pack of desiccant. This is the stuff that says silicone gel do not
eat. All this is, is a bead that pulls moisture out of
the air. Each of these beads can pull 40% of their own way of moisture out of
the air. Unfortunately, though I collect these all the time
they kind of die. But you can recharge them. All you have to do is take
these, save these and put it on a baking sheet lined with aluminum foil and put
it into an oven at 275°. Put it there for 60 minutes for every 30 ounces of the
silicone gel. What that will do is it will take some moisture back out of those
little beads so that when you put it into your equipment box it is fresh and
brand-new. So if you have a lot of these, go ahead and save them up because
they are always useful. Patrick what else do we have?
Patrick: Lee says, “After I get comfortable
with the Syma I’d like to use a quad copter for image
acquisition. Unless I have missed it, you haven’t talked much about the best
built including the camera. If you have talked about it can you point me to the
appropriate episode?”
Fr.
Robert: Very good
question. We haven’t talked about this because it is actually our more advanced
builds. Now remember, we told our audience that we were going to hold off on
more quad copter builds until our late February episodes. We are going to stick
to that promise. But I can ask her your question. When we talk about cameras
there are really two cameras that people think of when they are thinking of
quad copters. The first is the ever popular go Pro these things are ubiquitous,
they have great video quality and there are accessories galore for them. A lot
of people, especially if you are going to fly something in the 250 class, will
fly case lists. Which is nice because that means you don’t have the weight of
the case but on the other side it is very easy to damage the camera if you
crash. The worst possible thing that could happen is that you scratch the
lands. If you scratch the lens on a go pro then you are basically out of the
game. I am sticking to the Hero 3 series because that is less expensive. You
can get a silver for about $200, a black for somewhere
in the range of $400, they now have the Go Pro four is but those are
ridiculously expensive. So unless you are planning on shooting really high
quality 4K video, stick to the three series. The other option is this. We are
going to talk about this more in depth when we get to actually creating a video
bound quad copter. But this is the Mobius. This is the wide angle version. This
camera cost about $80. So it is at least 40% the cost of even the lowest range
go Pro three. It is not quite as good quality, in fact you are going to have to
do a lot of color correction and I will explain this when we get to the segment
on doing video on a quad copter. This tends to blueshift everything. So you have to color correct. You have to add the red and the green
back into the video for it to look right. But, at $80 you could crash this a couple of times without worrying about it. It is also
lighter than it go Pro which means you are going to get a little better
performance. Now those are the cameras. Let’s go ahead and talk about the
craft. This one right here, this big Mamma JAMA is a 450 class. You have seen
this before it is called a dead cat frame. It looks a little strange. That is
because the arms are kind of splayed out and that is why they called it a dead
cat or annex alien frame. The nice thing about this, is that the camera will be out of the range of the propellers. On a lot of the
other quad copter builds the products are so close to the center that there is
really no good way for you to get out of the range. They will always be in your
frame. The other thing that is nice about this, this particular frame has what
is called a clean and dirty plate. This little thing is actually mounted on
rubber grommets so as the quad copter shakes it is not going to translate all
that vibration over to the camera. That is a really good way to get steady
video. You still get a little bit of jumble affect but not nearly as much. You
can also get a dedicated gamble that will mount underneath the surface of this.
I have actually use this for my shots in Hawaii. It is
absolutely gorgeous. Now, the 450 is not the only way to get good video. You
can actually do it with the 250 class and something like this. This is the
extended frame on the 250. If this goes on top this gives you a long frame for
you to mount your FPV and your video gear on a 250, get decent photos but not
nearly as steady as a fourth 50, of far higher performance. So there we go.
Fr.
Robert: I do want
to do a few things before we have to go. And we do have to go. But the first
one is a question I get a lot about the Symas. And again
I know that a lot of you bought these on a recommendation so thank you very
much. Here is a question that many of you have. This one is broken so it is not
going to fly but, a lot of you are saying I got a Syma,
it flew a couple of times but now it tends to flip over and it won’t fly
straight. Or it flies a little bit and then it wobbles out of control. There is
a very easy way to fix it before you try and return it. What you have to do, is
you have to reset the flight controller to know what level it is. Here is the
procedure. What we want to do first is we are going to turn on our controller.
Now we turn on the quad copter and as you see it is going to do the flash flash flash. We are going to go
slow, sync it up and now take both sticks and go down and to the right. It is
going to fast flash. That that flash means that whatever level you have got
that quad copter on it is going to set that as the level for the flight
controller. Now again this one won’t work because this has one dead motor. But
my quad copter now knows what his level. So if you have an X5 and it is flying
a little funny, go ahead and set all the trims back to the center and go ahead
and read level your quad. And hopefully if you don’t move it, if you don’t move
it while it is calibrating, it will give you a level and fix it your little
drift problem. So that is an easy one.
Fr.
Robert: One last
bit before we go. Some people have been asking about the electronics builds.
For example, do I use batteries? What do I use to supply power? In the past I
have shown you that I go ahead and use old power supplies from computers in
order to give me a 5 and a 12 volt rail. Now, for most projects that works just
fine because five and 12 V are the voltages that I will need most often. That there are some other projects that I want to have adjustable
power. I've been using this. This is a nice, cheap power supply that I
bought off of Amazon. This is called a tech power HY. Believe it or not, this
was used for tattoo machines. The cool thing about this is that it was only
about $35 from Amazon. If I turn this thing on, it has a nod here that will
allow me to adjust exactly the amount of voltage that I need in order to run my
electronics. I can go all the way down from 11 V all the way up to 15.1 bolts.
This is a fantastic piece of gear to have. It only gives you 2 amps so you are
not going to be able to run your quad copter motors. Or for example if you
wanted to light up LEDs to find out what color they are or if you wanted to
light up your flight controller without having to plug into the battery because
you're worried about shoring, this is a really good way. All you have to do is
find the exact voltage that it needs, for example this is a 5 V device I use
banana clips to plug it in here and you've got yourself a fantastic way to give
yourself variable voltage. There you go. $35 shipped. Pick one up today. You
could get more professional models, models that can provide multiple amps and
weigh more than two. But for most cases a two amp power supply is going to be
just fine.
Fr.
Robert: I am afraid
that is all the time we have for this episode of know how. Bryan will be back
next week that we didn’t really miss him. Bryan aren’t you happy to be gone for a while?
Bryan: Yes, it's neat!
Fr.
Robert: Exactly.
Patrick, thank you very much for filling in for Cranky Hippo. Could you please
tell the folks at home where they can find you?
Patrick: The latest project is backtopredictions.com.
It is comparing Back To The Futures 2015 with Reality
Of 2015. And Hello Lens is the latest thing that I have posted.
Fr.
Robert: Wasn’t that
technology used to shoot Jaws in 3-D?
Patrick: No this is What They Were Wearing At The Dinner Table.
Fr.
Robert: Oh right.
Patrick: It looks exactly like it. Here is
Marty wearing the Microsoft Hello Lens.
Fr.
Robert: I wanted to
cover this technology today. Because of course there was that big announcement
yesterday. But I wanted to wait for Bryan to get back because I have a feeling
we are going to be able to badger about this quite a bit. It is enhanced
reality. Augmented reality. But they project that images on your retina not on screens. That is just
cool.
Fr.
Robert: Now folks
don’t forget that you can get all the information on this episode by going to
our show page at twit.tv/KH. If you drop very few will be able to get all of
our back episodes, all of our show notes, but you will also be able to get a
drop-down menu where you can subscribe. So every episode of know how
automatically ends up in your device of choice. Whether it be your iPhone,
iPad, computer, laptop, desktop, android device or whether it is going to be we
give you a format that works for you. Don’t forget to follow us on our Google
plus group. Just go to Google plus and look for know-how. We are very popular group, we are a very active group. I love what you folks are
doing in there. Bryan and I are always jumping in and what we find out is that
90% of the times questions are answered before we get in there. It is a great
place for DIYers, a great place for makers so go
ahead and join up.
Bryan: This is cool!
Fr.
Robert: Thank you
Bryan. We get sums up from the Cranky Hippo. Also, don’t forget that you can
follow both of us on Twitter. You can find them @cranky_hippo.
You can find me at @PadreSJ. If you go ahead and
follow us you can find out what we are going to be doing every week on
know-how. As well as the other shows that we have here on the
twit TV network. And also special thanks to our TD
Alex. He never puts a camera on himself, but could you say a few words?
No? Okay. Well could you make Bryan say a few words?
Bryan: This show is out of control.
Fr.
Robert: That is how
we do it. Next week We are going to be showing off a
couple of projects that you have asked to see. We are going to show you how to
document your bad connection and I am going to give you a couple of tips on
setting up your own home studio. Until then, I’m Father Robert Ballecer and he is…
Bryan: Some of those places out in the
Coast there isn’t a wifi connection that you can
connect to.
Fr.
Robert: Exactly!
Until next time, now that you know how, go do it!