Know How... 110 (Transcript)
Netcasts you love, from people you trust. This
is Twit! Bandwidth for Know How is brought to you by cachefly.com.
This episode of Know-How is brought
to you by SquareSpace. The
all-in-one platform that makes it fast and easy to create your own professional
website or online portfolio. For a free two-week trial and 10% off go to squarespace.com and use the offer code know-how.
And by lynda.com. lynda.com is an easy and affordable way to
help you learn. Instantly stream thousands of courses created by experts on business,
software, web development, graphic design and more. For a
free trial visit lynda.com/knowhow.
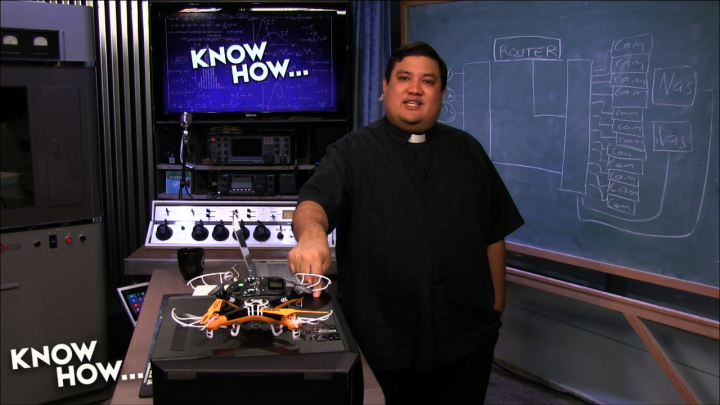
Father
Robert Ballecer: This week on Know-How we are going to take you with a
Mouse without Borders, Bryan is going to show you how to fix them busted screen
and then I am going to teach you how to fix a congested network.
Fr.
Robert: Welcome to
Know How. It is the Twit show where we build, bend, break and upgrade. I’m
Father Robert Ballecer. Oh and there is no Bryan
today. Bryan Has abandoned the show just to do some sort of honeymoon thing or
whatever it is. I’ve never understood that. Evidently we are not important
enough, he doesn’t care about the know-how audience enough to power through it.
But that’s okay. We will welcome him back with open arms next week. Seriously,
we wish Brian well on his honeymoon and hope everything is working out okay
with him in Florida. We wish his wife all the best of luck.
Bryan Burnett: And some of those
places out on the coast there isn’t a WiFi connection
that you can connect too.
Fr.
Robert: That’s
right Bryan. That is a big problem in Florida. Now speaking of problems, we had
a lot of people comment in the Google plus group about the episode we did on
3-2-1 super backup. Essentially I showed you how you could take an old net book
and turn it into your central backup station. Taking in
everything from dropbox and one drive any cloud
storage solutions and then pushing it along with the data on your computer and
your NAS into Amazon’s glacier. It was a cool solution but it did spark
quite a bit of discussion, which we are always happy to see. I want to bring up
some of the questions and posts that we had from the G plus group. Starting with Ed. Who posted, “I have one of these with an
AMD Hudson that would be perfect for the 1-2-3 backup project. They run Windows and Linux fine and they are low power. I’m using it with an Ubuntu
server 12.04, after I upgraded that I ran Windows on it. If you don’t have a
netbook or can’t find one, this works fine”. Actually that is a great one, that is a fox.com Nano PC. The
idea of course is that you could use any computer. It doesn’t have to be a
netbook. The one thing that I would suggest, and I
think Ed nails this, is that you want something low power. This is going to be
running all the time. If it is your desktop that is using 300 or 400 W, that is
not good. But if this is a netbook or one of these it is using 5 or 6 W, I
think you can manage that. We also had a comment here from Brent, who
suggested: “One of the things to consider in the 3-2-1 backup as shown, would
be an older netbook which has met most cloud storage clients for windows and
will sync all content after it is installed. Therefore reducing the overall
storage on the net book itself, if you have a ton of data on different cloud
storage solutions you could run out of local storage.” Thank you very much Brent, that is an excellent point. On that particular
netbook I was not all that worried. Because it had a 500 GB rotating hard drive
which I don’t want or need it to be fast because it it is just doing backup in the background. But, if you do have more than 500 GB in
your collective cloud, in your dropbox, in your one
drive, your Google Drive, whatever you are using to
sync to the cloud, that could be an issue. Now what I would suggest, at least
for my set up, is that if you do start to run out of space on the local drive
as long as you’ve got that NAS mounted, why not store the cloud storage on the
NAS. Then this same job that I created to back up the NAS would also backup
your cloud storage. that is not ideal because it does
make for a major point of failure if your NAS gets disconnected it is going to
stop backing up. But that is something to consider if you do have a crazy amount
of storage in the cloud. Finally, we’ve got a comment here from John who says,
“I just watched Know-How 108 and I think I missed something in the super backup
portion of the show. Where did the versioning come in? I don’t remember glacier
having any versioning that it has been a few years so I could be wrong.
Everything else just seems to be basic backup.” Well John, you didn’t miss
anything. That is actually right. You see, glacier isn’t really a service. It
is not a backup service the way you would think Carbonite or another commercial
business. Glacier is big, dumb storage. That is all it does. There are no bells
or whistles. The files you put up gets stored, the files you take down get
copied. That is it. Now the versioning comes through the software. You could
buy some really sweet software that does the versioning in the background and
gives you a nice menu system based on what it sees in Amazon glacier. But we
used vast glacier and fast glacier is free. So there is only so much you are
going to get out of a free client. Now the way that we did versioning is that
we set those switches. Remember we had the switches that we could add at the
end of the command line? That did things like make sure you delete files or
don’t delete files that have been cleaned out of the sync. Make Sure you keep all versions of the file. So let’s say that I
have a file named test and I saved it 15 times, it will save all 15 different
versions of test. It will just have a different date on each file. That is
versioning. And I know it is messy. It is really messy when you consider that
you might have 8000 files of the same thing on glacier, it is not all that
attractive. But that is a versioning and ultimately that is what is going to
save your butt if you find out that the document you were working on was messed
up 32 versions ago. So, does it have versioning the way we would want it? No.
Does it have versioning in the way that it will work? Yes. Could you get
something better for Amazon glacier? Probably. But you
would have to pay for it. Now keep your questions coming, because I do want to
answer more questions about the 3-2-1 backup. It is vitally important for geeks
to make sure that they’ve got their data in a safe place. And I am firmly
convinced that 3-2-1 super backup is the way to go.
Bryan: It’s neat.
Fr.
Robert: Thank you
Bryan. It is very, very neat. Any hearing it from cranky hippo, ain’t no better way to put it. Now, let’s get into the
first segment of the show. I want to talk a little bit about something that I
have been using the last couple of years. If you are an old hand at building
your own computers, you probably played with a KVM. That was a keyboard video
mouse switch. Back in the day before we had Internet, and networks and stuff
the KVM was the way that you would save desktop space. Remember we didn’t use
laptops. Everything was on desktop. What we would do is that in order to save
the desk space, rather than having a monitor for five different desktops that
you might be running behind your desk, you had a single monitor, a single
keyboard and a single mouse that used a switch, either mechanical or electrical
to switch between the desktops. Super simple solution and it worked. It was one
of these things that people just got used to. If you had to work with multiple
computers, a KVM was one of the easiest ways to make sure that you didn't have
to have an explosion of keyboards, mice and monitors sitting in your workspace.
That kind of changed when we got into the laptop/mobile/tablet era. KVM's are
still out there. In fact I still use them. But the utility is not so great.
With a laptop you've got the screen built in to the computer so it is not like
I can share the screen with the other computers. Or can I? I have been playing
with a piece of software that Microsoft created in their garage. If you don’t
know about the garage, it is sort of Microsoft subversion of the skunk Works.
It is based in building four on the Redmond campus for Microsoft headquarters.
It is a place where employees can come in their off hours and tinker. Or
invent, or innovate. What they found is that sometimes the projects that people
work on inside the garage becomes so valuable, so cool that they release it
into the wild. And that is what happened with the program called mouse without
Borders. Now what is Mouse without Borders? Imagine a KVM for laptops. And here
is how you install it.
Fr.
Robert: To Set up
mouse without Borders you first need to download the program from the Microsoft
download Center. The program will work with 32 and 64-bit versions of windows
XP, service pack three. Vista, server 2003 and up. Windows 7 and Windows 8. Any of those can be added to the
unified desktop. Once downloaded, install it first on the computer that will
act as the master of your mouse without Borders set up. Each computer will bear
the load of the program running on it scream, the master will coordinate all
the other computers participating in the mouse without Borders network unify
desktop. Click through the standard prompts and when you get to the let’s get
started window, you will be asked if you’ve already installed mouse without
Borders on another computer. Click no, and you will get the security code and
computer name. Make sure to write it down or leave the window open so that you
can copy it into the other installations. Now move to the next computer that
you want to use in your unified desktop. In our case, I’m using an Acer
Ultrabook, but you can mix and match computers and screen resolutions as long
as they are running one of the supported versions of Windows. Download and
install the program as you did with the master station. This time, when you get
to the let’s get started window and it asks you if you have already installed
mouse without Borders on another computer, click yes. Then enter the security
code and computer name that you have received from the installation on the
master computer. Assuming that your computers are all on the same network and
connected properly, mouse without Borders should automatically connect to the
master station and establish a unified desktop session. If you click on the
mouse without borders try icon you will be brought to the screen where you can
configure the orientation of the computers inside the unified desktop. You can
change that word are just as you would with multiple monitors and the Windows
desktop and you can choose to place the screens enter rows. Quick note, mouse
without Borders will work with multiple display desktops so if you connect two
or more computers and each have multiple monitors, the cursor will flow off the
border of each desktop adage on to the next desktop.
Fr
Robert: Now one of
the things that people are going to know about this product is they are always
going to be comparing it to other products that they are using. Like for
example, synergy. Synergy is a fantastic program and it does work across
platforms. So if you do work in a cross-platform environment that may be the
way to go. Me, I work almost exclusively in a Windows environment and all of
the workstations that I may want to share my desktop across our windows, so it
doesn’t make sense for me to pray for another product when mouse without
Borders is absolutely, positively free. And it is also incredibly lightweight.
I have never had a problem with mouse without Borders. I know some people that
had issues with some of the earlier versions. But they have really matured the
software. A couple of hits. The first thing is this.
Make sure you are running a wired connection. If you have an ultra-book you may
be tempted to run it over wireless. It will work as long as you are on the same
network you will be able to add a desktop to the unified desktop. The problem
is, wireless is inherently unstable. All it takes is
for you to have a slightly wonky connection, or a
little bit of lag and especially if you are sharing more than two desktop the
experience is less than optimal. Just don’t do that. Make sure that you are using a wired connection. The other thing to remember is
that it is not just moving across a mouse on the desktop. Both of these
computers on my desktop right now you can see I can move my mouse in between
them. Which is cool. That is nice, but it is not just
that I’m controlling this computer and then this computer. I actually can copy
and paste between desktops. For example, here is the mouse without Borders
installation and I am going to go ahead and copied this and then onto this
desktop I am going to go ahead and paste it. When I do that it will move it over.
So this is a really nice way to move files between computers if you don’t want
to have to use an intermediate step, or if you don't want to open up a share on
different computers. The other thing you can do, is you can copy and paste
text, which is nice if you are doing multiple things with creative
workstations. Something that it cannot do, that some other products can do, is
this. If I have a window and I am dealing with a multiple desktop I am kind of
use to being able to spread the window across, or move the window between my
screens. You cannot do that and mouse without Borders. When you get to this
border it is just going to say no. Now, that is kind of annoying and I wish it
would do that, but it would require a level of interaction that I don't think
they are willing to do for mouse without Borders. One of the things I really
like about this product is the ability to leverage fully the power of each
workstation. When we were using a KVM you have the ability to run a process on
this computer, then run a process on this computer,
and then run a process on this computer etc. which allowed you to maximize the
amount to every sources you were running on each workstation. That kind of
faded with some of the screen sharing program because you would only be using
the processing power of the master station. As I move between desktops in my
unified desktop, I can do that old school using the full power of that
workstation. Which means, I could expand my desktop
workstation that I use for rendering videos and have it next to the desktop
that I use for word processing, next to the desktop I have for my email. It is just kind of a nice way to be able to fully use the gear that I have
already bought. That is Windows without Borders. I am going to make sure the notes
are in the show notes and you will have the link to download it. What I have to
say is this, give it a try. You may go with something like synergy, which the
people are big fans of it is a good program. But this is free. It might fit all your mouse without Borders needs. Now when we come back
we are going to be going into a segment about how to fix the screen on your
phone. We gave Bryan Snubb’s old broken phone and we
said, “This thing is busted, see what you can do with
it”.
Bryan: I was sitting in my bedroom with my
laptop and I was playing TitanFall….
Fr.
Robert: Actually
that happens a lot. I think he’s lost it.
Fr.
Robert: But first
let’s take a pause and thank the first sponsor of Know It Alls everywhere. That is right, it is SquareSpace. Now, ideas
are great and you want to get your ideas out into the world. The problem is
that sometimes people get caught up on the website. They get caught up on
registering the domain, the perfect domain, the name that gets you the
attention that you want. Making sure that the backend is set up and at the
front end is good what server are you going to use? What frame work? What sort
of content management system? You can worry about all of that, or you just go
to SquareSpace. SquareSpace is the one stop shop on the Internet for getting your idea, your project, up
and running and out into the world. If you have used SquareSpace in the past then you know what I’m talking about. It is so easy to get
everything. Your content, your writing, your photos, your
videos already to display to the public. It is a great way to share a
weekend blog or provide the ability to jumpstart a side startup project. With a
professional looking site that has the ability to be quickly and easily
tailored to your exact needs. Now some of the reasons why people have come back
to SquareSpace year after year is that they are constantly improving their platform. They have always got new
features, they have new designs, and they always have better support. They are
always striving for the better way to help you when you make your project. It
doesn’t help SquareSpace if they sell you something
and then you don’t do anything with it because then you are just going to
cancel your subscription. And you are going to go elsewhere. So they understand
the attention to customer service is as important as their first sale. They are
also incredibly flexible. This is great for DIYers. there is a set of tools to create your own website without
any code knowledge. It is from design tools like the layout engine to the logo
Creator you get to create your brand online and the SquareSpace helps you to do it. They have also got beautiful designs. They’ve got 25
beautiful templates to start with and without logo creator, that tool for
tailoring your website, you can take that template and turn it into something
that truly is unique. It is also easy to use. It is just drag and drop, it is
click. But if you do need help, help is always available 24 hours a day, seven
days a week. Plus there is a completely redesigned customer help site for
easier access to self-help articles and video workshops. They also provide
e-commerce for those sites that support it. So it is easy for you to accept
payments especially for nonprofits like the one that I set up, a way to get
donations. It is also only eight dollars a month. We are talking about
something that is inexpensive and high quality and it is so rare to get those
two things together. SquareSpace is also mobile ready
which you are going to appreciate if you have ever tried to create a work plan
press blog and it doesn’t look as good on a phone as it does on a tablet or a
desktop. SquareSpace backend will automatically
adjust your content so that no matter what your user is looking at it with, it
is going to look beautiful. Speaking of beautiful even their code is beautiful.
I also host Coding 101 here on the Twit TV network and I love it when the code
is just neat. It is simple and yet elegant. That is what you see when you look
at the source for SquareSpace. Now SquareSpace takes care of all that stuff. All that stuff in
the backend, the front end, the hosting, the domain.
They take care of that so you can just worry about your content. So here is
what we want you to do. We want you to start a free two week trial, with no
credit card required, and start building your website today. When you decide to
sign up for a SquareSpace account, make sure to use
the offer code know how to get 10% off and to show your support of know-how. We
thank SquareSpace for their support of Know-How, a
better Web awaits and it starts with your new SquareSpace.
Fr.
Robert: Now it is
time for you to figure out how you fix your busted phone.
Bryan: We’ve all known someone who has
dropped were shattered their phone screen. My someone happens to be a coworker
named Shannon Morris. She was ever so lucky to have dropped her Nexus five from
a very short distance, cracking her screen. Well, seeing that I am just an
all-around awesome guy I offered to fix it for the knowledge. I will go through
the steps on how to fix and replace the screen on a Nexus five, but the
procedure is very similar to any other mobile device with a cracked screen.
First you are going to need the parts. I purchased the screen replacement from
Amazon for about $100. Unfortunately you can’t just replace the glass from the
digitizer as glass and digitizer are fused together with an unholy bond,
frustrating any do-it-yourselfer. If you have got some tweezers, a guitar pick
and some time, you are in luck. Does, and a heat gun
are the tools that you need for this job. Fortunately for me, I have some iFixit tools to help me along with this project. Step one
is going to be powering off the device. We don't want it to be on one we are
removing all these parts. Next, remove the symbol card tray. Opening the back
is simple enough if you have a guitar pick or for me, a plastic sponger. Starting at the bottom of the case and work your way along the
edge, popping the little rivets as you go. Step two, with a Phillips
screwdriver there will be six screws holding on the back plate at the top of
the phone. Once you have those removed, gently pry off the plate and set it
aside. Then at the bottom of the phone, there are four more screws that you
need to remove. And then you can remove that plate at the bottom. Along the
side of the phone is a long connector and gently release that from the board of
the phone and also the tiny connector that goes to the battery. On the left and
the right of the battery are the 4G and 3G antennas. Be sure to unplug both of
those from the port as well. You can gently use a plastic tool to pry the
battery up. At the bottom of the phone, release a connector that is connected
to the bottom board. Then gently pry, with a plastic tool, because this bottom board
is going to be glued to the bottom of the case. If you break this, you are in
trouble. So take your time and slowly left it up. It is time to release the
connectors for both the front and rear facing cameras. Again, be careful while
you lift these up because they are delicate. Now that you have the connectors
disconnected you can pry the board up from the chassis of the phone. With the
board out of the way, you can remove from right to left black tape gasket, the
front can, the headphone Jack, the ear speaker, and a rubber gasket, and the
rear camera. Down at the bottom of the phone, peel back the board just a little
bit so you can slide it through once we are ready to remove the screen. Now
that we have removed most of the components from the chassis we can go ahead
and get our heat gun out and sense this screen is pretty badly cracked at the
bottom of the phone I am going to apply some tape to try to hold it together.
Carefully go over the phone with a heat gun. You want to get it warm enough to
heat up the adhesive and then it you can gently push from behind to see if it
will come apart. Now with the majority of the screen removed, I will heat up
the last bits of glass at the bottom of the frame to remove them. And once the
frame is cleaned of any more glass I can insert the new one. Now it is time to
add a bit of glue to the screen edges. As I was in a hurry to finish up this
project for Shannon said she was going to DefCon, and
needed the phone for that, I used super glue. There is glue out there that you
can get that will come apart when heated but I didn’t have the time. Let’s just
hope that Shannon doesn’t break the phone again. Slide the connector through
the chassis and place the screen into the frame, making sure to apply pressure
to the edges for a good seal. Now it is time to work in reverse. But the
cameras back in place along with the head Jack, the microphone. Reconnect the
tabs as you go along with the antennas and make sure to screw the plate end
before putting the back protector on. Turn on the phone and make sure that
everything is plugged in properly. Clean the screen, and you are good to go. All in all this project took
me about three hours. If I were to do it again I could probably do it in about
a quarter of that time. Now all that is left to do is to return the phone to
Shannon and we are good to go.
Fr.
Robert: Now there
were a couple of things that Brian did that I know people in the chat room or
kind of cringing. Using gaffer’s tape not the best, much better than duct tape,
but First tape combined with the heat gun can leave some nasty residue all over
the place. Now luckily he was just going to throw away the screen anyway. But
if you got any on the sites that stuff is so hard to clean off. The other thing
is the crazy glue. I always assume that it is going to break again. So I would
never use Krazy glue. But, this is cranky hippo’s project
and if he wants to mess up his gear do it might argue?
Bryan: No, it’s neat.
Fr.
Robert: Exactly. It
is pretty neat. We also want to take a moment here to thank the second sponsor
of know-how. And of course, as being the purveyors of knowledge that goes into
your knowledge hole it has got to be lynda.com. Now what is lynda? Lynda is the source on Internet for filling
that knowledgeable. It is not just about tech stuff. It is about anything that
you may need to learn. Do you want to know about business? They got courses for
that. Do you want to know how to publicly present? They've got courses for that.
Do you want to be able to fix your computer or learn a new computer software
suite? lynda.com has Courses for pretty much everything under the sun. Which
is what makes them such a good complement for know-how. Now, lynda is easy and affordable. It
is a way to help you learn on the Internet at your own pace. You can instantly
stream thousands of courses created by experts on software, web development,
graphic design and more. lynda.com Works directly with industry
experts and soft word companies to provide timely training. Which
means that it is often the same day with the new software release that they
will have courses ready for you to learn that new software. It is a
great way to keep up to date and to update your skills. All courses are
produced at the highest quality. These are not homemade videos on YouTube,
which I love because that is where I came from, but there is something a bout a professional shot, good lighting, good audio. You
don’t want anything to get in the way of you and your learning and lynda knows that. That is why they
make the videos the way they do. They also include tools that let you learn at
your own pace. Things like search transcripts or play lists and certificates of
course completion which you can publish to your LinkedIn account, which is
great if you are professional in the field and you want your prospective
employers to know what you’re trained in. Whether you are a beginner or
advanced, lynda.com has courses for all experience levels. You get to learn while you were on the
go with lynda.com app for the phone, iphone, or android. Or you can
learn at home with your laptop and your desktop. you get to choose. It is one low monthly price of $29 and
then gives you unlimited access to over want hundreds of thousands video
tutorials. For me, I have been using premiere Pro a lot and I’ve been going to lynda.com to learn
all the things that I had forgotten over the years. Sometimes when you add it
for a living you forget do it is more than just copy
and paste transition. Sometimes you need a refresher course on how to make
things work. That is what lynda is best that. Premium members with an annual plan can also download courses to
their iPhone, iPad or android and watch them off-line. Which
is perfect if you want something for reference in the field when you are going
to be away from an Internet connection. It is an incredible resource for
those people who just need to fix things and go. So here is what we want you to
do. We want you to try lynda.com.
We want you to check out their courses on simple android development comma, on
practical cyber security, on Monday productivity pointers, and songwriting in
logic Pro. We want you to stay current with all software updates and learn the
ends and outs to be more effective and productive. And that is where lynda can help. We’ve got a
special offer for you to access all of those courses free, for seven days.
Visit lynda.com/knowhow to try lynda free for seven
days. And we thank lynda for
their support of Know How.
Fr.
Robert: We’ve got a
bit of a question. This is actually a really good question that we had from a
member of the audience who is having some issues with his network and he hoped
that we could help. In fact to this question came to us from Timothy in Los
Angeles writes, “I have a 24 port, TP link, TLSG102D Gb Ethernet switch. Connected to it is my router, 12 network cameras, 3 dual gig
NAS and 5 work stations. Two of the NAS are dedicated to storing the HD video
streams of the cameras. Three camera over each gigabit
Ethernet port. The third NAS is connected via iSkuzzy to the work stations where we edit video. For some reason we are getting heavy
network congestion. I have tried turning jumbo frames on but even then we can’t
to edit video from the NAS unless I disable half of the security cameras. The
specs say it should work. This switch has a 48 Gb per
second capacity at 35.7 million packets per second. Even with the HD streams
from the cameras I should be way under the maximum. I tried swapping out the
switch with my spare but the problem persisted. Please help”. Well, Timothy
from Los Angeles, first of all great job. Seriously this is a really good job.
You did all the things you should have done. All the things
that were the low hanging fruit on the trouble shooting tree. You tried
swapping out the switch to make sure that it wasn’t a problem with the switch
and you found out get the problem persisted no matter which switch you were
using. You also tried turning jumbo frames on and off, which is a good way to
push more data over your networks with fewer packets. Even with those jumbo
frames on you found out that it didn’t decrease the network congestion problem.
And, you also fixed the problem by disabling several of the cameras in your
security camera network. Now right there that gives me all the information I
need to help you fix the network you have. And here is the best part. You are
not going to have to pay a dime. Unless you want to. You can always send something to me. But, seriously let’s talk a little about
falling victim to the speck fiction. We are going to start with this. This is really,
really ugly representation of what your network looks like. You’ve got 12
cameras, two NAS that are dedicated to receiving the high definition streams from
those cameras, you’ve got a 24 port switch from TP Link, you’ve got a router
sitting up top, and you've got five workstations and the NAS that does nothing
but serve those workstations so that they can edit video. What you are telling
me is that with all of these on you can’t get enough throughput from that NAS to
your workstation to edit properly. But when you disable half
of them, then this works just fine. Now, I know that the specs say that
this should work just fine. I know the specs tell you that this should be
great. But unfortunately, the specs live. Let me go ahead and pull it up on my
screen. This is what the TP link specs tell you. It tells you that it has 48 Gb per second of switching capacity, which sounds like a
tremendous amount. 48 Gb are you kidding me? It is
only a 24 port switch. It also tells you that it has a 35.7 million packet per
second forwarding rate. Now those two are important because it tells you what
kind of fabric you have in your switch. How much data can you push through. And it also tells you how many packets you can
forward at any given time. Switches, like these, work on store and forward. The
frame comes into the memory, the processor says where you going, it checks the
table to see where it should go and then forwards it. That is the store and
forward. If you luck at most of these consumer level switches you are going to
see that they have those exact same specs. 48 Gb per
second, 35.7 million packets per second that can forward. The problem is, even
though it is there, it lies. And I can prove it. Let’s start with that 48 Gb per second. I know why they say 48 Gb per second because you’ve got 24 ports of gigabit and each port has two
directions in and out, so each port is technically 2 Gb. So it has a switching
capacity of 48 Gb. But that is not how it works. If
you’ve got a 24 port switch, if you’ve got traffic coming in, it also has to go
out somewhere. So basically half the ports are listening and half the ports are
receiving. Now you can have traffic going both ways so that basically means you
max out at about 24 Gb per second. There is no magic
port inside the switch this somehow stores all that data and then regurgitates
it. You have to have a constant throughput and the maximum constant throughput
is 24 Gb per second. So right there you know that the
specs are lying to you. It is a PR trick. That is not how it actually works.
That is not the problem. Because I am sure your switch is more than capable of
forwarding all the data it needs to. The problem is in the packet switching,
the packet forwarding. It tells you that you have 35.7 million packets per
second. But if I already know that my switch tops out at 24 Gb per second it means, at max, even at the smallest packet length possible I am
only pushing about 23. And that 23 is a theoretical maximum. What you tell me
with your troubleshooting, you are getting nowhere
near that. Now I am not saying that TP link is crap. Actually it is pretty
good. But, they do over’s back a lot of their gear.
You could go this route. You could go ahead and buy something like this, as Aterrasis D2. This is an enterprise class switch. This will
definitely work, it has all those extra features because
it is a managed switch. But this 12 port POE is going to run you about $1000
you are probably not going to want to do that. Especially if you bought a TP
link you probably want something that is a bit more budget conscious. so, here is the good news. You don’t have to buy anything.
You already have all the gear that you need to make this work. Because you told
me you tried your backup switch and it didn’t work what this means is that you
can segment your network. If you look at this, right now the problem is that
you have all of this going into one switch and when these cameras are running,
this switch is too busy so it can’t forward fast enough to let this NAS work.
So all you have to do, is go ahead and take that spare
switch that you’ve got and it divide your network. You are going to put all
your cameras on one switch, you are going to put all the workstations and the
second NAS on the other switch and then you are going to Them to the router.
Here is the beauty of the way that modern switching works. Because it is a
store and forward, because it figures out where the packet is going before it
actually sends it off, unless these cameras are doing a broadcast, as long as
they are only talking to those NAS’s, none of the traffic from this switch will
make it to this switch and vice a versa. That means that it doesn’t matter how
fast and how busy these cameras get, it is not going to affect your performance
when you try to use your workstations. Best part of all, you have already got
that switch. Just plug it in and you will be good to go. Now this is not going
to work for everything. Of course you are going to have problems with devices
that you have to access. For example, there will be some of these workstations
that will want to access cameras over here or access information on the NAS and
it will have to go through the router. So if that starts being a problem, all
you have to do is instead of going to the router just directly connected to so
that you can bypass what was probably also a week switch build into your
router. That is how we do it. Because switches don’t work like hubs, they don’t
just broadcast frames and packets everywhere, most of the time network
congestion can be fixed just by putting in an extra switch.
Fr.
Robert: Now, that has been a lot for the day. We have actually covered a
lot of material. We have gone over Windows without borders, we talked a little
bit about 3-2-1 super backup, Bryan show you how to fix a broken screen and I
just told you how to fix a network congestion. But I wanted to give you a
little tease on what is coming in the future weeks of know-how. The first thing
is this. This is an Acer predator desktop, we had this
a few weeks back on Before You Buy. Cool desktop, very nice. That people asked
us it is running 16 GB of memory, it is running with a hard drive instead of an
SSD, it is running with a video card that I wouldn’t choose. What is my bang
for buck? If I were to buy an Acer predator or desktop like this and then want
to upgrade it, what parts should I replace? What parts should I upgrade? So in
the next couple of weeks Bryan and I are actually going to tear this thing
down. We are going to replace the hard drive, the memory, the video card and
the CPU piece by piece to show you the performance gains that we are going to
get from each component. Which will give you, after the end
of the series, the ability to make an informed decision. That it is not
all just desktops, laptops and performance. We are also doing this. We have
project lunchbox and we love Project lunchbox. There is still a few episodes left in Project lunchbox because we’re going to be
modifying the suspension, we are going to be adding cameras and I am trying to
add an autopilot. But I think it is time to start playing with areal
remote-controlled vehicles. This is a really cheap drone. It’s not that
expensive. It is kind of a crowd device, it does have a camera and it tends to
crash into things a lot, but, we are going to be using this as sort of a
jumping off point to talk about building your own drones. We have seen DJI and
we’ve seen a few of the others that are a little on the pricey side, but with this we are going to be able to build something without
spending a lot of cash.
Bryan: Because the show is out of control.
Fr.
Robert: Absolutely
out of control. Now remember you can always find our show notes at twit.tv/KH
if you have a question about mouse without borders, if you have a question
about the procedures that Bryan use to replace the screen, if you have
questions about how I fixed network congestion, be sure to drop by. As long as
you are there go ahead and check the little drop-down menus that show you how
you can subscribe automatically to know how. So you can get each and every
single episode into your device of choice. If you wanted in your iPad, your
iPhone, your android phone, your tablet, your Mac or PC, your desktop or laptop,
no matter what it may be we have something for you and a way to get Know-How
into your Know Hole. Also don’t forget that you can find us on Google plus. You
will find a group of 7600 members strong. The cool thing about that group as it
is not just Bryan and I. In fact, most of the time it is going to be your
fellow members to answer your questions. And a lot of those amateurs are going
to need your help when they are putting together their projects. So drop on by,
see what we are working on, and maybe if you post a project, maybe if you post
a question we will use it on the show. Also, I want to thank everyone here at
the brick house who makes this possible. Specifically Alex. Alex if you could tell the folks where
they could find you on twitter?
Alex: I’ll be in the Know Hole.
Fr.
Robert: Alex will
be in the Know Hole but you can also find him @anelf3. You can find me @PadreSJ. And until next time, I’m Father Robert Ballecer and over here is Cranky Hippo. Did you see
anything? Now that you know, go do it!