Hands-on Photography Episode 137 Transcript
Hands-on Photography Episode 137 Transcript
Please be advised this transcript is AI-generated and may not be word for word. Time codes refer to the approximate times in the ad-supported version of the show.
Ant Pruitt (00:00):
Today on Hands-on Photography. I am going to walk you through the process of retouching from a professional standpoint. Yeah. I've shown y'all how to do some photo editing in Lightroom and Photoshop and things like that. But I haven't shown you everything. I haven't shown you from the professional's perspective far as doing, a portrait and going through that retouching process, we've talked about frequency separation. Yeah, yeah, yeah. But there's more to it. And I'm going to take you through that process. So you can start doing this for yourself and people going to keep coming back to you for your wonderful work. Y'all stay tuned. This is to it. This episode of hands-on photography is brought to you by Blueland. Blueland is on the mission to eliminate single-use plastics by reinventing home essentials that are good for you and the planet. Right now, you can get 15% off your first order when you go to Blueland.com/HOP.
Ant Pruitt (01:05):
Hey, what's happening everybody. I am Ant Pruitt and this is Hands-on Photography here on Twitter TV. Hey, I hope y'all doing well. I am unbelievable as always each and every Thursday. I like to sit down and share different tips and tricks that are gonna help make you a better photographer as well as a better post-processor. And today that's exactly what we're gonna do is get into a bit of post-processing or a bit of the approach of a professional photographer or professional re toucher going into the post-processing aspect. But before we get into that, I wanna say welcome to everybody. That's catching the show for the very first time. Welcome to you. Go ahead and subscribe right now and whatever podcast application you're using, whether it's Spotify, whether it's apple podcast or Google's podcasts app, whatever they're using at the moment until they kill it or our YouTube channel.
Ant Pruitt (01:58):
But if you have any issues, just finding the general subscription options, just head on over to the website, twi.tv/hop that's twi.tv/h O P for hands on photography. And you see all the subscription options there, as well as all of our previous episodes and previous show notes, I try to throw a couple different nuggets in those show notes. So go back and check those out and check out those previous episodes. All right. So without any further ado, let's get started with this week's episode. Now, I, I know I wanted to talk about getting into the retouching, like a pro if you will. But before we do that, I wanted to take a look at a bit of a news story that's released here recently from the folks over at, in gadget. And the headline says NECON is reportedly halting DSLR, camera development. <Laugh> well, surprise, surprise.
Ant Pruitt (02:54):
Somebody else is saying, you know what we're done with DSLRs? Okay. So way back in January of this year, I, I, I can't remember the episode number. I think it was, nah, doesn't matter. I think it was like episode one 40 or something. Nope. It was one 12. Wow. It's way back. Episode one 12. I talked about cannon, you know, cuz I'm a cannon fanboy, well known. They said, you know what we're done with doing DSLRs. We're just gonna move ahead with the mirrorless side of things and put all of our, our eggs in that basket and just continue to create and produce mirrorless cameras. Well, neon has decided to do the same thing and you know what, why the heck not? That's the nature of this business right now? That is the new technology. The mirrorless side DSLRs are just old tech mirrorless is clearly the, the winner right now.
Ant Pruitt (03:49):
I was just speaking to Mr. Rod Powell here recently because he was looking at trying to find a new camera just to goof off with rod Powell, host our show this week in space, that's twit TV slash Ts. Be sure to check him out each and every Friday. Anyway, this isn't about him. This is about <laugh> him wanting to get another, another camera and you know, so he's got some options out there. He can go and look at some of the inexpensive mirrorless bodies that we've talked about before with miss Vanessa joy and the budget friendly photography side of things. Or you can go back and just jump into the old DSLRs. And some people are thinking, well, if thelr technology is, is dead, why would I buy an O DSLR? Well, number one, because you can get, 'em ridiculously cheap. Now you, you, you can, and the support on them.
Ant Pruitt (04:40):
Yeah. The support is probably gonna die out, but really just how much, how often are you gonna use that camera if you're gonna consider just spending, you know, a couple hundred bucks, if it's something that you're wanting to use very often then yeah. Get yourself a mirrorless body. But if it's something that you just needed to set up as a quick webcam, if you will, to make it look better on your zoom calls or, or Google Hangouts or whatever, I would totally buy these old DSLRs NECON has made some nice ones over the years, as well as cannon and Sony. Yeah. But well, maybe not Sony, but well as cannon <laugh> I would, I would definitely jump into the old school DS LLL market DSLR market, just for, you know, certain purposes, if you will. Not necessarily as my daily driver. No, no. Maybe something as a starter camera for a youngster, that's just wanting to get used to, you know, handling the, the camera controls and understanding the exposure triangle.
Ant Pruitt (05:40):
Yeah. Why not? I, I think that's a nice option, but I just wanted to share this story from the folks sitting gadget, because I thought it was noteworthy. That neon is saying, you know what? Yep. We're moving on because they have some pretty great mirrorless bodies out there. They have the Z six and the Z seven and they did release these at nine here. Not too long ago, I was able to go check that out. I didn't really get to have my hands on it to shoot with it for an extended amount of time because I don't have those connections at NECON just yet, like I do with cannon one of these days, maybe I'll, I don't know. I'll see if I can get one from lens rentals or something and try it out. But the Z nine is a really, really nice camera. That's their flagship mirrorless body for the professional photographer.
Ant Pruitt (06:26):
That's got a lot of bells and whistles from eight K video shooting and extra a whole lot of mega pixels for your stills and really, really fast shutter speeds. All of that good stuff that the professionals are needing at a somewhat premium price. It's not as expensive as the cannon or the current Sony offerings. So it's, it's a nice worthy competitor and worth taking a look. I talked about it briefly on our tech break feed. You can check that out. Mr. Victor will pull that up here and I'll put it in the show notes as well, but anyway, that's it. I just wanted to touch on that for a few minutes. Do you even think about buying yourself a, a, an old camera just for kicks and you know, again, I don't see anything wrong with that just because of the purposes that you can get out of it.
Ant Pruitt (07:14):
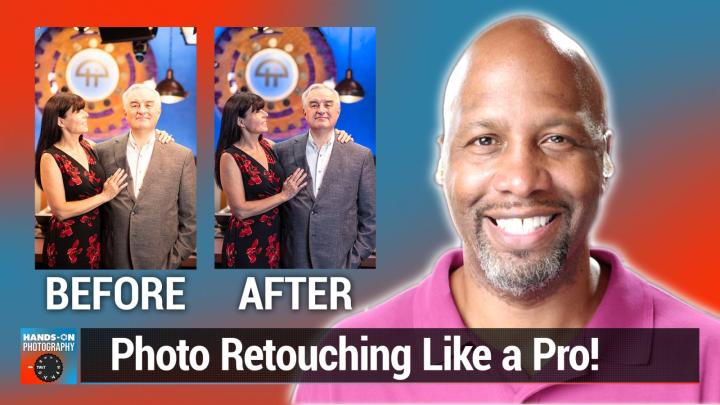
And it's not necessarily a break the bank investment. If you will, let me know your thoughts, shoot me a message over on Twitter. I'm ant underscore Pruitt over there. All right, moving on next segment. I wanted to get into the, the re the retouching images like a pro here. Recently, I had the honor and the pleasure to be able to shoot some images of the LePort family because they, they were being featured in a particular magazine. I don't remember what it was, but it doesn't matter, but I was honored that they asked me to take the photos for 'em to be used. And and they were quite pleased with them. I'm so happy about that. But as I was shooting at, I was thinking about my approach far as getting the shot, set up number one and snapping it, and then my post processing procedures before I even presented it to the LePort family to be used.
Ant Pruitt (08:10):
And there's gonna be a lot of different thoughts and opinions on this particular process, but that's fine because it's still an art. You're not gonna process an image the same way I would. But what I'm hoping you would do is, is be able to go into the approach post processing and looking at things that a professional photographer will look at far as doing the retouching and things of that nature. So let me hop on over into a light room and we'll pull up this image and we'll just walk through the process. So let me switch my screen. There it is. All right. So there's two images. This is the original shot here, and this is the process shot, and there's some subtle differences there. I'm not gonna keep 'em on the screen very long. I just wanna see if you can catch 'em, but there's a couple subtle differences there.
Ant Pruitt (08:57):
So let's walk through the initial processing on this, getting the exposure, right. And things like that. Now in light room, you have these different camera profiles that you can select. Of course I was using my can, but it also allows me to take and effect the the lens that I shot this on. I shot this on my 85 millimeter. That's my favorite lens to shoot with when it comes to doing portraiture because of the, the compression in the background and just, oh, just makes people look great. They don't have all of these weird shaped heads and things like that when you use a wide angle lens. But yeah, I was using I 85 and that way it knows to make sure this lens, this image is gonna be displayed properly and not all distorted and stuff. So got that squared away.
Ant Pruitt (09:43):
And we hop on up to the top and let's start looking at our general exposure. Okay. First things first now I use my, one of my studio lights. I brought one of my studio lights in to do this shoot, even though we are in the TWI studios with all of these lightings lighting kits and whatnot. I wanted to use my lights cuz that's, I, I, I have more control if you will. So what I did is I turned off the houselights and made sure the set in the background was lit up for, for the TWI D table set there. And then I just brought in my stellar pro light to key them, if you will. And then I had to take a look at the white balance and because I've been shooting with cannon for a very long time, I know that Canon's white balance tends to favor on the warm side of things.
Ant Pruitt (10:32):
And yes, my light was set 2 5600 K, which is standard daylight. But even that 5,600 K is not as warm as Canon likes to pull it out. When you pull up the raw files, so I've already known, I already known the back of my head. Okay, I'm gonna have to cool this image off even before I even see it on the computer. So let's go ahead and look at the white balance now and just take a look at the color temperature and let's cool it off a touch. So now this is looking way more natural. Look at their skin. This is looking way more natural now versus what it would normally look like under the regular quote unquote white balance offered from Canon. So we cooled it off a little bit and now let's just fix the exposure, cuz it's a little bit overexposure just slightly. So we'll pull the exposure slider back. Okay. Just a little bit. Okay. Next we're gonna pull up the shadows to give it a little bit more, feel looking good.
Ant Pruitt (11:38):
And then I like to take the white level and push it up just to touch because he's wearing a white shirt. So I wanna push it up. Just a touch, not too much. And then I'm gonna take the highlights and pull the highlights back because what's gonna happen is the highlights on his face. And the highlights on Mrs. LA's face tend to get blown out from the, the key light being a little too harsh at times. So I always pull it all the way back just to be safe. And if you're looking at this now that's pulled back a bit too much. So just, just put a little bit more back in there.
Ant Pruitt (12:12):
Okay. Just a little bit more. That's better. So now their faces don't look terribly harsh with the highlights on them. And for the most part, this looks fairly good. And I can play around with clarity and texture. Give it a little bit more vibrance in the color and you see, you have this vibrance here and you have this saturation slider here on the screen and both of those affect color, but it's a different level of color being affected with those sliders. Let me reset this vibrance one here. Okay. So if I wanted to change the saturation, that's gonna affect all of the colors in this thing. Not necessarily one in particular, anything like that, it's just gonna boost the color levels of everything to fill. And as I push it up, it looks really, really nasty. A lot of times I hardly ever touch the saturation because my camera's saturation is usually pretty good vibrant.
Ant Pruitt (13:06):
On the other hand, that's looking more at the midtones, the mid tone range of the histogram and looking at the colors there. So I'm gonna push it up and what should happen is it's gonna really make sure their skin is looking nice and alive letting you know that there's some blood under that skin, not just you know, quietly weird, dead, dead person standing there in front of me. Okay. All right. So yeah, this is looking pretty good. Let's push the exposure up just a little more like so, and cool it off just to touch more. There we go. I think this looks pretty good, right? What do you think? But that's just the initial process and the initial touch up if you will. But there's still some things that I see are not quite right with this image that I think could be better and that's something that we're gonna address.
Ant Pruitt (13:59):
But before we do that, I want to go ahead and take a few minutes and let you folks know all about this week's sponsor of this week's show. And that's those folks over at blue land. Did you know that an estimated 5 billion plastic hand soap and cleaning bottles are thrown away each year? And if that's not bad enough, most cleaning formulas are 90% water, which is pretty heavy to ship leading to excessive carbon emissions. Plus those products are often filled with nasty ingredients like chlorine and ammonia. Good grief. That's a lose lose situation for you for me and the planet. Do you ever feel overwhelmed by the number of plastic bottles and containers you throw away ever thought about purchasing more eco-friendly products, but didn't know where to start, or maybe you've tried a few green products, quote, unquote, but found in pricey or ineffective if you answered yes to any of these questions.
Ant Pruitt (14:58):
Let me tell you all about the folks blue land blue land is on a mission to eliminate single use plastics by reinventing some home essentials that are good for you and the planet blue land's innovative tablet, refill solution takes up 10 times less space than a traditional bottle and their powerful formulas. Keep your home clean and smelling. Amazing. The idea is simple. Grab one of the beautiful forever bottles, fill it with warm water, drop in the tablet and get cleaning refills start at just two bucks. And you don't have to buy a new plastic bottle. Every time you run out, you could even set up a subscription. If you feel like that's what you need to do that way you don't ever run out of the products that you use the most. And you save even more. When you buy in bulk from cleaning sprays to hand soap to toilet cleaner and laundry tablets, all blue land products are made with ingredients.
Ant Pruitt (15:58):
You can feel good about. I've been using their toilet cleaner tablets because it's just so daggum, simple and effective. Do you literally just drop it in the bowl and it fizzes up and it smells all good. And you just wash it around with the little brush and you're good to go done effective, try to clean essentials kit, which has everything you need to get started. Blue land products come in refreshing signature sense like Iris agave, fresh lemon and eucalyptus mint. And for a limited time, their hand soap is getting a bit of a summer upgrade with these three refreshing new scents. You got strawberry rhubarb, you got citrus Petly and you have coconut Palm. I think that's how you say citrus pet truly sounds fancy and clean <laugh> right now you can get 15% off your first order when you go to blueland.com/hop that's 15% off your first order of any Blueland products@blueland.com slash hop.
Ant Pruitt (16:59):
One more time. That's blueland.com/hop. And we thank Blueland for supporting hands on photography. All right. So now we, we just did a bit of retouching here inside of Lightroom. The next step is to take that image for me anyway, is to take that image into Photoshop because there's a couple different things that I noticed in, in, in this particular frame. So let me switch my screen and show you Photoshop here. So, all right. So we're now inside of Photoshop. And again, this is a nice looking image but there's still some things that I don't necessarily care for. Okay. So let's take a look at the scene in general, and I know this is a different type of show, but I remember thinking back when I first started this show, Mr. Leport said, I would love to have like a Bob Ross moment, if you just going through and editing photos.
Ant Pruitt (17:54):
Well, Mr. Leport today is that day <laugh>, we're gonna have a bit of Bob Ross's time if you will going through this image. So I'm going to go ahead and grab my trustee welcome tablet here. Let's see here. Got it. And we're gonna dive into this. Okay. So again, I'm looking at this shot. There's a couple things in the scene that I don't necessarily care for. So if I hover my mouse right here, you see, you have this set light here, you have this set light here, this set light here, and this looks like a PTZ camera, then I'm not sure what this is over here in the upper left. This looks like a cable or some sort. And granted, when I composed this, this shot, I did see all of that, but I didn't stress too much about it because I knew there was some things I could do inside a Photoshop to alleviate those distractions being in the shot.
Ant Pruitt (18:48):
If, if you can avoid doing that and just getting it right in camera, getting it right, right there on the set, do that first. But I know I couldn't go back in there and move those different lights around on the set. I knew that. So, all right. Anyway, so let's get rid of those first we'll go ahead and make this a non-destructive process here. So let's go ahead and duplicate our layer. So we have a nice backup there and we'll go in here and let's start cleaning up these, these lights and Photoshop has some tools built in just like affinity photo has where you can just clearly remove things from the scene. So I'm going to circle, whoops. I don't want to do it that way. I wanted to circle. So I'm gonna circle this little area here. See if I can zoom in a little bit, make it a little easier for you all to see.
Ant Pruitt (19:40):
Okay. So I circled that corner. Okay. Next we will do edit content aware, fill it's going to open up its new tool, just taking AI into effect and it pretty much removed it there. Great. And I can tell it to keep it on the same layer. Boom, apply. Okay. There done. It took away that light or whatever that was not granted. It left this other stuff here. I don't know what that is. Looks like another little cable or something. So we'll go ahead and get rid of that too, just by using our spot healing brush. So let's make our brush head a little bit larger and we'll just brush it away.
Ant Pruitt (20:29):
And sometimes Dai is like, eh, we can do a little bit better if you do this one more time there. So we brush that away. Now, this is where the fun is gonna begin because we got a lot to work with when you start looking at this particular studio light here and that PTZ cuz if I remove that what's behind it is this, this TWI sign here and thing is, I don't even know if the AI will be able to handle all of that and figure out, huh, let's try to recreate this sign. So what I do is take a bit of a piece by piece effect approach to this. So let's take our clone stamp. I hit an S on the keyboard and we'll just start to paint this away slowly but surely. So I'll hit alt on my keyboard to take a sample like, so, and then I'll make my brush a little bit larger and we'll just brush it away, take another sample and we'll just start brushing away part of this here. So just paint it in a little bit at a time. And then I get to some point where I can do a, you know, bigger chunks, if you will, and try to use those AI tools
Ant Pruitt (21:51):
Like, so, and when I'm looking at this, I don't necessarily have to worry too much about the detail because this is in the background. You know, when I'm looking at it from this perspective, I'm zoomed in pretty tight. Okay. But we're not gonna be zoomed in <laugh>. This is what it would normally look like. Right? So you can't really see too much detail if anything, maybe I'll blur at some, but for the most part, this is right on pace where I need to be. So I'm gonna zoom in some more and now I'll see if I can start to do a little bit more with the AI side of things. Like I could try with this patch tool or something. So go over here, select the patch tool like that stuff like this. And it's getting there and this is a, can be a pretty tedious process, but hang in there, it'll be worth it in the end. Okay. So we got that. Now let's see if I can do like the content of where fill like we did a second ago. It fill it in. Yeah. Looks like it did not bad. Right. And I can take that and you know, maybe potentially blurred if I need to, but I think that'll do for now. It filled it in
Ant Pruitt (23:33):
And now let's start working on this camera. Let's circle that and let's try a patch tool. How will that look? Not bad. It's going away. So I'm gonna switch back to my healing brush and just sort of brush that away like that. Not bad up bad. Go back to the patch tool. And we'll just keep trying to do it a little piece at a time and just enjoy the process of going through this tedious, tedious step <laugh> this might pin off like that. Not bad, not bad. I may have grabbed too big of a chunk right there, but let's see. Nope, that works. Let's try this. And again, you're looking at it and you're thinking, boy, that looks like a mess, but it's okay. It's back there in the background. It's blurred out. We just see it at a pixel peeping level. We're really zoomed in tight. Okay. So now this is gonna get tricky cuz as I zoom in on this, we're dealing with not only the background, having the, the TWI symbol back here, twit sign back here, but then there's the wall on the other side of it. So we need to take into effect that okay. Part of it is going to be replaced with the sign and the other part's gonna be replaced with the wall. So what I can try to do is just
Ant Pruitt (25:35):
Heal it this way, see how that comes out and it's trial and error. It may not look so good and yeah, it looks okay. So let's do that. Yeah. That's okay for there. But now this I'm really doing a rough job on this. So I don't take two hours to do this particular episode of the show. So now let's go over here and fill this in that looking good, easy stuff. Just filling in the background, looking good,
Speaker 2 (26:19):
Looking
Ant Pruitt (26:20):
Good, not bad. You know what? I can work with that. Right? This control D. And so now I will, I don't know. I'll just add a little blur to it. So let's grab my ol two by pressing L on the keyboard. And I'm going to select this particular section right here and I will go to filter blur, COUM blur. And if I turn it all the way off, you can see what it looks like now on the screen. But as I start to introduce the blur, you'll notice it starts to soften it adjusted a little more. See, and it's starting to fit the background a little bit more uniformly, something like that's good, right? Yeah. I think so. Next thing, this light here, this, this light just behind his head, I don't have a problem with the light. For the most part. What I have a problem with is the way the fixture is just designed. I don't like this whole, whatever this little thing is that's sort of sticking out <laugh> on the side. So weird. So let's see if I go back to the lasso tool. Oh, did my keyboard get stuck? There we go. Last little tool
Ant Pruitt (28:05):
And just circle that edge. Like, so switch the patch tool and let's see if we can patch it. How does that look? Yeah, that looks better to me. And then again, I'll switch back to my heel brush and just brush away the little artifact right there. Okay. All right. This is looking good. Folks can heal this up a little bit. Heel that up tiny little spots that are showing don't really need 'em there. Okay. And now lastly, we have this little weird cable or whatever this is showing in the upper left corner. I should just be able to zoom in tight and just brush it away as well. So let's see if that'll work with our healing brush survey says no, it did not. So let's try it in a couple strokes. It's get in there, get in there. Or I could have just done a content and wear a fill, got options. You got options. There we go. And again, I'm gonna continue to preach, get yourself a welcome tablet. Having a stylist to do this stuff is so much easier than using a mouse. Cuz you can get way more precise when it comes to, you know, doing your strokes, your brush, strokes and stuff. So, all right, so this looks pretty good. Let me zoom out.
Ant Pruitt (29:55):
That's great. I'm totally fine with that. All right. Now let's take a look at the heroes of the shot, our, our models here. Now we've talked about frequency separation a couple weeks ago and this could definitely use some frequency separation to help soften up certain spots of their skin. And I'm not gonna do a full frequency separation because that takes time. But I will just do a little quick pass here. It was just over a couple things that I noticed. All right. So let's go ahead and say duplicate this layer twice. Okay. And we will rename this one layers, our low frequency and we'll rename this top layer as our high frequency. And I will put these in a group like so, all right. So they're in a group and I can add this layer to that group too. It doesn't really matter. Now I think about it, but it's there. All right. So let's do low frequency turn off our higher frequency and let's just focus on the low frequency and blur it out to all get out. Okay. So filter blur G blur and we don't wanna go too much. Okay. Cause we don't want them to have plastic skin. We want them to have softer skin.
Ant Pruitt (31:29):
And I think, think about nine somewhere between nine and 10 pixels should work. So we got that click. Okay. And then we'll go back to our high layer and we'll go to image
Speaker 2 (31:48):
Here.
Ant Pruitt (31:49):
We will select apply image for the layer. We're gonna change that to
Speaker 2 (31:57):
Low.
Ant Pruitt (31:59):
And then from blending, we're gonna change that to subtract. Okay. Click. Okay. Now we have this weird gray screen. We need to change the blending mode to linear or light. All right. So now this is where the fund begins. We'll zoom in and we'll play around with their skin. And in particular, we'll take a look at Mr. Laporte's skin. And remember we talked about getting our mixing brush. So we'll go over to the brush tool and selecting, mixing brush, click on our low layer. And let's just get in a little closer on this face here. Now make this brush a touch bigger and up here in the upper left. We want, we want this to be a clean brush and transparent. Okay. We don't want it to have a color up there. So I'm just gonna lightly brush a longest along his cheeks and make sure I'm going along the natural lines of his face. So just lightly brush that in. Like, so take a look at his forehead here. Zoom in a little more. Okay. Brush is too big. And again, we clean brush. Just brush it. Just soften it up. Some cross the
Ant Pruitt (33:30):
Looking good,
Speaker 2 (33:35):
Looking
Ant Pruitt (33:35):
Good. This chin. Very good. Okay. So this is zoom out and let's do the same for Mrs. Laport. So take a look at,
Speaker 2 (33:53):
Okay.
Ant Pruitt (33:55):
I mean, not that our skin looks bad, our skin looks great, but we can always do some subtle or retouching. Just subtle, like so like that.
Speaker 2 (34:12):
Okay.
Ant Pruitt (34:12):
Zoom out
Ant Pruitt (34:15):
Now again, this was very, very subtle retouching there. Okay. So if I do a little before and after, so I'm gonna turn it off that's before and that's with the lights and all of that stuff in the background and look at her faces. And then this is the after much nicer. Right. And it's subtle. It's not something that's like totally obviously Photoshop. You know what I'm saying? All right. So I'm just gonna stop right there from a skin retouching things. Now there's still some, some other things that I'd like to handle here. So I'm gonna take this group and we're gonna merge this group. Okay. So let's say merge group, like so all right.
Ant Pruitt (35:00):
Not done cuz still some things that's really nitpicking me here. Look at her hair. All right. So we have Mrs. Port's hair looks totally fine. And prior to the shoot, when she was facing the camera, there was a couple times I had to say, Hey, miss Lisa, take your hair, pull it back around your shoulders. You have to notice stuff like that. We don't want her hair all over the place. We don't want to hear flying all over her shoulders, flying all over her, all over her face or anything like that. Take two seconds to say hi, let's let's fix your hair just for a second. So brush your hair back. You don't have to do it, have the model, do it. You know, cuz it's we don't want you touching the models without the consent, stuff like that. So she brushed her hair back and it's fine. Now we look at his hair and this isn't something that you know, that he necessarily did. It's just the nature of his hair and this kind of stuff happens. And it's these wispies see that you probably didn't see it, but I see 'em and it drives me nuts every time <laugh> every time I do portraits, but that's the nature of this, this business. That's the nature of this profession is you have to notice defined details like this. So I'm going to let me duplicate this layer again, just to be safe. So I have a clean copy
Ant Pruitt (36:20):
Going to get rid of those little Whis. So we'll just do a healing brush J on the keyboard and we can brush 'em away to get rid of them. See, and you'll have to use multiple strokes. And sometimes you may even have to use multiple tools. Okay. So yeah, I've gotten rid of them, but it doesn't necessarily look clean. So let's just switch the tool to the patch tool, grab that patch that we just did all of that brushing on and let's make it blend in a little better by looking like the rest of that light fixture like that. Okay. So I'll go back to the healing brush and I'm gonna zoom in some more. Cause I see this little tiny detail that needs to be addressed. That looks better. Wispy hair is gone easiest, that easy as that get rid of the whiskey hair. And again, there are gonna be some instances where you won't notice it as much depending on like the depth of feel that you shot with. I don't believe I shot this at a super shallow depth of feel. It's probably along the lines of F four. I'm not sure. I don't remember. Most of the time I start out at about F eight. So I don't have a shallow depth of feel cuz F eight is just when the lenses are really, really sharp in my experience.
Speaker 2 (38:10):
There,
Ant Pruitt (38:12):
There, so got rid of the wispy hair. So let's zoom out much better. Right? And then you can take a few minutes to do a little bit of spot healing on their, on their faces. Like if they have little blemishes, like he's got this little, little bump that shows up right here, let's get rid of that. It's gone another one there, another one here gone and he's got the line, you know, the line that goes across the top of his forehead. Those are natural. But sometimes I think they take away. So every now and then I'll take a look and just say, oh, let's get rid of that. You know, let's get rid of that because he still has his eyebrows. It still gives us the expression. These lines don't really add to that in my opinion there. And we'll do the same for miss Lisa. We'll just take a look, you know, see, we see this little blemish here next to it here
Speaker 2 (39:20):
And I'm just gonna brush
Ant Pruitt (39:22):
It away. Like that little bump there, then there's this light spot. So let's get rid of that. There we go. Again, this is all quick stuff. I should spend way more time on this image and in the original image that I shot. Yes I did. But for the podcast, this is a quick and dirty retouching. Like, so there now I think this looks so much better. You know, we got our models looking absolutely beautiful as they always do. And then we have the background with the TWI logo being captured, not a bunch of distractions coming from studio lights and things like that. This is looking so much better, but there is one more thing. Let me take a look here. All right. So if you're looking at this image, I see that both of them and she's got her hand on, on, on his chest and shoulders and she's got this really, really nice looking ring here. And then there's something going on right here on the screen, on her with her hand on her chest, on his chest. I'm like, what the heck is that? Is that a bandage? So I zoom in on it.
Ant Pruitt (40:52):
And as I look at this, it almost looks like a bandaid. Well, let me go ahead and tell you. It is not a bandaid. That's just happened to be how the light <laugh> captured. The, this ring that's on her finger and the way the shadows hit it, it, it hit it just perfectly to where it, it ended up looking like a bandage to me, she confirmed it is not a bandage after I removed it. <Laugh> but I'm looking at this right now. It looks like a bandage because of the way it matches up with their skin tone and stuff like that. It doesn't really look like a ring to me. So I'm gonna get rid of it. I'm sorry. No, I'm not. Sorry. It just doesn't look right. So we'll do this on the keyboard. Hit alt to get a sample and we're just gonna gently brush this away. Hold on. I did that wrong alt here. I'll just start brushing it away and then you should be able to do a fill like this. Okay. So now let's try to do a, like a patch, so called J on the keyboard, switch to the patch tool
Ant Pruitt (42:24):
And just start taking it away slowly. There we go. Much better in my opinion. And see right there, it does sort of look like a ring because it's a little shine there,
Speaker 2 (42:58):
But
Ant Pruitt (43:00):
All I could see was a bandage <laugh> and see, that looks weird right now. So next thing we need to do is to make this look more like the rest of our skin. So we'll go back to that cloning cloning tool. We hit S on the keyboard S on the keyboard. Oh, my keyboard got stuck again. Try it again. So now S on the keyboard then alt, and we'll just start to paint it. So where starts to look more like her skin there have some skin texture, you know, and it's a little rough, but it's okay for now. Something like that. It's getting better.
Ant Pruitt (44:13):
One more thing. There we go. All right. I'm not gonna spend more time on it cause I'm gonna zoom out and it's gonna look like her hand there and not a bandaid. <Laugh> Mr. Laport. I know you probably got that ring for but yeah man, or maybe she got, got it herself, but either way, when I saw it on the screen, it looked like a Daum bandaid. Wasn't too thrilled about that. So I had to get rid of it and I think that looks way better and it looks natural. Okay. So next we're gonna finish it up. We'll just hit save to bring this back into light room. So let me do an Al tab and hop on over in the light room screen is gonna refresh. There we go. And this is pretty much ready to go folks. So I will throw a little vignette on it here. I'm like, so not too much, you know, if you overdo it, then it looks like Oland mills or something. We don't want that little vignette like that. And I'm gonna bring the exposure up one more time, right. About whoops. That's too far in.
Ant Pruitt (45:36):
Here we go. There, we are done. That is our image. So if we take a look here in light room, we can go to the first one, which was this one <laugh> actually, that's not even how it started. It started out like that. Okay. So that's the before
Ant Pruitt (45:58):
And then this is the after much better, right? I think so. All right. Well folks, that is it. That is the process of, you know, retouching as a professional would retouch. There's a lot of things with, from a detailed standpoint and a nuance that you have to consider when you're retouching shots for people that are paying you to do this work. Again, think about the likes of miss Lisa Carney. Who's been on the show before. She's a photo finisher. And these are the types of things that she's looking at as she's finishing photographs, whether it be portraits like this, or whether it be for a movie piece of art like a movie trailer's artwork, she has to look at all those fine details to make sure it's gonna work out perfectly for the client. And even if it comes down to looking at the wrinkles in the shirt, you need to fix that.
Ant Pruitt (46:54):
If you can't fix it on the set, you're gonna have to fix it in post. If it's going to be little threads hanging off of the shirt, you're gonna have to fix that in post. If you're not fixing it on the set, fine details, all of that goes a very, very long way. And that is why people will continue to hire you because you pay attention to stuff like that. Okay. So keep that in mind when you're doing your retouching, whether it's retouching photos of people or just retouching objects, it could be products, things like that landscape, you notice things in a landscape seeing it just don't quite look right, fix it, fix it, find little details and people will notice it. And they'll keep coming back to you for your work. All right. That's gonna do it for this week's episode.
Ant Pruitt (47:38):
Thanks so much for the continued support. Checking this out each and every week again. Tell somebody else about the show. Tell your favorite friend, tell your favorite enemy, cuz I'm sure you got one <laugh> we all have a hater. So tell your favorite friend, tell one enemy about hands on photography. Check us out on the website. Twi.Tv/Hop, twi.tv/h O P let 'em know that we're trying to help make people better photographers and better post processors and help build the hands on photography community. I want to give a shout out to my man, Mr. Victor for making me look and sound good each and every week and dealing with crazy little episodes like this one, that's gonna be quite challenging from the editing standpoint. Thank you, my man. I really do appreciate your efforts. Hey folks, give me a follow on social media. Go follow me over on Instagram and, and Twitter and heck I think.
Ant Pruitt (48:31):
Yeah, I even use TikTok every now and then. I'm not the biggest fan of it, but I still use it. So give me a follow over on Instagram. I am T underscore Pruit there and I'm also T underscore Pruit over on TikTok. Yeah. Yeah, it is. And underscore Pruit on TikTok and the same on Twitter. My dogs decided to start barking right now. So I guess it's time for me to close this show out. Hey, <laugh> safely create and dominate and I can't wait to hear from you about this episode and I will see you next time. Y'all take care.
Speaker 3 (49:04):
Listeners of this program. Get an ad free version. If they're members of club TWI $7 a month gives you ad free versions of all of our shows plus membership in the club, TWI discord, a great clubhouse for TWI listeners and finally the twit plus feed with shows like Stacey's book club, the untitled Linux show, the gizz fizz, and more go to twit.tv/club twit. And thanks for your support.