Hands-On Photography Episode 131 Transcript
Please be advised this transcript is AI-generated and may not be word for word. Time codes refer to the approximate times in the ad-supported version of the show.
Ant Pruitt (00:00):
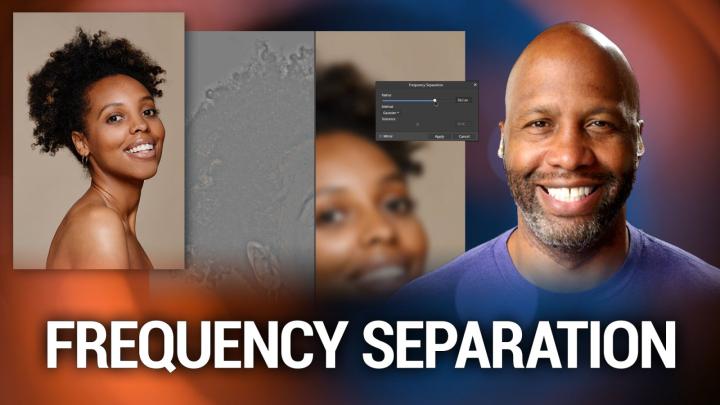
Today on Hands-On Photography, we are going to talk about frequency separation. What in the world is that? Well, let's say technique used in portraiture, retouching. It's a lot of fun. It could be quite technical. I got a lot of feedback about an image that I shared on my socials and I use frequency separation in that image. So yeah, let's talk about it. And are you following me on social? Make sure you're following me on social. Okay. Anyway, let's get on with the show.
Speaker 2 (00:28):
This is TWiT
Ant Pruitt (00:30):
This episode of Hands-On Photography is brought to you by no mad go to no mad goods.com/twit and use promo code twit for 10% off your first purchase of any nomad accessory. They have apple watch straps, wireless chargers, ultra durable cables, and more limited time offer.
Ant Pruitt (00:58):
Hey, what's happening everybody. I'm Ant Pruitt and this is Hands-On Photography here on twit TV. I hope y'all are doing well. I am unbelievable as always each and every fine Thursday. I'd like to sit down and share different tips and tricks to help make you a better photographer and a better post processor. And today we're going to talk more on the post process inside of things. As we take a look at a particular technique used in portraiture photography and it's called frequency separation, or it's basically just a step ND skin retouching process when people are shooting and working on portraits. But we'll get into that momentarily. Thank you for all of you folks that are joining me for the very first time. Welcome to you. Go ahead and subscribe in whatever podcast app you're enjoying us on and make sure you share this show out with other folks too.
Ant Pruitt (01:52):
So, you know, go ahead and subscribe in apple podcast or what have you, or, or YouTube. And then after you listen, go ahead and hit auto download. So you get the shows automatically as soon as they're released and then make sure you go tell at least two friends and one enemy about Hands-On Photography and so we can help grow this awesome Hands-On Photography community. All right, thank you again, but let's go ahead and get started with this, this week's episode. Okay. So again, we, we're talking about portraiture and in particularly a, a piece ind skin retouching process, and it's called frequency separation. I recently shared a picture in my social medias over on Instagram and said photo got a lot of attention, probably because it's a photo of this dude known as his chief twit wink, wink <laugh>, but I got a lot of messages and a lot of feedback about that, that photograph and in particular is because of the way I processed it.
Ant Pruitt (02:54):
It's the way I, I worked on it in editing and I did some retouching, just some retouching. And part of that technique is called frequency separation. Okay. So I've said that word probably at least three times now, or phrase at least three or four times now, you're probably wondering what the heck is frequency separation. Okay. I'm gonna tell you frequency separation. All right. So when you're working with, with photos, you have frequencies within that photos. You have a high frequency and you have a low frequency and the low frequency of your images are, is, is your tones and your colors and things of that nature. That's, that's pretty much like the underlying layer of your image. The higher frequencies are the details of the image. Especially when you're looking at faces and things like that. So you have with with the skin, you have the color of my skin as the low frequency.
Ant Pruitt (03:52):
Okay. For example, and then on the high frequency, you have the actual whiskers on my face for my beard or the, the eyelashes on my eyes or the little imperfections that may be worth keeping in the photograph. Those are the higher frequency things. And when you're doing frequency separation inside of your photo editor of choice, whether it be affinity, photo or Photoshop, I'm gonna show you both of those today. You're basically gonna have two layers because we're talking those two, two particular apps. You're gonna have two layers, one, layer's gonna be the low frequency and the other, layer's gonna be the high frequency and they're gonna be totally separate from one another, but yet we're gonna work with them in tandem to find the balance, to help smooth out the skin. Yet we don't want it to look like plastic and we still want to retain some details in there.
Ant Pruitt (04:48):
Okay. So that is frequency separation in short. Now, how do we put this in practice? So first I'm going to hop over into my computer. Let me see if I can get affinity photo open up. So let me go ahead and share my screen Wiki doki. So right now I am in affinity photo and this is a stock image that I downloaded. I, I pay for a stock service every month which includes photos and video assets and things like that. So this is a stock image here. I don't know who this model is, but I thought it fit perfectly for this particular episode. So again, in affinity photo, they make this easy-ish <laugh> to do versus what Photoshop does. So I'm gonna go over here to my little layer panel on the upper right corner and, or, or right side. And I'm gonna duplicate this layer because we always want to make sure we're trying to work as non-destructively as possible.
Ant Pruitt (05:51):
So I've duplicated that layer. And now we just have this, this background layer that's off to itself, safe and sound just in case we really screw some things up. Now, inside of affinity photo, I've talked about getting started with affinity photo, a handful of episodes back, Mr. Victor, if you don't mind popping that on the screen right now, so people can reference set episode. But yeah, it, affinity photo is a great Photoshop alternative. Just takes a little bit to get used to if you're, you know, been doing Photoshop for a while, but I think it's highly underrated and worth taking a look anyway, inside of an affinity photo. You have these different filters, just like we would in Photoshop and unlike Photoshop affinity photo gives you an option right here on the screen. <Laugh> that says frequency separation. And as I click on that, you're gonna see something happen on the screen.
Ant Pruitt (06:43):
It has now split up this in two, over here on the left side of the screen. This is the high frequency on the right side of the screen. This is your low frequencies. And if you take a look if you can look a little bit closer, you can see it's got the little labels down here on the bottom, high frequency, low frequency, and then you get this little dialogue box here talking about the different separation. The radius is going to deal with the high frequency and how sharp you want the details to, to really pop up. And a, a, a good rule of thumb is if you look at this screen and we just back it all the way down, everything disappears. So I got it all the way down to zero pixels. And as I increase this, this pixel size, you start to see the hair detail come in.
Ant Pruitt (07:29):
And if I crank it all the way up, this is what it looks like. Okay. You don't want that. That's way too much detail. You only wanna set this to be where there's just barely the details showing through, you know, so roughly like four pixels, anywhere between two and four pixels is probably where I would go, cuz outside of that, it would look over sharpen and it won't look good. Okay. And then for the gauzy side of thing, the blur here, you want to try to make sure it's set to like right here by default, they have it at 50% and this is something I didn't really care for. Cuz it's inside a Photoshop. I can change that. But most of the time when I've been using this, the 50% has been pretty good a balance on this. So we're just gonna roll with it and we're gonna hit apply on the screen.
Ant Pruitt (08:18):
So now that we've hit apply, what it's done is gone ahead and separate the layers over here. Okay. So you have a high frequency layer and you have a low frequency layer right there, frequency separation. And what I'm gonna do is I'm going to group these two layers together so we can see when things start to get a little bit different. Okay. So if I were to turn off this particular group, you'll notice nothing really changed. Okay. It just separated the two different layers and put 'em on top of each other. It didn't really manipulate the image. It just gave us the data so we can work with it individually. Okay. So that's a good thing. Now let me go back into these layers and let's start really fine tuning this information. I'm gonna zoom in on the photo a little bit, just a little bit like that.
Ant Pruitt (09:10):
And you can see she's got some imperfections on their skin like these little molds or what have you. I'm not sure what you call 'em. But, and then you see the other details right or wrong. The, the eyebrows and things like that. A lot of times in beauty photography, they want you to smooth that bit of details out. Even like down here on a chin, they wanna smooth all of that out. And I know when you see this in person, you're thinking she's got great skin. Yeah. But when it comes to print and online photos, people, you know, especially like makeup companies and things like that, they want, they want that stuff just washed away. Quote unquote washed away is, is to a, as, as tastefully as possible. So that's when sec frequency separation comes in. So just like I would in, in Photoshop, I'm gonna create a layer mask on top of this high frequency layer here.
Ant Pruitt (10:05):
So I'll just click on the layer mask icon. Okay. And then I'm going to use my brush to reveal the frequency that's below the high frequency, the low frequency. We wanna try to reveal the low frequency, which is in turn, going to sort of brush away, gently the details on the skin and just going to reveal more so of the tone below. Now, I highly recommend using a Wacom tablet. You know, I have my trust tablet right here and my stylist, it just makes things a lot easier, but I'm not gonna get into that right now because honestly I, I'm still a little bit more comfortable in Photoshop when it comes to using frequency separation techniques. So let's just brush in with a little bit of black paint on the layer mask because black will reveal the underlying layer. Okay. So just tap on this and just sort of brush it in ever so slightly on her chin.
Ant Pruitt (11:05):
So make sure we got black selected. Here we go. And what I'd like to do is if over here in the upper left, you can see the brush settings you have, the flow is set to, I have it set to 5%, cuz that seems to be the sweet spot for making sure I'm not really overpowering the brush. And then for hardness probably should make it even softer. So let's make the hardness zero. So let's just soft brush and just sort of click along on your skin. And it's a good idea to sort of brush along the contours of the models face. You know, you see these little dimple lines, just adjust your breath size and brush along that dimple line. And you'll see that we're just gradually taken away. Those tiny, tiny little <laugh> micro details on her face. Okay. And if you do too much, you just hit X on your keyboard to go back to the white paint on the brush and you just paint the details back in like so, okay.
Ant Pruitt (12:16):
But that's not what I wanna do, so let's get rid of them. Okay. And I'm gonna move around and I'm gonna work on her forehead here, cuz it's got that hot spot from the hot from the key light. And I'm gonna overdo it a little bit. So you all can see the difference on the podcast video, cuz it's a little hard to see after podcasts and YouTube does all of their compression and stuff. All right. So there that's brushed in and I'm zoom out. Okay. So what we're looking at now is the after I'm gonna turn this group off. Okay. So this is the before. And if you look right here in the middle, you'll see some changes in the details there and this will be the after. So it softened it up. Just a touch just enough. And I probably could do that a little bit more. Let's just do it a little bit more just for the video sake. So let's brush it in like so all right. See what I'm looking at with my eyes. Y'all it looks really bad. <Laugh> it looks really bad, but I'm just trying to prove a point, Ooh, weed that's overdone. And then we'll do our chin too like that because what tends to happen is if you overdo it, the model will start to look like that. Daum what do they call it? The beauty filter inside of smartphone apps. This that's looks really, really bad. Okay. So that's the after and this is the before
Ant Pruitt (14:08):
And this is the after we've blurted out a little bit there. Now granted there are still some, a couple more things that we could do from a fine tuning standpoint. Like we could get rid of some of these little spots, you know, there's a spot removal tool. You can get rid of some of those spots or keep some of them. It just depends on the preference of the client at the time. Okay. So that is doing it inside of affinity photo. I gotta tell you, I think it's a little bit easier to do this inside a Photoshop, but that's mean right now in my experience, because I've been doing Photoshop for, I don't know how many years now, so it is just like muscle memory for me. But yeah, we're pause and take a break just to thank this week's sponsor before we get into taking a look at it inside of Photoshop.
Ant Pruitt (14:58):
So let's go ahead and give the fine folks at nomad a shout out and thank them for their support. This episode of Hands-On Photography is brought to you by nomad nomads founders met in Santa Barbara, California, just down the road from here and started a Kickstarter project in 2012 with the goal of building extra rugged and minimalist tools for the 21st century that would seamlessly integrate into everyday carry that's your phones and your watches and things like that. In the past nine years, nomad has expanded to offer a wide range of mobile accessories to fit any need for iPhone cases, apple watch straps wireless chargers to premium wallets and passport holders crafted with horn. Leather nomad uses leather from the horror tannery in Chicago, founded in 1905 and offers an unparalleled blend of quality and consistency. Leather accessories develop a rich patina with time.
Ant Pruitt (15:57):
That looks great and completely unique to you. And also leather just smells amazing. Doesn't it? Gosh, I love the smell of leather. Nomad offers convenient wireless charging solutions for the home, the office in the bedroom and in a suite of charges for whatever apple device you use as well as the apple watch and AirPods nomad is now offering AC adapters too. Check out their new 30 wat and 65 wat GaN adapters. Yes. I gotta tell you isn't it a pain when you try to go and grab a charger to charge up your devices. And then it's like this really, really slow trickle charge because it's some cheap dinky little AC adapter. Oh no, not with the nomad. You're gonna get some power. You got 30 wat and 65 wat the crew at nomad was tired of dealing with flimsy charging cables that seemed to just fall apart every few months.
Ant Pruitt (16:55):
So they set out the engineers, some of the most rugged cables around the reinforced, but double braided Kevlar out in sheathing and strong metal Allo connector houses, nomad cables have been engineered for extreme durability and heavy everyday use. There are also a climate neutral certified brand nomad is and always will be a company that prioritizes design and quality over everything else. One of the most important aspects of nomad when designing new products is that they use the highest quality and longest lasting materials available. They design all of their concepts from the ground up rather than white labeling existing products. Don't you hate it when people do that, <laugh>, you know, my little niece also known this little weirdo. She has an apple watch and I said, Hey, check out this watch band from nomad. And she looked at it and her eyes lit up and she just really enjoyed how cool it looked and, and how great it felt on her wrist because you know how teens are.
Ant Pruitt (17:55):
They want things to, to not only look good, but they want 'em to feel good too. And she is totally digging that watch strap. So yeah, you're welcome. Lil weirdo. I love you. <Laugh> it always folks go to nomad goods.com/twit and use promo code twit for 10% off your first purchase of video nomad accessory that's nomad goods.com/twit with the promo code twit. This is a limited time offer. Thank you so much to the folks that nomad for their support of the show and thank you for supporting us at twit. Okay. So now we're gonna take a look at doing frequency separation inside of Photoshop. And again, yes. Affinity makes it a little bit easier because you have a few less clicks in there, but on the Photoshop side of things, at least for me, I dig it a little bit more because I feel like I have a little bit more control and, and can really get into the nuance of doing frequency, separation and skin retouching to really help the model look as good as they can in the portrait.
Ant Pruitt (18:59):
So let's go ahead and open up Photoshop and take a quick look, see here. So I'm gonna switch my screen. Here we go. So now I've already opened it up here in Photoshop and I've separated this out into two layers. Okay. So this is the main layer on the bottom. Okay. Bottom, right? That's the main layer that's off by itself. And then we have these two layers. So let's go ahead and group them together just by highlighting them both and doing control or command G and that puts them in their own group. Okay. So I'm gonna rename this bottom layer. We'll call it low and then we can rename this layer and call it high. Got it. Okay. So turn off the top layer, turn off the higher layer and let's highlight our low layer for low frequency. And we're gonna go ahead and put that blur on top of it.
Ant Pruitt (19:47):
So let's go to the filter menu. We'll go to blur and we'll go to gauzy and blur. Okay. Now this is set to 19.4 radius in inside a photo shot. Remember it was only like three to five in, in affinity. So I'm gonna back it off. Okay. And then I'm gonna just crease it up. No, it was about 50% in affinity. Yeah. 50% in affinity. And if I put it to 50% over here, it looked, it doesn't look as good. Okay. So this all right. That's 52. That's too much blur. You want this blur to be where there's just, just starting to show the detail fade in a way. Okay. So this is, this is at zero and then we're gonna push it up usually around eight or so. Yeah. Details are just starting to fade away. So right about here is about as much as I'll go.
Ant Pruitt (20:44):
Okay. And we just hit. Okay. And now we'll go to this high layer, turn it back on. You wanna get over here to let's see, apply the image. So we go to image, then we go to apply image. Okay. And now the layer that it's dealing with, we wanna change this layer to low. Okay. And you wanna change this to subtract? Like, so there we go. And I believe this has to be sent to two with an offset of 1 28. There we go. All right. So now you look at it. We have that whole gray looking screen, like we did inside of a affinity photo. So we're gonna click. Okay. Like, so, and next we need to change the blend mode of the layer and just set the blend, the blend mode to linear light there. Okay. So now if I were to turn this group of layers off, it shouldn't look any different from the original layer on the bottom.
Ant Pruitt (21:52):
So I'm just gonna turn it off and you notice nothing change. Good. That means we're doing what we need to do. We've perfectly separated out the two frequencies, but didn't really damage any information or data in said photo. Okay. So now let's get down to the nitty gritty of really dialing in and just getting this to look great. So I'm gonna zoom in a little bit on the screen and let's start with doing a little of retouching on like getting rid of the some of the spots there. So let's just hit J on the keyboard and we can just brush away some of the little spots and I'm going to get my welcome tablet because I swear this is just so much easier. Get your welcome tablet. And I'll put some links in the description for some really inexpensive walking tablets that make photo retouching so much easier than a mouse there. So we just brush away some of those there on this particular layer, like so, okay. And then when I click on the high, I wanna do the same thing. Just brush away a handful of them. Not all of them, just a handful.
Ant Pruitt (23:10):
There we go. All right. So we got that done. Next. We need to do a layer mask, just like we did over there with Definity. So a click layer mask. And instead of using our regular brush to reveal, we're going to do a mixer brush on, on this particular one. So there's another brush over here. If you just hold down the, the brush icon, you'll see a couple different options. So you just hit the mixer brush option there, and then you wanna make sure this at the top is set to just transparency. So let's cancel that we don't want, we don't want there to be a color. So you just toggle off this particular button here and that'll give us the transparency and you can leave all these other settings at the top to the default. And what's gonna happen is as we're doing a mixer brush, we're basically mixing in these two frequencies too. Okay. Okay. Actually, I wanna do it over here. I don't really wanna do it on layer. Like, so hop down on the low frequency you brush it in. And when you're looking at this, you're thinking, man, there's nothing really happening, but I promise you, it is
Ant Pruitt (24:37):
Just brush across the cheeks, like so nice and easy. And then we'll get the chin just barely and just go down at the bridge of her nose, following the same contours. Okay. Just easily brush it in and you're looking at it and you can still see there's some detail there, but I promise you, it's actually getting better with this retouching here. So let's take a look at the group. So let's turn the group off. So this is with it being untouched and now we've retouched it and you see how just how subtle it is. It's cuz I got way more control. Okay. And I think this shows up so much better versus inside of affinity. Okay. And you just do that around certain spots of the model, around the forehead where the light is just easily brush it in. And we still have some of the details showing up on our skin. Their skin can even go down here and do her neck just brushing down here on her neck. Okay. Like, so, and we'll turn it off, see a difference, you know, see a difference.
Speaker 3 (26:26):
Okay. There
Ant Pruitt (26:31):
And you don't and you put the layer mask there and you brush on it. But most of the work is being done here on the low frequency layer.
Ant Pruitt (26:42):
Most of it. So if you want to skip the layer mask option, you can, but that's just more so for fine tuning certain spots. So you don't overdo it. Okay. All right. So turn this off. And this is the before and this is the after so much better, so much nicer. But yet it's still natural looking. You know, it's not a lot of just overdone. <Laugh> someone just slapped a ton of makeup on the model and making the model look bad. That's not what this is here. But again, this is frequency separation. This is getting two different layers, separated out and working with them independently and combining them together to make them work for one beautiful image. Lots of fun. I could spend way more time on this. As a matter of fact, I may, I may do another episode of where I just go full on, Hey, this is how we're going to retouch a portrait because there's a lot more details that could be addressed here in this image, nothing wrong with this image, but it's just from a post processing standpoint, from a photo finishing standpoint, there are just a few more things that we can do, but that is gonna do it for this week's episode.
Ant Pruitt (28:01):
Hey, thanks for joining me each and every week. Y'all I really do appreciate all of the support, but again, please do me a favor. Go ahead and tell other folks about the show to help grow the community and help push us up in the ratings again, we're available on apple podcast, Spotify, our YouTube channel. If you just go to our website, twit.tv/hop that's twit.tv/h O P for HandsOn photography, you'll see all of the different subscription options there. So you just click on that. You can go to it on your mobile phone or on the computer either way, you'll be able to subscribe quite easily. And you'll also see the previous shows and the previous show show notes from each episode. There's a lot of good information in there that you can share out with other folks as you peruse the previous episodes.
Ant Pruitt (28:50):
Okay. And yeah, give me a follow over on the socials too. Give me a follow on social. I am ant underscore Pruitt on Instagram. I post post quite a bit on Instagram and I'm starting to put some more video content out there as well. So go follow me on Instagram, tag me in some of your favorite images that you've shot or captured or what have you. And yeah, just let me know, tag an underscore Pruit and follow ant underscore Pruit. Okay. And one more thing. Hey, again, I just wanna say thanks. Continue to send your messages to me about feedback image, critiques show, topic requests and things like that. Send an email to hop twit.tv. I get a lot of those messages in and I love it. And yes, I am still to come up with another photography challenge.
Ant Pruitt (29:43):
If you have a suggestion for a photography challenge, go ahead and send it on over to me as well. That's hop twit TV, and I answer them as soon as I can. And we'll get right back to you regarding your image critiques and things of that nature. If you want me to share or if you're okay with me sharing your image on the show, make sure you say that in the email. Okay. And then we can potentially have it featured on the show, but it all depends. I can't say I'm gonna put everybody's pictures up here. Sorry. Can't do that. <Laugh> all right. That's gonna do it for this week. Folks. Thank you to my man, Mr. Victor for making me look and sound so good here on the show each and every week. And thank y'all for being you and being so supportive. It's a pretty, Daum crazy world we're living in right now and Hey, you Hands-On Photography folks, please continue to share and spread love all around the world. Hopefully that's gonna make this a better place. Thank y'all so much. And we will catch y'all next time. All right. Safely create and dominate take care.
Rod Pyle (30:46):
Hey, I'm Rod Pyle, editor of ad Astra magazine and each week I'm joined by Tariq Malik the editor in chief over at space.com in our new this week in space podcast, every Friday Tark. And I take a deep dive into the stories that define the new space age what's NASA up to when will Americans, once again set foot on the moon. And how about those samples from the perseverance Rover? When do those coming home? What the heck is Elon must done now, in addition to all the latest and greatest and space exploration will take an occasional look at bits of space flight history that you probably never heard of and all with an eye towards having a good time along the way. Check us out on your favorite podcaster.