Hands-On Photography Episode 119 Transcript
Please be advised this transcript is AI-generated and may not be word for word. Time codes refer to the approximate times in the ad-supported version of the show.
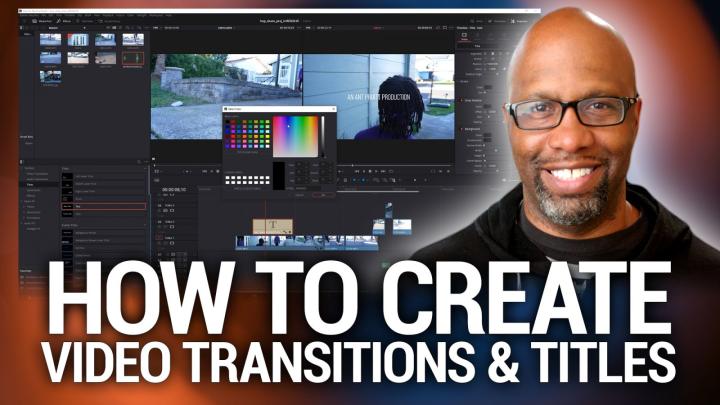
Ant Pruitt (00:00):
Today on Hands-On Photography. I am back looking at my video editor of choice. Well, not of choice, just a couple video editors, and we're gonna continue our little bit of training in the world of video editing and making sure your videos can look really. Daum good with just a few little simple tweaks, little, little simple effects. You all stay tuned TWiTs. This episode of Hands-On Photography is brought to you by the RVA traditional audio conferencing systems can entail lots of components. Installation can take days and you might not get the mic coverage you need. That's complex expensive, but the RVA audio is easy to install and manage. No technician is required and you get true full room coverage. That's easy, economical, learn more@nova.com.
Ant Pruitt (00:58):
Hey, what's going on everybody. I'm Ant Pruitt. This is as on photography here on TWiT TV, hope y'all are doing well. I'm unbelievable as always in this week's episode, we're gonna go back into our video editing module because it was a lot to video editing. You know, I want to try to make this as simple as possible, but I want to try to hit all of the fundamental basis of the concept of creating an editing video. But before we get into that, let me say welcome to all of the first time listeners and viewers of the show. Welcome to you. Thank you for popping in. Go ahead and hit subscribe and whatever podcast app you're enjoying us on particular. If it's apple podcasts or Spotify or, or Googles or podcasts, go ahead and subscribe and hit the little rating option that's built in to those particular services.
Ant Pruitt (01:56):
Not all of 'em have the rating options, but if they do go ahead and rate it, give me a nice five star rating. I'm not gonna be upset if you do so. And also be sure to leave me a comment on there to let everybody else know what you think of the show. If you're having some issues, just finding the subscription options to our show, just head on over to the website, TWiT TV slash hop a twit.tv/h O P for Hands-On Photography. And you'll see all of the previous episodes there and all of our subscription options and show notes and all that good stuff. So go ahead and check that out. Thank you for the support. So now let's go ahead and get started with this week's episode. Okay. So again we're gonna continue on our practice of video editing. You know, I've been using premier probe and using eventually resolve.
Ant Pruitt (02:44):
I've been using Vegas pro cuz those are options that are available to me. I don't have final cut, but again, you can still sort of take into effect the fundamentals regardless of what app you're using today. I'm going to be using premier pro as well as using DaVinci resolve. And today's topic far as video editing is going to deal with just adding a couple little minor effects to your video sequence, little minor effects and a simple little old title graphic onto your video. Something that's just gonna give it a little bit more polished as you're trying to tell your story. I was recently talking to one of my friends, Mr. Mike Olson. I appreciate you brother. I thank you for watching the show and he brought up a good point. You know, that I, that I want to try to reiterate when it comes to doing your videos.
Ant Pruitt (03:40):
It's it's about, you know, yeah, you gotta do your editing and make sure you got your color balance and corrected and all of that good stuff. But none of that stuff means a hill of beans if there's no real story to it. So really make sure when you're composing your video, you, you try to create a story with it, you know, have some type of arc with it. All right. So here inside of premier pro you'll see that I have a bunch of different little clips there. And over here on this left hand side of the screen, all these are video files. I mean that's a lot of video files and some of it is stuff that I did re to takes of. So as you're thinking about your, your video that you want to do understand that it is not gonna be just one huge video file getting started, it's gonna be several different takes.
Ant Pruitt (04:32):
And it depends upon the type of story that you're trying to tell. So as we look at my timeline here, let's just start back here at the beginning of the timeline or have to delete these. I just got an end point right here. So if I started here, basically my model or my son, he's coming out of the building out of the house there. So you follow him down, follow him down, follow him down. And then you notice on the timeline, the, the clip changes a different color because this is a separate clip, not the same clip. And by doing that, I get a whole different angle, a whole different perspective. You know, I'm even lower down on the ground with the camera versus shooting, you know, up at eye length back here when, you know, in this sort of lowering the camera and so forth.
Ant Pruitt (05:23):
So it's a lot of thought process when it comes to, you know, setting up your particular video composition. So go out and, and sit down and plan it out. If you gotta write it out and come up with a little shot list, do that, then go out and record those shots. And it doesn't matter what kind of camera you using use your dad, gum, iPhone, they're good at shooting video. They really are, or just use whatever camera you have and just create those shots. Once you got those created dump, 'em onto your computer, bring them into your video editor and start creating. Okay, now let's get back to this here, timeline and take a look at just something simple that we can do to help make this just a touch better, you know, just by spruce it up a little bit. So if I play this through and I've taken all the audio out of it, cuz it's not necessary.
Ant Pruitt (06:15):
And again, I'm in inside of premier pro I just, if I play this through, this is just him walking out the door, walking down to the streets here and so on and, and so forth. And he gets, gets on the skateboard and he's gone. And then there's this blank spot. And then there's these other shots here. And if you remember for, in my previous episode, this is the shot where I used to make different layers and add it in a, a little sound effect there just so we can show how you can add sound in addition to whatever ambient sound you already had recorded. So how can we blend that together? So let's see, I can grab all of these little clip and just sort of slide it over in the timeline like, so, And if I hit playing, It goes through And then it just jumps into that.
Ant Pruitt (07:12):
And for some people that may be okay, but I gotta tell you, eh, not my thing. I think there needs to be some sort of transition there, whether it be another shot, setting up going into this whole jump or just some type of transition effect, that's gonna say, Hey, I'm going into something totally different. It could be as simple as a dissolve or fade that takes from shot one into shot two and just sort of blends it together seamlessly and just sort of tricks the viewer. Okay. So let's take a look at that. We'll have a, just a simple fade effect or a cross dissolve to this and see if we can make this look a little bit better. So I'm gonna take this footage here and I'll just drag it down to the same track here like that. And now I have them next to each other. Okay. And then I just go to my effects tab here inside of premier pro yours may be over here on the left hand side. Mine is up here on the right cuz that's where I stuck it. And then you can just search for dissolve. How do you spell dissolve?
Ant Pruitt (08:25):
Is that how you spell dissolve? I'm struggling today. There we go. All right. So I got a bunch of effects in here that mentioned dissolve. And then if I scroll down, I see this, this one here, this just says cross dissolve, you take these effects. I'm like, so, and you just grab it drag and drop onto your footage right here. Okay. And that's done there. That little error says it's not enough frames. That's cuz it's a short clip, but we're good. I promise you. All right. So now what happens if you play this through, it'll just sort of blend into the next shot. Okay. Instead of that jarring cut going on right there. So that's so much better if I hit play so much better. Okay. Now granted, this has not been rendered out, so it's not totally smooth. If you look at this upper line here, it's yellow. So that maintain my GPU and processor is still working a little bit hard. This needs to be rendered out to be a smoother playback. I could just go up here to the sequence and just hit render in and out and it'll power through like that and make it to where this bar is green. So Mr. Victor is just gonna fast forward through and we'll pop right back to this screen.
Ant Pruitt (09:51):
Okay. So now we're back and we got the green bar at the top and this thing just plays through so much more smoothly. And as, as we mentioned before, we get to this shot where it's gonna be a transition and it just blends right on the end and it looks so much better. Now, what else can we do to this? So if you're watching our shows, whether it's my show or any of the other shows on the TWI network every now and then see us on the screen and we just look like this here, it's just our, our faces, our mic and so on and so forth. And then something to pop up across the bottom of the screen, those are called lower thirds. And that's just a simple little graphic just to spruce up, you know, what's going on on the screen there and you can put anything down there in a lower third and it doesn't necessarily have to be something as nice and fancy as what Mr.
Ant Pruitt (10:41):
Victor has up on the screen right now with this beautiful color bar. And it's got the name of the show and my name and so on and so forth. You can just simply just put text there, something that just, maybe it's like a an image credit or a director it or something like that. Something that just, just gives just a little bit more Polish to the screen. So that's what we're gonna do on this particular shot here. So I'm gonna switch over, let's go to this screen here now, and we're just gonna add a simple little title effect here. So I'm gonna close all of these effects to out right here and inside of premier pro you have a new ti and tool and it's with this little T icon here on the screen. So you click the T and you just find the spot here in your program monitor and you just click there.
Ant Pruitt (11:35):
And now it's gonna give me a text area to, to start to in. So I could just say an Pruit production, something like that. Okay. And now the beauty of this is if I hit control a to highlight all of the texts, I can do whatever I want to those letters, because this is essentially now a text editing space on the screen. So inside of premier, you have the essential graphics panel and you just click on that and you'll see all of these different text options here. Okay. So let me highlight this text again,
Ant Pruitt (12:16):
And then I will change the font because I do not like this to ho a font. My favorite font is babe. So we're gonna change that font to babes. And if I wanna make it larger, I can make it larger just by dragging these little sliders here. Like, so I, and change the positioning of it with all of these different parameters here. So I can just drag it down on the Y like, so I wanna drag it over to the left, like so on the X, just very, very simple movement and even better if I wanna change the color of the text I can. So I just make, get, I'm not gonna do this, cuz it'll look horrible. If I wanna make it say like this yellow or something, I can do that. And there we have yellow text there actually that doesn't look terribly bad, but I don't really want it that.
Ant Pruitt (13:08):
So let's just put that back to white, like so, all right. So select all of it to X, change that back to white. Okay. And then you have these other options. Y'all you have this, this here, it says stroke stroke is what's going to allow you to have like a bit of an edge around your text. So right now it's set to white. I'm gonna change it to black, just so you gotta show up a little bit better and then it's that one pixel. So you can barely see it. But if I increase this to say eight pixels, you'll see the difference. Like, so, all right. So now when I click off of it, you'll see how that white text has a little bit more of a it's almost, who's got a little bit more contrast to it. It see if I can overdo it. So let's change this to say 16, something like that.
Ant Pruitt (14:04):
There we go. So it's a little bit darker, not something I would do on every bit of text, but that just gives you idea that you can play around with stroke when it comes to doing your different types of lettering and titles in your video. Okay. So now moving on, let's take this and again, just make it look a little bit better in the scene. So I'm going to render this out real quick because I'm noticing that yellow line right there, and this only takes a second it sequence here in the menu. And so a render selection and it'll play through and there it pops up on the screen
Ant Pruitt (14:44):
And then it goes away. I think that stayed on the screen a little too long so we can just trim it back. Like, and if I want to make it look even better, let's not have it pop up. Let's have it fade into the screen. So just add another little, like a dissolve effect. Again, I save it into my little favorites folder over here. So I'm just gonna grab one of these dissolves and just drop it onto the footage hit play, and now it fades in and pops out there. So that's pretty, Daum simple stuff that you can add to your footage just to make it look a little bit better and a little bit more polished. Now I wanna show you a couple different steps inside of the, even to resolve, but first I wanna take a few seconds to thank this. Week's sponsor.
Ant Pruitt (15:36):
This episode of Hands-On Photography is brought to you by Neva complicated and costly. That has been the state of audio conferencing for larger spaces for a long time. Choosing a traditional system might entail difficult design software and electing from a dizzy array of separate mics, speakers, DSPs, and a whole lot more tech y'all good grief installation usually requires outside techs and is often highly invasive and expensive. It could take your room offline for days. Now, the industry was definitely primed for the same type of leap in technology that has transformed and simplified other sectors. Right? Well, Neva made that leap when they created the revolutionary microphone, miss technology with this patented technology one or two integrated microphones and speaker bars fill a room with thousands of virtual microphones. There are no dead zones and everyone can be heard everywhere in the room. Even that person is trying to hide back there in the corner of the meeting meeting and class participants can simply talk and move naturally into space and still be heard by remote participants.
Ant Pruitt (16:50):
Thanks to continuous auto caliber. The rooms are instantly and always ready to be optimized with audio that's that's that's really cool. No outside tech is required on this. Ne Reva has also simplified installation. It's about a 30 minute DIY job to get these installed yourself. That means big savings on in time than cost compared to traditional systems. They simplified management too. Nova consoles gives it the power to monitor, manage, and adjust their systems from anywhere. No need for it to go from room to room to make sure everything is sounding good. So ask yourself if you want to go with the costly and traditional system or make the leap to the simple and economical Neva, you can learn more@neva.com. That's N U R E V a.com. And we thank Neva for their support.
Ant Pruitt (17:53):
Okay. We're back in now. I am inside of DaVinci resolve again. This is just another free video editor that is actually pretty dagum. Good to be free. They do have a paid version, but this free version is it's real, really, really D I'm good. So what I've done is I brought the timeline into resolve that so we can have the same type of idea and feel. And we're gonna take a look at just, just again, have having some type of ti and added to the scene or, and having some type of transition added to the scene. Now I did leave the audio on, on here. So I wanna get rid of that audio. It's not needed there. Get rid of that audio. Let's see. So I need to take this little link thing and turn that off and then get rid of these, these little crazy sounds like that. And I don't wanna magnet timeline, so let's move that stuff us back to where it was. There we go.
Ant Pruitt (18:55):
There we go. Why is the magnet timeline still doing that stop that nobody saw this anyway, we're moving right along powering through. Okay. So we got our audio out of the way that we don't necessarily need, and we're going to give our, it was a nice little transition going from, from one scene to the next. So I'm gonna drag the play head through he's going through the scene. And then it just switches over to this jumping scene here with the photograph that we captured. Okay, this is so easy. So easy inside a premier, you had to search for an effect to do the little dissolve and inside of resolve. You can do pretty much the same thing. So let me take myself off of the screen here. If you look over here on the left hand side under the effects tab, you just click that and it'll bring up all of your effects and you got all of these stuff from categories and you have those video transitions and you'll see that there's a bunch of different transitions listed right here.
Ant Pruitt (19:59):
And just like you would in premier, you just do a bit of a drag and drop onto the footage. So if I want to do this cross the design, I just drag it onto the beginning of the footage there. Like so, but I'm gonna undo that. So I don't wanna do that. This is so much easier. All right. So I'm gonna take this footage and I'm gonna raise it up just one track, like, so, and then I'm gonna slide it over just a little bit to overlap the track that's on bottom. So video track one and video track two are now just slightly overlapped, but if you look at this, the, the first clip here, it has this little, these little handles at the top and you notice I could just drag it like that to the right. Okay. And I just dragged it to where it says point, you know, point 20 or something like that.
Ant Pruitt (20:53):
Okay. And I'm going to push this over a little bit more, something like that. There we go. And then I'll do the same thing on the track. At the end of on the clip at the end of track, one, one has a little handle and I'm just gonna drag it to the left. Instead of dragging it to the right now, what's happening is that's creating a transition effect where the opacity for these two layers are going to change. If you look at the end of of track one, you'll see that now this video is going to fade out versus the beginning of video track two, the track is going to fade in insist on top of each other. It should create just a nice little cross dissolved transition. So if I'm just go ahead and hit play, we should see a fade in and fade out. That's seamless. See, nevermind. This sound effect was a little bit off, but that's okay. So let's play it back again. Here is across this off. Good.
Ant Pruitt (22:01):
That was so, so much easier. Okay. So now what about the title and thing? So we can go back to this beginning spot again, somewhere, right, right along here. What have you, and again, this, the titles are just another bit of effects. You go to your effects menu. Okay. And you got all these different transitions. And then there's the title section right here on the left hand side. And there's a whole bunch of them in here. You notice one says fusion titles, fusion is a bit of a motion graphics piece of software built inside of Davin. Resolve, not gonna touch on that yet. That's way too advance for most of you. We're just gonna do something very, very simple. When you notice it has lower thirds, let's sit there. And if you hover over it, it's shows you just this sample view in your program monitor of what the lower third could look like. And you can just drag and drop whatever you want. So let me, I like just plain on text here. So let me just click on text.
Ant Pruitt (23:06):
So I got text and I'll drag it over and I'm just gonna drop it on, you know, video track two, like, so, and it says basic title, which is horrible. We don't wanna just say basic title. We need to change that. How do you do so you just click on it and you look over here on the right hand side of the screen at the upper, right? It says metadata mixer and inspector click on inspector after you've clicked the NASA inside of your timeline. And it's gonna show you all of the information that's regarding that particular clip that you've selected. So in this instance, I've selected the title or text box there. So it's giving me all of the parameters that I can play with here. So, I mean, again, I can change the font to something I like, you know, babe, let's trying middle, something like that, and I'm gonna erase basic title and I'm gonna put in an and Pruit pro and do that.
Ant Pruitt (24:07):
Okay. And we'll leave it at white, we got drop shadow stuff. We can add a drop shadow. So I'm gonna click that and we'll make the drop shadow, say, let's go with something in the warmer red side, something like that, click. Okay. Add a little blur to it like that, whatever. Just keep playing around with all this stuff. That's none of that is necessary. I'm just gonna move on. Sorry. I get ahead of myself. But anyway, the positioning of this is the problem. We don't want this right. Dead in the center of the screen, if you want to fine, but me, I want this more on the lower third and the lower left. So we just go to the exposition and the Y position and just move it around. So let's just move this down like that, move this down, like, so, and we have it in the right position. So as we play it back, it should hop up on the screen. Boom. And it's still rendering out cuz you can see it's got a little red line there. That's why it was choppy and then it goes away. So let's try that again. Give it a second to render out this one, renders out behind the scenes, unlike premiere pro does. So give it half a second, play it again. And it pops on the screen. I think that's a little too long. So I'm gonna trim it back.
Ant Pruitt (25:34):
Yep. There we go. So now let's play it pops on the scene and then it should just pop away. All right. Again, I don't like that. It, it should be a little bit more, you know, transitional. So just like we did with the dissolve, let's just play around with the opacity and just have it ease in and ease off with its opacity.
Ant Pruitt (26:02):
There we go. And then it should fade away. So simple, very, very, very simple stuff. Just to spruce up your video just a little bit, just a little bit. So you are not necessarily showing off amateur footage. Okay. Now you're stepping up into slightly above amateur. All right. So folks, that's gonna do a for this week's episode, I hope this has been helpful for you. There's so much more to these, these video projects, and I'm just trying to make it as simple as I can. So I don't really run you off and get you to just really, really intimidated with so much extra data and information. Cuz I tell you that, you know, things like after effects, things like fusion. I mean they, they have so many different menus and so many different options and it's great to get into that stuff, but I don't recommend people just jumping right into it if they don't, if they don't have any, I idea about video editing, you really should just sort of understand the basics of the things when you're working through these projects, same way you would with photography.
Ant Pruitt (27:11):
And again, you don't necessarily have to have Premiere Pro you can use the venture resolve. You can use Vegas pro the venture resolve is about $300 or you can get their free version and work. Totally fine. Okay. So if you have any questions, Hey, feel free to shoot an email over to hop twit TV, again, questions, comment, feedback images you like from me to critique on the air. Just make sure you mention in the email that I have your permission to show it on the air, all that good stuff. And also don't forget it by our moon photography challenge. So some of you folks have already started sending those in, keep sending them all in and we'll catch up on those images very, very soon. All right. That is gonna do it for me this week. Folks. Thank you all for the continued support. Thank you for my man. Thank you to my name, Mr. Victor, for always helping me look and sound good on these things. Especially when I have one wonky edits like this one, Hey, keep sharing out the show. Keep telling everybody about Hands-On Photography and keep coming out and checking out disparate show folks. I really do appreciate it. All right, that's gonna do it for this week. Y'all take care and we'll see you next time. So safely create and dominate. Take care.
Leo Laporte (28:24):
No ads, just the content. That's what you get. When you join club TWiT, you even get extras like TWIT plus our new bonus feed just for members and exclusive access to the club. TWIT discord community. Join now for just $7 a month and support TWIT. As we continue to create top-notch podcasts you expect and deserve just getting started. So be one of the first to join. As we build club TWI from the ground up, you could be an early member, go to twit.tv/clubTWIT to learn more and sign up now. Thanks.