Hands-On Mac 183 transcript
Please be advised this transcript is AI-generated and may not be word for word. Time codes refer to the approximate times in the ad-supported version of the show
0:00:01 - Mikah Sargent
Coming up on Hands-On Mac. Let's take a look at using dictation on macOS. Stay tuned.
0:00:09 - Leo
Podcasts you love.
0:00:10 - Mikah Sargent
From people you trust.
0:00:13 - Leo
This is Twit.
0:00:23 - Mikah Sargent
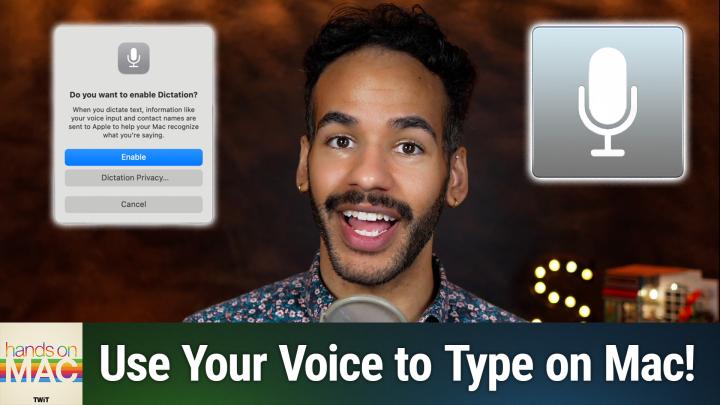
Welcome back to Hands-On Mac. I am Micah Sargent and today we are taking a look at a great feature on macOS the ability to use your voice to type out words. It is dictation on macOS, and it's a very powerful feature that may have more going on than what you might expect. So let's head over to macOS and take a look. All right, here we are on macOS and the first thing that we're going to do is enable dictation. If you do not have it currently enabled, you're going to launch system settings and then you are going to go to keyboard in the sidebar, so we will scroll down until we find keyboard From here. So we will scroll down until we find keyboard From here. We will look for the dictation portion of the keyboard settings and you'll notice that dictation is currently turned off. It says use dictation wherever you can type text To start dictating. Use the shortcut or select start dictation from the edit menu. So we will click to enable it and it's going to say hey, when you dictate text, information like your voice input and contact names are sent to Apple to help your Mac recognize what you're saying. So we'll choose enable. Now that means that it does go to Apple to process the request. So it's not happening on the device locally. You can change the language here. English, united States is what we want. The microphone source can be set to automatic or you can pick a specific one if you'd like. So in this case we are going to leave it on automatic because we will be using the microphone of the MacBook Air. You can find the shortcut, which in this case is to simply press, in the function row, the microphone icon, in the function row, the microphone icon. But there are a few options, including pressing the control key twice, pressing the keyboard change option twice, pressing the right command key twice, the left command key twice, or either command key twice, and then, of course, you can customize it. We'll keep it as the microphone and then you can turn on or off auto punctuation. So this gives you the ability to have it kind of guess what you're saying, how you're saying it, and then punctuate based on what you're saying.
Now, importantly, you can use dictation anywhere. You can insert text into a field so it is available across the board. If you have a Silicon Mac, an Apple Silicon Mac, then you are able to also sort of keep using dictation and then switch to the keyboard and start typing. When you switch to the keyboard, it will take away the little dictation icon, let you type and then, as soon as you stop, it'll go back. It also lets you dictate for as long as you want, with, of course, the knowledge that after 30 seconds of no sound, it will turn off dictation, so it will stop listening for what you are trying to say. So let's take a look.
Now that we've got dictation enabled, we are going to go into a text edit document and I am going to hit the F5 on my Mac, which, of course, is the microphone icon. So now that I can see that the blue microphone icon is showing comma, I know that I am currently able to dictate text period. As you can see, comma, I am choosing to add punctuation so that I can make sure it is exactly where I would put it period. However, it is possible to just type, or rather talk out loud and have macOS decide on when punctuation should be added. As you can see, it knew that I wanted a comma after, however, but comma. It didn't notice that I wanted the sentence to end at added and pick up again at as period. At any time, you can hit the escape key to stop dictation. You can also hit the microphone key again to stop dictation, and both of those will give you the ability to turn that off when you are using this. Understand that by using dictation, you are deciding that that is your method for being able to dictate text. If you want to do control of your entire Mac as well as the ability to type in text, then you would use voice control. If voice control is enabled, dictation is disabled.
Now I want to talk about some of the well, I'm going to try to go through all of the options that you can do for dictating text on Mac that exist outside of just talking. So you saw earlier that I was adding punctuation by speaking it out loud. Let's take a look at some of the punctuation that we can add to our text through dictation. Text through dictation Apostrophe, open bracket, close bracket. Open parentheses, close parentheses. Open brace. Close brace. Open angle bracket, close dash, ellipses, exclamation mark, hyphen, period, question mark, quote, end quote. Begin. Single quote, close, single quote, semicolon. Now, that shows you all of it in uh, in, in kind of a row, right, but let's take a look at what that looks like if we're talking out loud. So let's see if I can figure out a way to get all of this into a document.
Let's see, I'm trying to think of how to do an apostrophe. I can't even think of anything for an apostrophe because most of it's going to be shortened text, right. So let me try this. Here we go G-O-N apostrophe. G-o-n apostrophe. G-o-n apostrophe. G-o-n apostrophe Open bracket. What that means is going comma, but without the full word Close bracket Period. Now you'll notice open parentheses if you look close close parentheses that it chose to do parentheses instead of brackets in the last sentence Period. Do you know what I'm going to do? Next Question mark I'm going to say open quote. I'm having trouble figuring out what all I can say to fit in all of this punctuation period. Close quote yeah. So there's an example of some of the punctuation that you can do. But that's not it.
You can also do typography symbols. So we can do this backslash, forward, slash, carrot, and you'll notice that it is having some trouble here. So let's try that again. Ampersand, ampersand. New paragraph. Ampersand symbol, paragraph, ampersand symbol. Yeah, so it should be typing it, but it's not. But we can also do something like new line, large center dot. This is a bullet point. This is an octothorpe. New line 50%. New line Underscore Isn't this cool Underscore? New line hey, vertical bar, hi, vertical bar, hello. So those are some typography symbols that you can do. It should be able to do the ampersand, so it's ampersand asterisk at sign backslash, forward slash, caret. Center, dot. Large center, dot. Degree sign, the pound sign, which you can also call a hashtag, percent sign, underscore and vertical bar.
For formatting, there are a few commands that you can issue as part of your message. You can say new line, which is equivalent to hitting the return key once. You can say numeral, which makes sure that the number that you say afterward is actually a number. You can say Roman numeral, which formats the number as a Roman numeral. New paragraph, which is equivalent to hitting the return key twice. No space on, which formats the next phrase that you speak without spaces. No space off, which turns it back to default spacing, and then tab key is equivalent to hitting the tab key on your keyboard.
If you want to shout at people, you can say caps on to format the next phrase in title case. You can say caps off to turn it back. All caps is how you actually shout and not just do title case, and then all caps on will. So all caps on its own will format. The next word in all caps All caps on is going to just format everything in all caps until so all caps on its own will format. The next word in all caps All caps on is going to just format everything in all caps until you say all caps off to turn it back.
There's also some mathematical options the equal sign, the greater than sign, the less than sign, the minus sign, the multiplication sign and the plus sign. There is the dollar sign, the cent sign, the pound sterling sign, the euro sign and the cent sign, the pound sterling sign, the euro sign and the yen sign, and you can say things like smiley face emoji, angry emoji, sad emoji, sobbing emoji, smiley face and frowny face, winky face, cross-eyed, laughing face. So in those cases it will sometimes turn them into emoticon If you don't say emoji at the end. That is how you get emoticons to display. And last but not least, there are some intellectual property symbols that are included, so you can say copyright sign, registered sign, trademark sign, and those should format as the copyright sign, the registered sign and the trademark sign, the trademark sign. Of note, these options will display in notes as well, because again I can say iOS today copyright sign new paragraph. Hands on Mac registered sign new paragraph new paragraph hands-on ios trademark sign, copyright sign. So in that case the copyright sign didn't work, but should, it did at one point kind of display as that.
So sometimes you may have some issues where dictation isn't working exactly as you expect. Make sure that you have the correct language selected. If you are using a microphone, make sure that you're doing the microphone. That is the best option for you and, of course, also make sure that you have an internet connection. To determine if you need an internet connection to use voice input and transcripts, all you have to do is go to the keyboard options that we saw earlier the keyboard options that we saw earlier and you just look at the text below dictation where you can see it says dictation sends information like your voice input, contacts and location to Apple to process your requests. So, depending on the device, you may or may not have to have that sent off, and I can always click about to see more information about dictation and privacy information that goes along with being able to use these features, understanding of how you can not just speak words but also certain symbols and inputs and formatting options to change things as you are dictating your text.
Thanks so much for tuning into this week's episode of Hands on Mac. I'll be back next week with another episode. Until then, though, I remind you out there, consider joining Club Twit. Twittv slash Club Twit is where you go to sign up, and we have a monthly and a yearly plan, and we'd love to see their ad-free versions of every single one of our shows, access to the members-only Discord server and access to the Twit Plus bonus feed, plus that warm fuzzy feeling knowing you are helping support the work we do here on the network. Thanks so much. I'll catch you again next week.
0:14:54 - Leo
Bye week, Bye-bye. Hey, buddy, are you a geek, Are you a tech enthusiast? Then I would love to invite you to join a tech community like no other. You can gain exclusive access to our incomparable quality tech content with Club Twit. As a member, you'll enjoy all Twit TV shows ad-free plus access, private video feeds for insider shows like iOS Today, Home Theater, Geeks and so much more. Dive into the members-only TwitPlus bonus feed for behind-the-scenes content, club discussions and special events. But here's the best perk Join our incredible Discord community to watch live show productions, chat with hosts and participate in exclusive members-only activities.
It's your backstage pass to the world of Twit. Whether you're a tech enthusiast or a lifelong learner, club Twit elevates your knowledge while entertaining your interests. Get two weeks free when you sign up now and unlock unparalleled access at twittv slash club twit. That's twittv, slash club twit and, from the bottom of my heart, thank you and welcome to the club.