Hands-On Mac 182 transcript
Please be advised this transcript is AI-generated and may not be word for word. Time codes refer to the approximate times in the ad-supported version of the show
0:00:00 - Mikah Sargent
Coming up on Hands-On Mac. Let's take a look at a powerful accessibility tool on your iPhone and your iPad. Stay tuned.
0:00:10 - Leo
Podcasts you love.
0:00:12 - AI Voice
From people you trust.
0:00:14 - Leo
This is Twit.
0:00:25 - Mikah Sargent
Welcome back to Hands-On Mac.
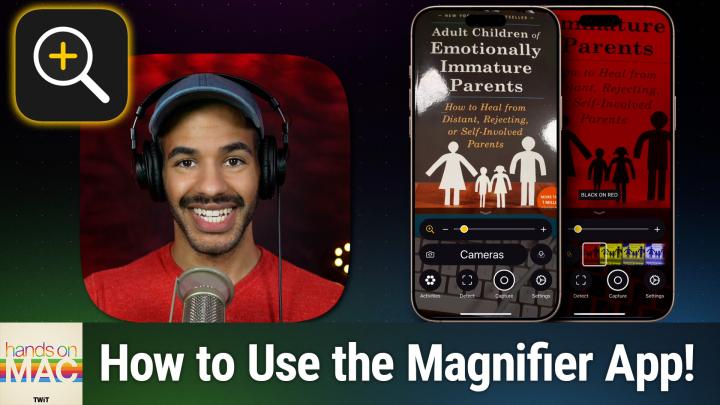
I'm Micah Sargent, and today we are taking a look at a tool that has long existed on the iPhone and iPad that Apple has just announced is coming to macOS. It is a tool that helps you to better see the world around you, interact with the world around you, regardless of your accessibility needs. It's a tool called Magnifier, and Magnifier may not be what you are thinking when you first hear the term. It is not a simple tool for magnifying what you have on screen, but instead is a powerful toolkit filled with different sort of smaller built-in tools to help you to explore the world around you and be able to take in what is there. Now, as I mentioned, as Apple does every year for the past few years, ahead of WWDC, the Worldwide Developer Conference, apple goes ahead and announces some of the accessibility tools that it plans to release or accessibility features in some cases and during that time, the company talks about the new stuff that it is planning on bringing out, and one of those new things new features is Magnifier on macOS. So we'll be able to take a look at that when Apple rolls out the next versions of its software, but in the meantime, I want to talk about Magnifier and the place where it already exists, and that is on your iPhone and your iPad. So here we've got an iPhone and we can access Magnifier in a few ways. One way is to simply swipe down from the top right corner of the screen to access your control center, and in this case I have added magnifier to my second screen. Now, we've talked before about how to add different shortcuts to your command center. You can tap and hold somewhere and you can simply hit add a control at the bottom, which then brings up the ability to, in this case, add magnifier or another tool. You can also use your search functionality to access magnifier. So swiping down and starting to type in magnifier will give you the ability to access it that way, or you can go into your accessibility settings and check out magnifier from here.
Now what we are going to do today is just access magnifier by swiping down from the top right and choosing it in our control center. When we do this, it brings up the magnifier tool and you can see immediately that we've got a bunch of different options here, and I want to start from the left, moving over to the right. So in the far left bottom corner, and you may not have. By the way, you might not see the two icons that I have in the middle of the four circles at the bottom and the zoom at the top, and we'll talk about that and how you get that added to yours if you'd like them. But let's start in the bottom left, the circle that says activities. This is a way to kind of set up individual views based on where you are and what you might be doing.
An activity Right. So if we tap on this right now, I have this custom design right that has the zoom at the top, it has the option to switch cameras, it has on the right there, filters, which we'll talk about in a moment, and that everything else is just set up as normal. So I could call this an activity. I could say let's go with, given that it lets you choose cameras and filters. We will call this. Let's just call it filtered. We'll call it filtered. So filtered view with a book. Now this activity is saved as the filtered option. But if we choose no activity, we can change this to the default view and be able to kind of go back to that. So the next option is detect.
0:04:26 - AI Voice
Now when we choose detect, it turns on detection and a screenshot of a website with text and an illustration of a person a box with text and an illustration of a person on a keyboard. A screenshot of a website with text and an illustration of a group of people. A screenshot of an app with text, a brown sign with white text and an illustration of a group of people. A screenshot of an app with text, a brown sign with white text and an illustration of a person.
0:04:49 - Mikah Sargent
So, as you noticed, I tapped detect and it started to tell me what it could see in the scene. If I tap and hold on detect, I have some different options here. The first one is scenes, and that does exactly what you just saw and heard. It will tell you what it is viewing in the screen and be able to give you that information. If I were to put my hand in there, it would say that a hand was detected and talk about a hand sort of sitting on a box of text, because it couldn't tell it was a book. We weren't zoomed out far enough and it couldn't tell it was a book, also probably because of the glare that's on top of the book. The next option is people, also probably because of the glare that's on top of the book. The next option is people. This will help you determine if there are people in front of you or near you.
Furniture, will help you find furniture that's in front of you, near you. Doors, as you might imagine, helps you find doors and can actually give you information about doors. Again, we'll talk about that in a little bit. Text will just look for text on the screen and will help you to sort of understand what that text is and then point and speak is pretty cool because it looks for a hand, looks for a finger pointing at something and then we'll tell you what it sees near where you are pointing. I'm going to and remember we're tapping and holding detect to do this. I'm going to choose text and whoops and then turn off, point and speak and turn off scenes and then we can tap on detect.
0:06:13 - AI Voice
RARENTS W to heal from and rejecting ELF. Involved PARENTS. 1 million copies sold.
0:06:20 - Mikah Sargent
Yc, gibson, psyd, percent sign five, circumflex six, ampersand seven, asterisk eight so now you can see, with detection mode on, it was just looking for text and reading that text on the screen. So that is kind of all the sections and types of detection that it's able to do. Again, you tap and hold to be able to access that. The next option is capture. If we tap on capture, what it does is it takes a photo that you can then zoom into to see closer. So if you have a wall of text in front of you maybe it's a sign or something like that you can zoom in and actually read what it says. And you can also use the reader. It will detect what it sees on screen and give you that information. So in this case it's not only detecting the text of the book in front of me, but it also is detecting the keyboard which is right below the book. In our view, there's a share button that lets us share that away. And also, as you'll notice, I brought up that reader option that kind of turns the text into an easy read mode and my filter option is still selected so that I could change the filter.
The last section is settings, and that's the big one. But first I wanna talk about these two in the middle here, cameras, and then over on the side I have filters. So cameras lets you change. You tap and hold and it'll let you change what camera is selected. So we can do, of course, auto selection. So it just chooses the best camera based on what it sees close-up view or the front-facing camera and then filters lets you change what the view is. So we can change it to black and white, we can change it to red on black, yellow on black, yellow on blue, white on blue, and these filters are important based on what a person might need for, for example, colorblindness or some particular kind of contrast that helps them to better see what's in front of them. And then, last but not least, let's go into settings, because this is where things get pretty powerful.
So here in settings, up at the top, we have activities, and that gives us the ability to choose which activities we are selecting. Remember that activities are essentially different modes that change what's visible on the screen. So we can choose to show it in control panel, meaning that it shows at the bottom, and we can change what each of these activities has. So if no activity is selected, what do I want that to look like? Well, I want it to have zoom to be available, so that control is always shown. And then the secondary controls are controls that will be shown at times when it makes sense to take up part of the screen. So I could add, for example, flashlight and make that a secondary control or a primary control, meaning that it will always be shown. You can have up to two added at once to be able to have it always on screen.
And then the detectors. So by default, when I choose detect what is selected. So in this case I might want text detection so I can toggle that on and I will turn off scenes, meaning that it will not when I have, by default, no thing detected. I only want you looking for text, I don't want you looking for the rest of it. We can tap done to come out of it or we can go back to activities and see the other activities that we have available.
And now let's go to capture. So capture we have shown in control panel at the bottom and we can choose to have it always show playback controls in the reader view, which gives you the ability to actually play the text that is showing up in that reader mode that we looked at earlier, versus just reading it. So if I tap on that, it's going to show, play and rewind down at the bottom, and then, last but not least, detect, which by default is not shown in the control panel, remember, because I turned it off in the setting for this base mode, but it has different options. So if you double tap on the screen with two fingers, it will pause or resume detection and you can choose what type of output it actually pauses whenever you are, whenever you are excuse me, what type of feedback it does whenever you decide to pause it. So this will let you hear or feel that it has indeed been paused. And then it also has the ability to detect languages, so other languages beside just English or your base language on your system.
Now the next option here because again we're looking at these kind of primary controls for this specific mode, that's, zoom and flashlight, is the secondary control in the current view that I have, with the other controls like brightness, contrast filters, focus lock, cameras and capture mode also being available if I would like them. We're going to change now from the no activity to the filtered activity, just so you can get an idea of how that changes, what the settings look like. So here you'll notice that cameras and filters are an option for us where before they were not. And if we choose one of the options that has a little arrow icon next to a right facing arrow, then we can decide what is actually available to us in the that option. So if I tap on filters, maybe I don't need to have any of the inverted options. We can turn those off. And now if we go back to our main screen and choose filters, you'll notice that it just goes through the first modes there. Now we can add brightness and you'll notice that our brightness slider comes up as well. We can add contrast and let's remove brightness. We can add flashlight, focus, lock and capture mode, and let's just take a look at what that is. So in this case we've got five different options whether it's locked or not, which way the camera is facing the filters that we're doing, the contrast and turning on or off the flashlight. Those are all now available and we can sort of keep that as default.
The last thing that I want to talk about here, because again, we've looked at activities. We've looked at how that lets you set a default for your magnifier. We've looked at capture and being able to sort of take a photo of text or a poster or anything that you have in front of you and give some information about that. But let's go into detect, because when we go into detect, this has a lot of options. Again, we talked about detection and pausing, feedback and languages. But look at the different detector options. Each of these has its own set of settings. So if we tap on scenes, we can say I want you to provide a speech feedback and I also want you to provide label feedback. So that means that on screen, when I roll over a bit of text or whatever it happens to be, it will say out loud, like it did that box of text is here, but it can also provide a label around it to give you a little bit more information. To give you a little bit more information People.
This is pretty cool because it lets you change the way that it communicates to you that there are people near you. So, first of all, it's units and we're set to feet because we're imperial and you can change the sound, the pitch of the sound that it provides to you when people are detected within the distance indicated. So if people are 10 feet away, 9 feet away, 8 feet away, 7 feet away. It's going to be at one pitch, but as soon as you are within 6 feet, the sound that it makes to let you know that there are people nearby is going to shift higher, letting you know that they're closer. And again, with feedback it also can do different things. So what it does is it provides that sound feedback, but you can also have it provide speech feedback, label feedback, so if you aren't able to hear or hear well, you could always just see it on screen and then also it will provide more frequent feedback. So the sound will raise higher as they get within six feet and become more frequent as they get closer and closer. In order to use this, you need to understand that you have to have ring mode turned on to be able to hear the sound play, but up to that you are able to have those haptics playback for you.
Next is doors. Again, we can do the same thing with the distance, but what's cool is it will outline a door if it sees a door, and on top of that you can choose to have it provide more information about the door if you back tap. So if I turn this on, what it does is. It will provide some more information, like the color, the material and the shape of the door. You can choose to have it tell you information about where the door handle is, how it thinks you should open it, whether it's a pull or a push, whether it's currently open. You can then add to that the shape, the size, the color of the door and even the ability to ask if it has a window. Now, that's important because some places will provide information for accessibility purposes about the door that is meant to be used to enter a building. So if you have that information ahead of time knowing okay, they said, use the yellow door with a window on it knowing that ahead of time is great. And then it also can you choose whether it provides information about door decorations, so text and signs on or near the detected door. So something that says, for example, use other door would be a door decoration that gives you some more information about that door. Very cool.
And again, we talk about the usefulness of these tools for everyone. I can remember a couple of times where I've had to get my eyes dilated and I'm wearing those sunglasses they provide over the top of the sunglasses that I have myself. Uh, and it's very difficult to see right. This is a great tool in a situation like that. Even if you don't have um, you know regular as in uh occurring frequently, or occurring regularly um accessibility needs. This could be something that's very helpful in that case.
Furniture the same six feet away and then it can also tell you if it thinks that there's someone or multiple people occupying a specific bit of furniture. So it will have the number of people that are occupying chairs and sofas, giving you the ability to know if there's a place for you to sit. The next one is text, and with this we don't have a whole lot extra, except for the ability to know if there's a place for you to sit. The next one is text, and with this we don't have a whole lot extra, except for the ability to have it automatically turn on the flashlight for a period of time a period of 10 seconds to illuminate the text, if the camera is having trouble seeing what the text is, and then turn that off after 10 seconds, which gives it enough time to see what it is. And then, last but not least, is the ability to, as I mentioned, use your finger to point at a specific place to say, I want you to tell me what this is. What's great is, you can decide the location so you can say please detect the text that is under my finger, so where I'm tapping under my finger or above my finger, so I'm pointing up toward text and I want you to read that I currently have it set to under, so it's essentially going to look at what's directly underneath my finger versus just being above my finger, and this also has the ability for an automatic flashlight and this also has the ability for an automatic flashlight. So that is a look at the sort of detect portion of the settings. And again, remember that, depending on what activity you have set up, you can set this so that you can use it, for maybe you've got, you know, I'm going to a concert mode and it has the door detection automatically. Or I'm going to a house party and that's got the seat detection set up automatically All different ways that you may want to use that activities option to be able to quickly access these different modes for magnifier. That is a look at what it is like to use an iPhone, an iPad. Now, as I mentioned, it will be coming to macOS in the next iteration of macOS and in that case we will see the introduction of using webcams or your iPhone by way of continuity camera as a means of viewing the world around you for magnifier. So pretty excited about that. That is going to bring us to the end of this episode of Hands on Mac.
I want to thank you all for tuning in this week. As always, it is my pleasure to bring you this show. If you have yet to become a member of Club Twit, we'd love to have you join us. Twittv slash Club Twit is where you go to sign up. We've got a two-week free trial. After that you can sign up for a monthly plan or a yearly plan, and we look forward to seeing you in the club. Thanks so much for tuning in. I'll catch you again for another episode. Bye-bye.
0:20:03 - Leo
Hey, buddy, are you a geek, are you a tech enthusiast? Then I would love to invite you to join a tech community like no other. Love to invite you to join a tech community like no other. You can gain exclusive access to our incomparable quality tech content with Club Twit. As a member, you'll enjoy all Twit TV shows ad-free plus access, private video feeds for insider shows like iOS Today, home Theater, geeks and so much more. Dive into the members-only TwitPlus bonus feed for behind-the-scenes content, club discussions and special events. But here's the best perk Join our incredible Discord community to watch live show productions, chat with hosts and participate in exclusive members-only activities. It's your backstage pass to the world of Twit. Whether you're a tech enthusiast or a lifelong learner, club Twit elevates your knowledge while entertaining your interests. Get two weeks free when you sign up now and unlock unparalleled access at twittv slash club twit. That's twittv slash club twit and, from the bottom of my heart, thank you and welcome to the club.