Hands-On Mac 174 transcript
Please be advised this transcript is AI-generated and may not be word for word. Time codes refer to the approximate times in the ad-supported version of the show
0:00:00 - Mikah Sargent
Coming up on Hands-On Mac, let's take a look at a third-party open-source archive utility tool for your Mac, oh and your iPhone. Stay tuned.
0:00:13 - Leo
Podcasts you love From people you trust. This is Twit.
0:00:32 - Mikah Sargent
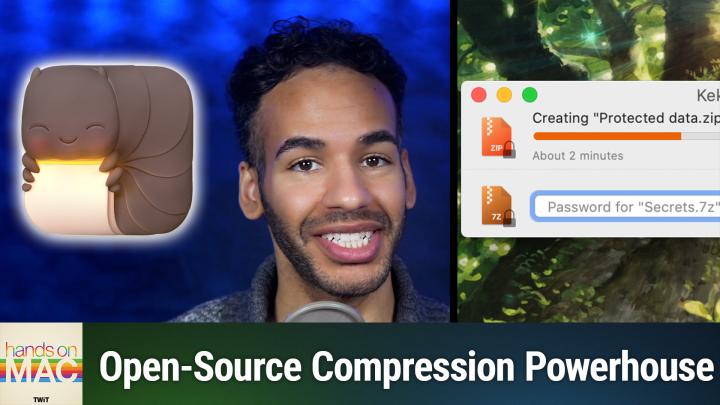
Hello and welcome back, or welcome to Hands on Mac. I'm Micah Sargent and today we are continuing our plunge into archive utilities. This time we're taking a look at a third-party archive utility tool, because I received an email from a listener who pointed out a tool that I had come across and that I thought was potentially something that we could talk about. But hearing from some folks who said, yes, I too use this app, I thought it'd be worth talking about. So thank you, listener Brent, for writing in as a longtime watcher and a first-time writer to encourage me to go ahead and talk about this application. The application in question is Kika K-E-K-A. Here we are on the Mac and you can see that we are on the Kika website. Of course, we'll have a link in the show notes to that and Kika is a file archiver that you can get in a couple of places, and I want to talk about that first. So, first and foremost, it's important to know that this is a free and open source tool that you can download. So if you go to the GitHub page, you can get the current version of Kika, the Mac OS file archiver, or you can also use if you've got Homebrew installed, you can get it via Homebrew as a cask. That said, if you are looking to support the developer of this tool and you also want to make sure that you've got the latest version at all times, you can of course get it on the App Store. Or I shouldn't say, of course, get it on the App Store, but you can get it on the App Store for $5.99. Making that purchase will give you the app through the App Store and then, from that point forward, you'll be able to update the app via the Mac App Store app. Now you'll notice, if we kind of zoom in here, it does say offers in-app purchases. Don't be afraid, do not worry. That is simply if you would like to tip the developer afterwards. So it's not a subscription service.
But let's take a look at Kika. So I have Kika here and the basic window that comes up is a kind of simple window, and we're going to take a look at that in a moment because, first and foremost, we're going to head up to the menu bar and choose settings and kind of talk a little bit about what's possible here. So when you are using Kika, you can actually set it up to do different actions based on the file extension of the file that it has. So, basically, by default, depending on how you set this, you can say I want you to always compress a file, always extract a file or always extract compatible formats. So what that means is basically, if you come across a set of files and you have Kika, use them. What do you want it to do by default? Well, obviously for me, if it's a zip, I want you to unzip it. If it's not a zip or another archive tool, then probably what I'm asking you to do is compress it. You can also set some of these other general preferences, like activating Kika whenever you start a new operation and even having a control center integration. Another thing that you can do is set Kika as the default uncompressor. This does require the installation of a third-party tool that basically goes through and finds all of the files that Kika is able to work with and tells macOS I want you to use Kika as the default operating system. Of note, it's very easy to do this piece by piece, by simply, as we've shown in a previous episode, right-clicking on a file, choosing Get Info and then, under Open, with changing it from Archive Utility in this case, which is the default file, to Kika and at that point, going forward, it will use that for that file you choose, change all and then, from that point on, kika becomes the default for opening CPGZ files. And then we would want to do the same for zip, where it's currently set to archive utility. We would change that to Kika and say, across my system, set to archive utility. We would change that to Kika and say, across my system, I want you to always use Kika to open zip files.
Now if we head to the Kika website, we can see that Kika works with quite a few different files. First of all, it can create 7-zip files, that's 7-Z zip files, tar files, g-zip, b-zip2, xz, l-zip, dmg, iso, brotli, zstd, lrzip, aar and WIM. Of note, it can extract quite a few files, including JAR, iso, dmg, that's disk image, tar files, rar files, exe files even, and so on and so forth, including that CPGZ file we just took a look at. So there are lots of methods for using Kika to be able to extract or compress files. Now you can change the appearance.
I don't want to go into super detail about some of these things, but I do like to mention the compression screen because you'll notice when we looked at Archive Utility before. It's not super in-depth. This, kika, absolutely is. You can choose the default format, which, of course, is zip. But look at all of these different options we have, including snappy and, as we talked about before, dmg seven, zip, l, zip. Uh, we can choose how the compression takes place. If it's normal, if you compress it even more by letting the system take a little bit, a little bit longer to be able to use um, you know the processing that's available, it'll take a little bit, take a little bit longer to do when the files are saved. Remember we talked about this before how the files are named.
If you keep the extension and I also like that you do have an option to verify the integrity of the compression. I think that's a big one being able to note for sure that after it's been compressed, it truly is what you expect it to be that the integrity is there, so that if you choose to delete the original files, you don't have a concern that those files will be there when it comes time to uncompress them. You also have the ability to add encryption, that's AES-256 encryption, if you would like, and do things like being able to create tarball extensions. So for those of you with a little bit more know-how, especially whenever it comes to creating software pieces. Knowing about those tarball extensions is very helpful, and so on and so forth. Now those are compression options, extraction options. You also have quite a few as well, including whether you include or exclude Mac resource forks on the Mac If you move those compressed files to trash after extraction and I mean again what you would expect but also things like inherit quarantine from downloaded files, so you can make sure that those files stay where they're supposed to and also make sure that things are kind of behaving as expected whenever it comes to the extraction of the files.
File access is great because this makes sure that Kika, even without needing to prompt for the first time, has access to different places on your system. So if you give it home folder access, then it will automatically have access to your desktop and downloads folder. If you enable external volume access, that means that Kika will be able to access flash drives or other external storage and then if Kika isn't able to work with a selected folder, where it falls back to basically what folder it can work with, and then also you can just add individual folders by customizing the access. Performance. Of course is all about how much resource, how much of the resource pool, is available to Kika. So if you don't like the default, you can change it there and then you can also set a default password for when you do encryption. And what's great about this is then, from that point on, kika will use that as the default password, should you have encrypted and compressed files. So if you use the same password across your encrypted files let's say you have it saved in your password manager it can be kind of saved here as well. So when you're using the tool to decrypt and uncompress or decompress your files, then it will say okay, this is what you usually use as your password. So that's what we'll use as well. And last but not least is the Finder extension. So this gives you the ability to have Kika show up in your Finder and kind of easily, with that context, select files and compress them.
Now that we've kind of gotten the settings out of the way, let's use Kika as normal and see what we're working with here. So again, normal compression. We could do slower at any time, whether you split them across so 4.7 gigabyte DVD, for example, depending on where you're trying to put it. So basically, how big each of these files is going to end up being. If you're going to have a password and of course we have that encryption down below, we're excluding Mac recess forks like what is it? The DS store? If we want to verify the compression integrity afterward, delete the original files that we have and archive items separately so that each of the individual items is separate. Now we can select some of these files. Again, we know about JPEGs, as we talked about in the last episode, but I'm just selecting a good amount here.
We have a couple of options. We can right click and we can move down to services and say send to Kika. We can move down to services and say send to Kika, at which point it asks Kika has no file access to the destination folder, so it needs to ask for a location. You can add access to this and other folders and Kika's preference. So we're going to call this special archive Kika and it's dot zip by default and we're putting it back in that example folder and we'll click compress and then it creates that compressed zip.
So, 4.2 megabytes versus I can't remember all of the files that I selected here. I think it was all of these. Let's see Versus 4.4. So it was able to save 0.2 megabytes of space, and that was simply by right-clicking to choose Kika. I will show you, though, in the Kika preferences. Last but not least, that we can turn on the extension here, like so, and we should then see Kika show up in our menu bar like that.
Now I can select let's go with all of these PDFs which we may or may not see some compression here.
But we can say compress here and yes, we want to give access to that PDFs folder and yes, we want to give access to that PDFs folder. Suddenly, there is a zip which is 4.3 megabytes bytes, versus, if we select all of these, 5.2. So Kika was able to save a lot, and now that we've got the zip, I can choose the Kika thing and say extract here or extract to a different place. So it's very handy to have it right there. One more reminder that, again, that app is available as a free and open source tool. So you can get it from Kika's website, from GitHub or again from the Homebrew system. But if you want to support the developer, the easiest way to support the developer is by simply getting it in the Mac app store. One more shout out to listener Brent for sort of pushing me to definitely talk about Kika as a third party tool with quite a bit more functionality and quite a few more settings. We do enjoy a setting or three. Thank you so much for tuning into this week's episode of Hands on Mac.
0:13:11 - Leo
I'll be back next week with another episode, but until then, it is time to say goodbye. Community. Like no other, you can gain exclusive access to our incomparable quality tech content for just $7 a month with Club Twit. As a member, you'll enjoy all Twit TV shows ad-free plus access, private video feeds for insider shows like iOS Today, Home Theater, Geeks and so much more. Dive into the members-only Twit Plus bonus feed for behind-the-scenes content, club discussions and special events. But here's the best perk Join our incredible Discord community to watch live show productions, chat with hosts and participate in exclusive members-only activities. It's your backstage pass to the world of Twit. Whether you're a tech enthusiast or a lifelong learner, Club Twit elevates your knowledge while entertaining your interests. Get two weeks free when you sign up now for $7 a month and unlock unparalleled access at twittv slash club twit. That's twittv slash club twit and, from the bottom of my heart, thank you and welcome to the club.