Hands- On Mac 139 transcript
Please be advised this transcript is AI-generated and may not be word for word. Time codes refer to the approximate times in the ad-supported version of the show
0:00:00 - Mikah Sargent
Coming up on Hands-On Mac. Let's take a look at the Action button on iPhone 15 Pro and 15 Pro Max. Stay tuned Podcasts you love From people you trust. This is Twit. Welcome back to Hands-On Mac. I am Micah Sargent, and today we're taking a look at a feature that I honestly have to say, I'm surprised I have not covered yet. That is the action button that is on the side of the iPhone 15 Pro and the iPhone 15 Pro Max. It's an extra button that can do something for you, depending on what you wanna do, simply by pressing it. So you've got your volume up and your volume down buttons. You've got your side button, which locks and unlocks the screen, as well as accessing your cards, as well as activating Siri. That action button can be customized to many different features. So first let's take a look at how you access the action button and change those features, and then we'll take a look at how you access the action button and change those features, and then we'll take a look at what you can do to kind of customize it even further. So here we have our iPhone.
The first thing that we're going to do is launch settings. We're going to scroll down until we get to action button. It's the third option in the kind of second, or rather the third, section within the settings menu. So general control center, action button. We'll tap on action button and up pops this beautiful screen that has multiple options. Now, if we scroll all the way to the left, we'll see what is, first and foremost. This is going to be familiar to those of you who have an iPhone with the toggle switch on the side Silent mode the ability to turn on silent mode or ring for calls and alerts. So with this it's a lot like that switch used to be, where you would toggle it to make it so that you couldn't hear out loud the ringing. I always had mindset to never ring out loud, so I never really used that toggle. So it's nice that they've turned it into a button. The second option is to trigger a focus mode. Now with this one you get to choose which focus mode you want it to trigger. By default it's set to the do not disturb focus mode, but you can choose a different focus mode that you'd like by simply tapping on the section beneath it to choose one of your focus modes. So I could have this set to automatically turn on sleep when I click the button on the side.
Next is the camera option. This will open the camera to a specific camera mode. So right now it's set to capture a photo, but I can choose to have it capture a selfie, a video, a portrait or a portrait selfie, and each of those camera modes, of course, are different. So if I have it set to selfie, it's going to use the front-facing camera. If I have it set to portrait selfie, it will use the front-facing camera, but will also make sure to capture depth and show me on screen what that depthy photo would look like.
Next is the flashlight. This just turns on the flashlight when you need it or turns it off. There is the flashlight. This just turns on the flashlight when you need it or turns it off. There's no extra option here. Next is voice memo. This lets you record in voice memos. So clicking on this will automatically open voice memos and give you the opportunity to record a voice memo right there. So if you want to make sure you're capturing your thoughts, this is a great way to do it. Whoops.
Next is translate. So this will launch translate and give you the ability to kind of have the phone listen in to a conversation that's taking place, or maybe it's just you or what I like to do. I'm watching a show, somebody says something and they don't have subtitles for it because it's not meant to be understood. I will use translate to just hold it up to the speaker and have it translate so I can figure out what's going on. Magnifier, which lets you use your iPhone as a magnifying glass. So this is great for text like actual physical text. If you're looking at a newspaper and you're having trouble reading the text, the magnifier mode will let you kind of zoom in and see what you're looking at. But it also has some built-in AI or, technically, computer imaging techniques that will give you the ability to. That gives your phone the ability to identify objects so you are able to get a better understanding of what you're looking at.
A shortcut, which we're going to come back to. This lets you run a specific shortcut or perhaps open an app by way of shortcuts. So when you tap on the option, it shows you a bunch of your shortcuts, as well as shortcut options that might also exist here. I have it currently set to start a voice conversation in chat GPT, but you can set any number of shortcuts. Again, we're going to come back to that one.
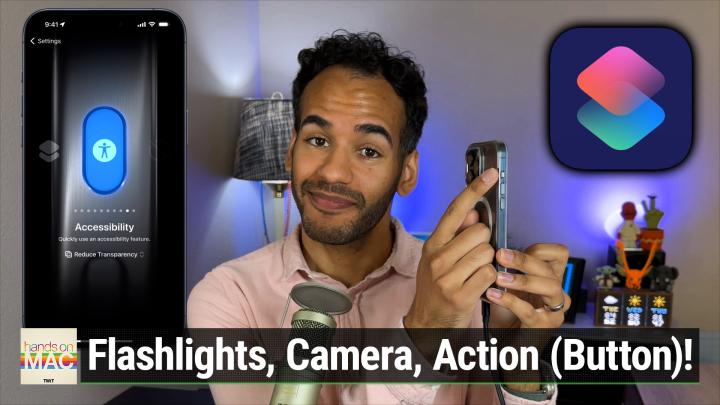
Next is accessibility. So if you have an accessibility feature that you like to use regularly, then you can have this automatically turn on that accessibility feature. So you tap to choose a feature and you can say I wanted to invert the screen, I want to set a specific color filter, I want to use detection mode with the magnifying app so we talked about that uh, increase the contrast. I want to reduce motion or transparency, reduce the white point, which is a feature that I use regularly. Um, smart invert, which kind of reverses the colors of the display but it doesn't mess with media and images, so those stay the same. And voiceover and zoom, which kind of reverses the colors of the display but it doesn't mess with media and images, so that those stay the same. And voiceover and zoom, which voiceover, of course, turns on voice over. Zoom lets you magnify portions of the screen. So, whereas magnifier will actually magnify via the camera, zoom magnifies the screen itself that you're viewing. And then also some motor controls, some hearing controls and general controls like guided access and live speech. So all of those are accessible via accessibility. And in fact, I think what I'll turn on is reduce transparency so that if I were to click on this, it would reduce the brightness of my screen.
Next is just to set it to no action. So if you don't want this thing to trigger whenever you accidentally click the button, you can say no, I don't want any action for the action button, just leave it be so. Those are the basic settings, but I want to go to shortcuts and I want to show you first and foremost that if I tap on this again, I can look through the shortcuts that I have. That are my typical shortcuts, like an big and shortcut, which I'll talk about in a moment, that was created by Matthew Cassinelli, auto brightness, a setting that I have called DND reminder. But it also shows you different apps so I could choose the clock, for example, and if I have timers set with the clock, which I do, these are different amounts for my washer, how long it takes the washer to run different washing cycles. So quick wash, rinse and heavy duty. I can have it so that when I click that button it automatically turns on the heavy duty timer and the clock, letting me know that a heavy duty wash has completed.
I can go and choose in the files option, scan document, for example. So clicking that button gives me the ability to immediately access the scan document interface within files and scan in a document that's before me and then, scrolling through. You know you've got so many different options here depending on the apps that you have installed. Uh, for example, starbucks, there's an order ahead option so I can automatically go into the order ahead menu place an order for the coffee that I'm going to go pick up. But Rosemary Orchard has provided a suggestion for the best uh shortcut option to create.
So I'm going to leave that menu and I'm going to go into the shortcuts app and from here I'm going to create a new shortcut by hitting the plus icon in the top right corner, calling this shortcut, by tapping on the top and choosing rename, and we're gonna call this iPhone action button Whoops. And then we're going to create an action and we're going to call it run shortcut and then we're going to choose done. Now we're going to swipe back to get into the settings menu and we're going to choose Done. Now we're going to swipe back to get into the Settings menu and we're going to choose the dropdown menu here and we are going to choose iPhone Action Button. Now, anytime you want to run a shortcut with the iPhone Action Button. You can change it from this menu so I can go here and I can choose a specific shortcut.
So I want to launch the Ambigan shortcut and so now if I click on that iPhone action button oh, I forgot, I've got to hold it then it's going to run the the M big and shortcut, which has two options here easier, please, or defaults, please. I'm going to choose easier and it automatically makes the screen text bigger and gives me access to that. I can click and hold it again to access it and I'm going to choose defaults and that's going to switch it back to the small text. Now I can go back to shortcuts and I can change this instead to and let me look back on the screen auto brightness. So we will choose auto brightness, which is up here, and choose done. And now we come over here and I run my shortcut and it immediately goes into the text page that I wanted to access within the settings for display. So that's all that that shortcut did was that it launched an accessibility menu that includes the auto brightness option. But now I can change this to anything and I don't have to go through that kind of peskier, harder to navigate menu within the action button options itself.
When I create shortcuts, I want to be able to access those shortcuts from here. So being able to have them all here is really nice. And the auto lock shortcut is one that I use regularly because I need to be able to access the auto lock menu whenever I'm doing shows to turn off or on auto locking of the display. So again, you create let's go back to settings you create an action button shortcut and you select that in the settings for the action button, right there.
Folks, that is going to bring us to the end of this episode of Hands-On Mac. Thank you so much for tuning in and for checking this out Again. I can't believe that I hadn't done one on the iPhone action button. I'd done one on the Apple Watch Ultra's action button, but it's good to cover the iPhone action button as well, because there are some more features there that you don't get on the Apple Watch Ultra. If you have questions, if you have feedback, if you have requests, send those to Micah at twittv and I'll catch you again in a couple of weeks for another episode of Hands on Mac. Bye-bye.