Hands-On Apple 215 Transcript
Please be advised this transcript is AI-generated and may not be word for word. Time codes refer to the approximate times in the ad-supported version of the show.
Mikah Sargent [00:00:00]:
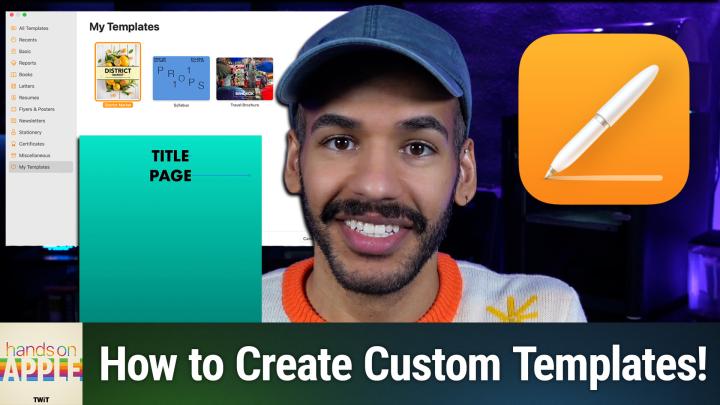
Coming up on Hands on Apple, let's take a look at creating custom templates for your Pages documents. Stay tuned. Podcasts you love from people you trust. This is Twit. Hello and welcome to Hands on Apple. I am Micah Sargent, and today I want to show you what it's like to create a special template for Pages. This came up during my show,OS today, and I thought, you know what, I love creating custom templates, and I think you and others may benefit from it as well. So let's head over to macOS and take a look.
Mikah Sargent [00:00:46]:
All right, here we are on macOS, and first and foremost, of course, we can launch the Pages app. I've held down the command key, hit spacebar to open up spotlight, and up pops Pages. Now, when we get to Pages, you may see this welcome page, and we can start by creating a document. Now, when you do this, up pop the templates and you can see your basic standard templates that are built in. But perhaps you want to create one yourself. There are ways to go about doing this where you can kind of start from scratch, or maybe you just want a slight adjustment on something that already exists. So maybe it's a newsletter. For example, here's one called Simple Newsletter.
Mikah Sargent [00:01:31]:
We can choose create, and up pops this newsletter that already has all of the information kind of filled out in it. We can see an image placeholder, we can see a heading, we can see the headline of the newsletter or the sort of the title of the newsletter. You can see it says, drag your own photos onto any image placeholders in this template, then crop or resize them if you wish. We can also click on this text and you'll notice that that text goes across page. Here we've got a poll quote. You would change this to a caption and so on and so forth. So these custom styles are built because we have a template in front of us. Now, if we are wanting to take a template that already exists, then what we would do, let's make a slight adjustment to this.
Mikah Sargent [00:02:20]:
Okay, so we're selecting Today's News up here. And I want to change the text style to instead of Helvetica, let's go with Goth. Oh, wait, I don't have Gotham on this machine. Let's go with Futura. So we go with Futura and we're going to shrink that down so that it actually fits. And you'll notice that up in the text section here we have a text style that we can update. Now, all we would need to do is if we decided that this was the new way of doing things. We'd go up to file and we would choose Save as template.
Mikah Sargent [00:02:58]:
So instead of keeping it as a standard save, we're going to go down here and choose Save as template and we can make the choice to save it to our template chooser. That is that screen that pops up at the beginning asking us what we want to choose as a new option. So from that point on if we look in the templates chooser we can give this Micah's newsletter and clicking on it is going to bring up that custom version with Futura. But if we go ahead and delete that and we choose command N, we can go to simple newsletter and boom, that text style has bounced back to Helvetica. So you can actually see the difference between the two now. This episode of Hands on Apple brought to you by Melissa, the trusted data quality expert since 1985. You got to know that bad data could be costing your business. And Melissa is has specialized in making data clean, accurate and of peak quality for 41 years now, combining expertise with cutting edge AI.
Mikah Sargent [00:04:02]:
So yes, they've got the AI too. Here's what that means for your business. It means address verification. It validates addresses globally in real time, reducing failed deliveries. Mobile Identity Verification, which matches customers to mobile numbers, cuts fraud, opens SMS channels, change of address. It will keep customers connected automatically when they move. Plus AI powered deduplication. Do you know? On average, a database contains 8 to 10% of duplicate records, while Melissa's powerful matchup technology can identify non exact matching duplicate records.
Mikah Sargent [00:04:35]:
Also Customer Data Intelligence, which will enrich records with demographics, geographic, psychographic, firmographic and property info for more intelligent targeting. And the new Melissa Alert service, which monitors and automatically updates your customer data for moves, address changes, property transactions, hazard risks and more. Clean data leads to better marketing, roi, higher customer lifetime value and AI that works as intended. If you're using AI for personalization or predictive analytics, garbage data means garbage results. Melissa ensures your AI learns from accurate information. When it comes to data, Melissa's got you covered. For example, Etoro, the social investing platform with 23 million users, uses Melissa for identity verification. Their business analyst says, we find electronic verification is the way to go because it makes the user's life easier.
Mikah Sargent [00:05:32]:
Users register faster and can start using our platform right away. Whether you're a small business just getting started or an enterprise managing millions of records, Melissa scales with you. Melissa has easy to use apps for Salesforce, Dynamics, CRM, Shopify, Stripe, Microsoft Office, Google Docs, and more. Melissa's APIs integrate seamlessly into your existing workflows or custom builds. And very importantly, Melissa's solutions and services are GDPR and CCP FedRAMP and ISO 27001 certified and meet SOC2 and HIPAA high Trust standards for information security management. So get started today with 1,000 records cleaned for free at melissa.com TWIT that's melissa.com TWiT that's one way to go about creating a template, by sort of starting with something that already exists. But you can also create a template from scratch. So we would go and we would choose the blank template document.
Mikah Sargent [00:06:31]:
And when I'm creating a template, I like to go up to view and choose Show Layout and View Show Invisibles. Now, when you do this, the first thing that you're going to want to do is go to the toolbar at the top and go to Document. We want to set up the document first. Do we want the documents to have a specific orientation? Perhaps it is landscape instead of portrait. Do we want it to have a header and a footer? Do. What size do we want this header and footer to be? In this case, 0.25 for the header, 0.25 for the footer. And whether or not it has a document body. Yes, we want it to have a document body.
Mikah Sargent [00:07:09]:
You can also set it so that the margins are much smaller. I like a smaller margin. So I'm actually going to set these to 0.5 for all sides. And so now you can see that the margin is much further out. And then whether the document allows for hyphenation and ligatures, which are based on the typeface that you're using. Next, you can set up sections, and if a specific section has a specific look or feel. So how that's set up, for example, is we can choose create a new section here, and you'll notice that it pops in a little section break. That is the invisible that is showing up there.
Mikah Sargent [00:07:54]:
And we can make it so that this specific section, for example, has a gradient fill. And you'll notice that only that first page with that specific before that, that section break will have this gradient fill. Now, I can add text to this section. And we could, for example, take this text and put it in the center like so, and we change it so that it is a title. And once again, we'll center it there. And we could move it to the middle of the page if we wanted to, but no matter what, it's going to stay in that section. So we've created a section right for this page. And from here we can also select the header and footer and insert a page number.
Mikah Sargent [00:08:51]:
So whether this is page one or page two, Page one of two, page two of two. However, you want to set this up, so we'll set that as 2 of 2 and then 1 of 2 automatically gets added to the first part. Now, from there you can change the format of the page numbering. And then we have our last section, which is Bookmarks. Now, with Bookmarks, this is a way for you to be able to kind of create almost a PDF style look and feel. So we'll skip that for now. Right? We've got the document set up, we've got the sections set up. Now we want to choose formatting.
Mikah Sargent [00:09:27]:
Now we're specifically looking at the title here. We know what the font is going to be. We're going to go back to Futura and we are going to keep it as bold. We're going to set it to 30. Then we've got our normal options of bold, italics, underlined, strikethrough, but we have special text options, including changing the character spacing, whether it's a superscript or subscript, if it's all caps, small caps, or title case, for example. And then we could also add outline and shadow. Now, since we're making this the title page. Whoops.
Mikah Sargent [00:10:09]:
I want to make that all part of the same thing here. So this is the title page, where we can also add special character styles on top of this. So we've got our text style and then our character styles that are separated. We could change the spacing. We could add a drop cap from here. We could then decide if this page has columns, if it has specific indents, tabs. If we put little spaces around the title page, those are called paragraph borders, and then some information about, again, hyphenation and ligatures and how these pages are broken up. So we know that this is the title page, right? We're going to set this to.
Mikah Sargent [00:11:00]:
Whoops. We're going to set this title to the size of 50 and then we'll move down to our main documents. Now, with the body, we want to choose our basic body, but I could add in here some text. So I could say, I want to have, you know, well, let's, let's add some text. Here is some text that I'm adding to my document. This will be a template comma, so please make sure to change this text to something else. We will select this text, we will go up to format, we will choose advanced, and we will change this to define as placeholder text. Now, when we save this as a template, if you were to select this text, it would all highlight and you'd be able to change it.
Mikah Sargent [00:12:05]:
We can also take an image, drop it in, and let's go ahead and crop this down. So I'm going in to choose Edit Mask. I have the crop selected and we'll crop it down so that it is just whoops, our little cat. Like so. We'll choose done. We'll pop this in like so. And we will change the arrangement so that it will stay on the page and the text will kind of move around it. There we go.
Mikah Sargent [00:12:51]:
And now I can right click on this image, or rather I can select this image, go up to Format, also go to Advanced and choose Define as Media Placeholder. From that point on, that image is a media placeholder, which means selecting the spot there that is the image replacement. I can then drop in a new image like this jpeg. Now that's there instead. We could also insert tables and charts and be able to access those. Once we're done, we once again will go up to file, choose Save as template and add to template chooser. And we'll call this Mica's default template and create it. Now I can close these.
Mikah Sargent [00:13:42]:
We'll delete this. Choose command N to create a new document. And up at the top we can see Micah's default template. When I choose this, the title page is here. Now you'll remember I did not highlight this text and choose to make it placeholder text. So now when I select it now, it will let me change it. This text also lets me select all of it and make a change. And then this is that image placeholder that can also be changed, replaced with another image.
Mikah Sargent [00:14:16]:
Now, what do you do if you want to get rid of templates that you don't like? Well, it's actually very easy. If we go to our template chooser, we can simply right click and choose to rename it. If we want to, we can actually share this template with other people or we can delete it. All of that is possible from right there. So I want to get rid of that default template. I want to get rid of my special newsletter. And now everything looks beautiful and perfect, exactly how it is. If you want to.
Mikah Sargent [00:14:49]:
Sharing templates will let you create a template file. So upon sharing that with someone else, they'll be able to open that in pages and gain access to it. So if you want custom templates for your recipe cards, that's what I like to use it for. Or creating a newsletter that's all your own. Or maybe you have business cards that you regularly print out. That is a way to set up your own special templates and not have to pay for that Apple Creator Studio subscription that has those templates that you can get there. Thank you folks for tuning in to this week's episode of Hands on Apple. As always, a pleasure to have an opportunity to chat with you and I will of course be back next week with another episode.
Mikah Sargent [00:15:30]:
Until then, goodbye everybody. Whoa, look at the time. Time is flying. And there's only a little bit of time left to take our annual survey. Sorry, it's freezing here. Your feedback helps to guide the future of TWiT. Your feedback matters. It makes us make our shows better.
Mikah Sargent [00:15:49]:
So if you head to Twitter TV survey 26 before January 31st, that is the time to tell us what you think. By the way, every time one of you fills out the survey, it gets a couple of degrees warmer here, so I could really use it. It'll only take you a couple of minutes, I promise. Thanks so much. We appreciate it. And oh wow, I appreciate the few of you who've filled out the survey because it's already getting warmer here anyway. TWIT TV survey 26.