Coding 101 54 (Transcript)
Father Robert Ballecer: Coming up
on Coding 101, we start our embedded processor segments with Mark Smith.
Netcasts you love, from people you trust. This is TWIT!
Bandwidth for Coding 101 Is provided by CacheFly, at cachefly.com.
And by Squarespace. The all in one platform that makes it fast and easy to create your
own professional website or online portfolio. Now
introducing SquareSpace 7 with even better site management tools and other
improvements. For a free two week trail and 10% off, go to
squarespace.com and use the offer code C101.
And by HipChat Plus. Collaborate, save time and be more
productive with your teams. HipChat Plus is IM, video chat, plus file, code and
screen sharing all in one place. Invite your team members and get a free 30 day
trail of HipChat Plus at hipchat.com/c101.
Fr. Robert: Welcome to Coding 101. It’s the TWIT
show where we let you into the wonderful world of the code monkey. I’m Father
Robert Ballecer, the digital Jesuit and I’m joined by my super special co-host
mister Lou Maresca, a senior software lead for Microsoft. Lou thanks for coming
back onto the show.
Lou Maresca: Thanks for
having me, I appreciate it.
Fr. Robert: Now we promised our audience something
awhile back, that we would take a look at embedded processors. Specifically the
programming that you would need to play with these devices, like the Arduino or
maybe even a propeller chip set. Something that wasn’t quite
the conventional programming language that we had been playing with here on the
show. And we’re going to get to that but before we do that, Lou, you’ve
got some news about the internet of things.
Lou: Yeah, that’s right. Right now there’s approximately 4.9 billion connected devices in use
this year. And they’re saying 1 in 5 developers now work on IOT projects. Which is pretty interesting if you think about it. From home
automation to connected devices to health devices to wearables, and so we’re
looking at almost 19 million developers worldwide and 19% of those are doing IOT
related work. So that’s a lot of people actually working on IOT devices if you
think about it.
Fr. Robert: Lou, hold on a second. IOT is one of
these things that have been a buzzword for probably the last 2 years. People
are always saying oh it’s about the internet of things and big data, we’re now going to get data points from everything,
from traffic signals, from home appliances, from your thermometer, your smoke
detector. But I’ve seen something different and maybe you’ve seen this too,
which is, it’s not so much that there was a new field called internet of things
and people started building internet of things, things, it’s that everything is
now enabled to be part of the internet of things.
Lou: That’s right, I think one of the biggest things is, what are they actually doing when they
integrate these little devices into your world, into your life? And to me, I
think it’s really taking those devices and kind of, where are you bringing that
data, where are you merging that data together? That’s really kind of the key
to what the internet of things is about today, is taking that big data and
making sense out of it all.
Fr. Robert: Right. Now I remember there was a
gardener study that was talking about how sensors in devices could result in
15% savings in just the food and beverage industry alone. Which leads me to the
question, where’s the money here? So if you’re a programmer, and remember,
we’ve talked about how money is not the reason you get into programming, the
passion for programming is why you get into programming. But that aside, if a
programmer watching our show right now started saying maybe I want to start
doing IOT programming, where are the studies saying money is going to be?
Lou: The biggest value today in IOT is
definitely not necessarily the sensors, because you could put an unlimited sensors together and be able to get data out of
them. The key really is making sense out of the data, its housing the data. The
services that wrap around the data is where the money
is. So you can have all these different sensors, especially around wearables,
that you’re pulling all this data from a person’s body, what’s useful for that?
What are you going to do with that data? Are you just going to show them their
heartrate? What’s that going to do for them that they can’t already do by just
doing this, right? so I think that’s kind of the key is, those services
wrapping those IOT devices is really where the value is for that kind of
device.
Fr. Robert: The Architect in the chatroom is saying
“now I only program for the dollar bills yo”. That’s a semi-joke, but it’s also
true, which is, if you’re going to learn a specialty, carve out that niche, you
kind of need to make sure it’s going to be able to pay the bills. But here’s
something that I saw at CES, and again, I want your expert opinion on this. We
saw a lot of companies that seemed to be presenting on new services that maybe
focus on the analytics of things instead of the IOT. So in other words, every
company is doing an IOT enabled thing. Smart bands and health bands and fitness
bands and refrigerators and dryers, but it seems as if the real money, and maybe this is where the programmers can get an
early leg up here, is taking the data that you actually get from those sensors
and turning it into something useable. It’s no longer enough to say “this is on
the internet”, it’s got to be this is on the internet and this is the kind of
data and the kind of forecasts that you can make.
Lou: Right. That’s the key is forecasting. You’re
taking these models, you’re training these models with this
massive amounts of data coming in and then you’re forecasting, you’re
recognizing data that actually can give you forecasts. So like for instance, you’re
doing things like pattern recognition and anomaly detection where you’re
identifying things that are kind of out of bounds. You’re doing predictive maintenance.
You’re detecting problems with a car or with your heart device. Optimization. How can you optimize things going forward?
Prescriptive, being able to get into saturations and give things for people
that they don’t actually know they need. And of course situational awareness,
so if you’re in a situation and you don’t see this over here, maybe the device
can actually show you that, increase your vision, that kind of thing. So that’s
really where all these are coming from, but the key is where is that data going
and how is it making sense out of it all? So that’s where the power lies in the
IOT.
Fr. Robert: Lou I’m glad that you found this story
because this ties right in with the segment that we’re going to be doing today.
One of the things that Smitty brought up at the very start of his segment was
that when you start looking at embedded programming, and actually you could say
this when you start looking at IOT, it’s not necessarily what I can do, it’s
about what problems do I have and then how am I going to solve them? We’re
going to go right into that. We’re going to jump straight into this segment
that we recorded with Mark Smith where he’s going to be talking about taking an
Arduino and doing something interesting with it. But first let’s take a break
and thank the first sponsor of this episode of Coding 101, you know them, you
love them, they’re the fastest way to get online with
your portfolio, with your work, with your blog, with whatever piece of retail
business you want to bring to the internet, its Squarespace. Squarespace is
that one place you can go to on the internet to easily get your project or
portfolio on the internet and I love Square Space because they’re always
improving their platform. In fact they just released Squarespace 7. That makes
getting started much easier and they have a unique web presence that is built
up over templates that they give you. It’s now more all in one, it’s simpler to
navigate and it’s simpler to operate in 1 seamless experience. Squarespace 7
allows you easier editing. You can edit on 1 screen which means you no longer
have to toggle between site manager and preview mode. You can even preview
designs in divide modes - that you see exactly how it will look on tablets and
mobiles. Now it also offers instant access to professional stock photography
from… It’s now integrated into the package. They’ll allow direct purchases
inside the platform from getting images at just $10 each for your site. No more
having to jump out, get an image imported into Squarespace, make sure all your
licensing is taken care of. It’s all in 1 interface. You can get google branded
email with Squarespace 7 so you can have the branded email for your small
business and it’s automatically set up when you set up your Squarespace
account. They’ve got templates, designed for specific professions which this is
a big one. All their templates have been beautiful but now they give you the
option to switch between different classes of templates. You can move between
templates for musicians, artists, architects, chefs. They designed those
templates, those category specific templates so that you can find the one that
looks right for the project, for the business, for the industry that you’re
trying to represent. On Squarespace 7 the developer platform is now on a beta
which means that you can customize your site exactly as you wish. If you’re a
developer you have access to the same platform that Squarespace uses for its
own site – complete code control They also give you e-commerce with all
subscription plan levels that includes the ability to accept donations which is
great for non-profits, cash wedding registries and school fund drives and it’s
easy to use. Yes, sometimes you’ll run into a ram but it’s easy to get it
solved because Squarespace offers you support; 24 hours a day 7 days a week.
They’ve got an army of folk in their forums giving you self-help articles and
video workshops to browse at your leisure. It also starts at just $8 a month so
it’s not going to break the bank. That includes a free domain if you sign up
for a year. The Squarespace portfolio, the note, metric and blog mobile apps
are on the go extensions of your website so that you can monitor and make
changes from anywhere. They include the hosting so again it becomes a 1 stop
shop. You don’t have to worry about buying different services from different
providers. It’s all from 1 place. It’s all in a square space. Here’s what we
want you to do. We want you to start a free 2 week trial with no credit card
required and start building your website today. When you decide to sign up for
Squarespace make sure to use the offer code c101 to get 10% off and to show
your support for Coding 101. To begin using Squarespace 7 now existing
customers can go to the setting tab to activate all of your new features. We
thank Squarespace for their support of Coding 101. A better web awaits and it
starts with your new Squarespace website. Squarespace, start here, go anywhere.
I’m standing here with Mark Smith. Mark, we had you on the show before, it was
for a wildcard interview and you explained what you do at DefCon. For the folks
at home, can you tell them again, what’s your involvement with, I’d say, the
coolest hacker conference on the planet?
Mark Smith: Well, I spend most of my time in the
hardware hacking village working on various different projects. This past few years I’ve been doing the DefCon dark net
project. Which is kind of inspired by Demon and Freedom TM by
Daniel Suarez. Where one of the many projects that I did was to, I don’t
even know.
Fr. Robert: Well you created the dark net badges.
The idea was that you had these badges that people could solder together. And
they had to create them because they came in their components. You had to solder
these things together. You could actually synch them together with people who
offered knowledge. So the idea was not only did they learn how to solder, how
to load up the embedded device, but they also had to go obtain knowledge to
obtain points. Which is basically the plot of Demon and Freedom which is, when we have these networks of people who interact with
one another to gain experience, it’s a better world. You promised that you
would come on the show and give us some embedded program knowledge. So that’s
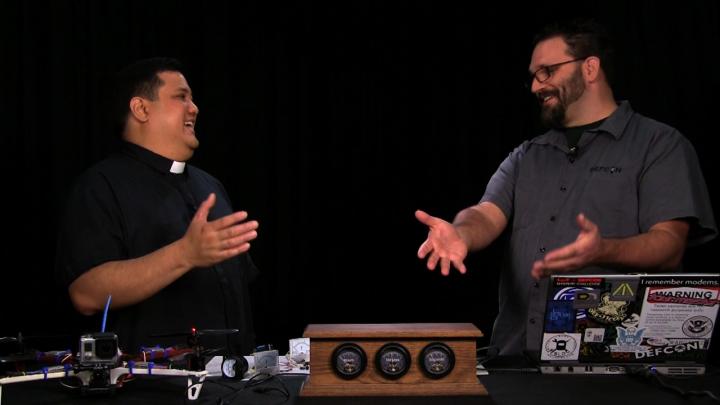
what we’re doing here today. This seemingly beautiful clock in front of us is
actually not any sort of standard clock at all. I’m not sure if the audience
can see it but these are actually standard gauges, panel meters that take volts
and they tell you how many volts are coming into the meter. But you have
repurposed this a little bit. It’s no longer a standard clock. In fact, if we
turn it around I think the folks will be able to see that that’s an Arduino.
Mark: It’s an Arduino and a real time clock
and a few potentiometers and some wires.
Fr. Robert: And what does this do?
Mark: Well, it tells the time, just like a
clock. So the whole point is that it is a micro controller and it loads the
time off the real time clock which is that board right there. That little blue board hanging off the top. And then the
Arduino is programmed to output the correct analog voltage so that the meter
reads the correct time.
Fr. Robert: Very cool. One of the phrases that make
me wonder if people actually understand what they’re talking about is when they
say oh, I’m just going to internet enable something. Or I’m going to add an
Arduino to it and its going to be an internet of things thing. It’s a buzzword.
But a lot of people don’t understand how that actually works. You don’t just
slap an Arduino onto a refrigerator and all of a sudden it’s an internet refrigerator.
Can you tell me a little bit about what you need to do before you even pick up
any hardware or do any embedded programming, what are the steps that you take
to say “this is a project I can do and this is how I should do it”?
Mark: So first you have to know what it is
you’re trying to accomplish. You want to know what your inputs and outputs are
right, and this particular case we’re going to be taking the time from the real
time clock and turning it into an analog voltage to read on the panel meters. On
a refrigerator what are you going to be doing? What are you controlling with an
Arduino? Are you going to be reading the temp? Are you going to be storing it?
Are you going to send it to a computer to be graphed over time? You have to
understand what it is you’re trying to accomplish. You can’t just slap an
internet on to something and say “hey look, its IOT!” so you need to understand
what it is you’re trying to accomplish and then choose the right tools for that
job. The job is not, I’m going to go put the internet on it. The job is I’m
going to read this particular value and then perform some action. I’m going to
take some inputs and I’m going to do some outputs and I need to put the box in
the middle that’s going to convert those inputs into the right outputs.
Fr. Robert: It’s interesting that you put it that
way because that’s actually the methodology that we gave to our audience in
talking about any sort of program. Any time you want to program, you need to
figure out what is it that I have, what do I want it to do, what kind of data
can I take in and what do I expect to push out? And unless you’re doing those
steps, then all you’re doing is putting together a bunch of hardware that may
or may not do what you want it to.
Mark: Exactly. One of the things they taught
us in computer science classes is that you can optimize- if you have a program
that has no outputs- you can optimize it into a no op. it does nothing. If you
have no output, all it is, is a bunch of input, and it doesn’t do anything with
it, you can perform all the competition you want, but if there is no output
there is no point in writing that program at all. So you need to have some sort
of an output to have an effect on the world. That what your ultimate
goal is. To change the world in some way. And generally
those outputs require some inputs. Not all the time, but most of the time they
have some sort of an input that goes into that.
Fr. Robert: Well if it’s going to be useful it has
to have an input. Otherwise it’s just doing the same thing over and over and
over again. You want something to be able to react to its environment. Or react
to the place that it’s tied into. In order to do something
useful. Now in order for us to do that we have to understand what kind
of inputs we can get and what kind of functions we can get. Specifically we’re
dealing with embedded processors. Now we’ve got here some Arduinos.
Mark: Correct. This is an Arduino Uno. It’s
an R2. One of the older versions. But it is. And you’ll
note that the big chip here is an at mega 328. 18 mega made by Atmel. It is a normal “standard” micro
controller. But what the Arduino folks did is they wrapped this board around
it. They gave it a power supply, a programming port, and some standardized
headers over here that made it very easy for other manufactures to make what
are called shields to go on top of them. And this is a prototyping shield. So
we can put components into the holes and run wires around as necessary. To rig
things up on kind of a temporary basis, try it, break it, realize it didn’t
work, pull it out, try something else. And go from
there. And then when we’re done, we can rig up something like that. Where you
actually hard wire all of the components in place in a point to point fashion
and it’s still on top of an Arduino. But it’s much more permanent. The wires
aren’t going to fall out like they would on the bread board.
Fr. Robert: This sort of programming, these sort of chips, have been around forever. There’s many different
platforms, each are good at something, or a few things. But what Arduino did,
they took that stuff and put it into an easy to use package. So people could
actually start to learn embedded programming. For comparison, this is one of
the quad copters that I built. So this is a 450 class. This is actually, inside
here, this is a flight controller that’s actually using an at mega. It’s a chip that allows me to upload a sketch. So if you learn Arduino
programming you learn the programming that you need to do things like the multi
we controller, which, all it does is take inputs. It takes it from the sensors.
It knows these kinds of pitches, it has a barometer and this has an input for a
GPS. So it can take that input and then I can use that in my sketch to say, if
the angle is thus, increase the thrust on this side so it levels out. And so
on. That’s exactly what you do when you want to try to program an imbedded
processor. It’s really not that complicated as long as you know from the
beginning what are my inputs and what do I want it to do. So let’s go a little
bit deeper. Now we know what this is and ultimately we want to show the folks
how to make something like this. We’ve talked a little bit about what we need.
I need to know what my inputs are, I need to know what my outputs are, I now know what we’re going to be playing with. What do they
need to do when they’re looking around? Because there’s going to be people out
there to say this is the module I wanted, what do I need to buy and have before
I start programming next week?
Mark: You’re going to need the Arduino itself, there are lots of different flavors of Arduino. Uno’s,
Leonardo’s, Duos, Megas, all kinds. They all have different features and inputs
and outputs. So you want to find one that is capable of doing whatever it is
you’re trying to accomplish without being over spaced. You don’t want to have
too much because then you’re just spending a lot of money on things and a lot
of power budget on things you don’t necessarily need.
Fr. Robert: When you say over spaced, what are the
differences between the Arduinos?
Mark: So the Leonardo and Uno are actually
very similar. The main difference is in the USB IO. The Leonardo, the USB is
built into the main processor which lets you do things like I am going to write
a sketch that makes my Arduino look like a USB keyboard. Or a
mouse. You can actually talk on the USB bus from your sketch. The Uno
doesn’t do that. It just has a serial port out to another processor that
converts it into USB. So it’s only a USB serial port. But some of the other ones
have much more differences. Like the Mega is a much bigger board. It has a lot
more inputs, a lot more outputs, it has more memory, I believe. It’s got more.
So you kind of want to size your micro controller for the project that you’re
doing. In my case, I am reading from a real time clock, I’m doing a very little
bit of math and I am turning it into an analog output. So as long as the main
Arduino has 3 analog outputs, which it does. It actually has 6. And it has the
ability to read from an I squared C bus, which it
does. To read from the clock, then it serves my needs for this clock. So I was
able to use some of the smaller and cheaper Arduinos.
Fr. Robert: In the next episode we’re going to be
giving people a sketch that they can load up onto an Arduino to make it do
something. But right now can you show them what the interface looks like? Because there’s an IDE for this chip. For
this platform. What does it look like and can you run us through some of
the things that we can start playing with before the next episode?
Mark: Sure. So the Arduino IDE, basically it
is a text editor, like what we have on screen here, combined with a compiler.
And in this case, also because we need to upload our final product onto a chunk
of hardware, it also includes the code uploader. So what I have on screen here
is just the blink code that comes with Arduino. It’s very simple, it has a set up function and a loop function, which are the 2 default Arduino
functions that you need to write. And all it does is it sets a pin mode 13 to
output, we’ll go over in more detail what this means. And then it does that in
the setup which runs once. And then in the loop, all it does is sets pin 13
high, then it delays for 1000 milliseconds, just waits, then it sets it to low
and sets it for another 1000 milliseconds. And then as the name of the function
implies, it loops. It goes around and around and around and does the loop
function over and over again.
Fr. Robert: We’ve covered loops in several
different languages here on Coding 101, and I’m sure my audience is looking at
that loop and saying wait a minute, there’s no condition. This thing would
never stop right? It’s just going to keep looping and looping and looping?
Mark: Correct. So the way Arduino does its
code is that there are 2 functions that always have to be in an Arduino sketch.
Set up and loop. Set up gets executed once, at the very beginning when the
devices first powers on, and then it calls loop. And when loop exits, it calls
loop again. And when loop exits, it calls loop again. And it just continues to
loop over and over and over again. So that is the basic structure of an Arduino
sketch. You can also write loops inside the loop function to do your own
looping for whatever you want. But the way the Arduino works is it just does
the same thing over and over again.
Fr. Robert: Which is what you want it to do because
it’s not a multipurpose processor, it’s an embedded processor. You want it to
always be looking at the same instructions. Otherwise it would run once and
then just sit until you rebooted it. So if I am writing in a sketch, it’s
always going to have those two parts. If I ever write a sketch that doesn’t
have those two parts, it won’t even compile. Now if you go back to that screen,
this is a wonderfully simple piece of code. In fact, this reminds me of some of
some of the code that we would get on the DefCon badges. Like the ones that we
could actually program and we could start changing the LEDs. Now when you look
through this, what are some of the features of the program, aside from the fact
that there is two parts that you think people should start to be aware of? So
you’ve got digital write, delay, and digital write again. Why is digital write
there? What does that do?
Mark: So one of the things that separates embedded programming from programming that you
would do on a normal computer, a full sized computer, is that you are
interfacing to hardware. And so you need to have, if you are developing an
environment like that, like the Arduino folks did, you need to be able to make
it easy for the programmers to interface with that hardware. So rather than go
into all of the assembly nitty gritty to flip the output pin on the device and
so forth, they just wrapped it up in a function. And it’s called digital write.
It means write this value, to the pin. So this line here is literally taking
the digital pin called 13, and we are setting it to high. Which means put a
high voltage on it? In this case either 3.3 or 5 volts. I’m not sure which one this one is. Otherwise if you write digital write low, it’ll
bring it down to zero volts. So it’s a very simple way of affecting the real
world. What this program is meant to do is it’s meant to blink an LED on and
off. On for one second, off for one second. So it’s a very
simple demonstration of how do I make my code change something in the real
world.
Fr. Robert: Alright. One of the other features here
that we should probably talk about is it doesn’t just have to be on or off. You
can actually do more with the pin, which is vital if you’re going to do
something like the clock. Because of course this clock has way more values than
you have pins. So you have to have some way of saying set it for x value, x
value plus something, x value plus something, and just keep going up and up and
up. We don’t want to get too much into the clock already, but there is another
feature about this, which is, this doesn’t give you high voltage. This isn’t going
to give me enough power to do something like a gauge, which is why you would
need something like a proto shield because you’re going to have to add
components to turn your programming into useable output.
Mark: Correct. So in this case, you went the
other direction. The meters are current devices. Even when they’re measuring
voltage, they are current devices. So the actual mechanism, that coil right
there is measuring how much current is being sent through that wire. It doesn’t
care about the voltage across the wire. And then they add extra components
inside the meters to turn a voltage into a current to make it gauge correctly.
Fr. Robert: So right now you can see the Arduino is
actually increasing the amount of current on seconds in order to make it match
up with the numbers on the display. So it actually shows you seconds. I’m not
sure if people realize, this is actually working right now.
Mark: Right now, you can see the seconds
moving because they’re pretty easy to see. If you look closely at minutes, which
we probably don’t have enough resolution to do here, minutes actually ticks up
by every 15 seconds. There are 240 ticks on each one of the meters, so the
minute hand goes by every 15 seconds, every quarter of a minute.
Fr. Robert: Right. Let’s talk a little bit about
this proto board. Because this is something that I think a lot of people are
going to want to do. Because you want to be able to add and
remove components without doing a lot of soldering. When I first started
with electronics, this was the thing. I had a bread board, I would put LEDs, I would put watt jumpers between the LEDs and components
just to figure out what that component did. Show me what a typical assembly
would look like. You’ve got some components here, what would I put on this board
in order to make it start working with my Arduino?
Mark: So we have proto board here, I don’t
have any circuits in mind, but let’s go ahead and hook up a potentiometer. So
that is what’s called a 10 turn, or in this case a 25
turn potentiometer. It’s just an adjustable resistor. So this one is a 10k so I
can turn the little screw head on the top and make it any value between 0ohms
and 10,000ohms. And then we have these wires that with the little hard pins on
them and you can just plug that into any one of the outputs of the Arduino and
then plug it into a hole on the board. So something to note about these proto
boards, the way they work, they just look like a sea of holes. But if you were
to plug in a wire in that hole in the very corner over there and then plug in a
wire in that hole there, on the other end, each one of these rows is all
connected. So all the holes on that row are connected, all the holes on the
next row are connected to each other and so on all the way down. And then on
this side as well, they’re connected separately. The idea is that you can put a
chip across the gap in the middle and you’ll be able to get access to all of
the pins on either side. So that’s why we had to hook up the potentiometer this
way so that I can get access to all of the pins. Because
there are 3 pins on the potentiometer.
Fr. Robert: Right because if you turn it sideways
they’re on the same line.
Mark: Exactly. They’re all in the same row, you just shorted all of the pins together. So that’s
how the bread boards work. You can plug components into the bread board and
then you can plug jumper wires between pins on the components and make a very
simple circuit very quickly, very easily without having to do any soldering,
without having to fab any boards or do any circuit layouts or anything like
that. It’s very quick iteration. You can experiment and figure out what works.
And then once you have a circuit that you know works, then you can solder it and make it more permanent and be done.
Fr. Robert: In just a second I’m going to ask you
to give people a preview of what we’re going to be doing over the next three
episodes of Coding 101, but something that we heard from Steve Gibson, and one
of the things that he told us was look, this is about foundational knowledge.
We understand that you could go out and could buy something that could tell you
the time. A lot better than this. You could go out and
you could buy things that would do most of the functions that you might create
with an Arduino, but you don’t get the knowledge. You don’t understand the
underlying workings of the things that you’re using. So what kind of advice
would you want to give to someone who is going to buy one of these kits? What
do you want them to play with between now and next week when you’re actually
going to show them how to program?
Mark: What do I want them to play with? Well,
the Arduino IDE comes with a lot of good sample code. Looking into those would
be a good option. And just think about what problem they have in their life
that they might want to solve that they think something like this would solve
for them. So that’s where all of my projects come from. It’s not a, oh, I want
to play with an Arduino, what should I do with it? This one is more gratuitous.
It’s pretty. It’s an art thing. But I’ll give you another example, my fish tank
aquarium controller. I have a 55 gallon aquarium at home and I wanted to be
able to control the lights and give my fish sunrise and sunset at sunrise and
sunset. Again, it’s a little bit gratuitous. But it’s one of those things I
thought I could do. So the input would be what time is it? And then the work
that the controller would do would be to calculate what time sunrise and sunset
are on any given day. And then the outputs would be alright, I’m going to
output an analog voltage and I will have to amplify it, I will have to have a
board that turns a small voltage from an Arduino into a large voltage for the
LED lighting in the fish tank to slowly ramp the lights up on the east side of
the tank, and then slowly ramp up the lights on the west side of the tank. And
then of course it went overboard and I have red lights for sunset and dawn and
dusk and I got a blue light, it just goes overboard. I’ve got 6 analog outputs
and I’m only using 2, what could I do with the other 4? So the advice I would
give would be to figure out something in your life that you wish you could do. Some
problem that you have, or just some sort of an artistic crafty thing, whatever
it is. Just start thinking about what are the inputs and what are the outputs.
And chances are, if you can enumerate what those are, there will either already
be modules that can do that for you, or you can research that one particular
thing and there will be some instructional tidbit on the internet that shows
you how to do that thing.
Fr. Robert: Mark Smith, thank you very much for
coming on. Thank you for being our code warrior for the next couple of
episodes. Could you tease the audience with what they’re going to see next
week? So we’re assuming they’re going to get all the hardware that they need
and they’ve loaded the ID on the platform. By the way, it will work Linux, Mac,
PC, doesn’t matter. Get it, get it working. What will they be doing come next
week?
Mark: So there is my tease.
Fr. Robert: Every language needs to start with
Hello World.
Mark: Every language needs to start with
Hello World. If nothing else, it proves that you know how to compile and build
and put on to the platform and all that fun stuff.
Fr. Robert: And believe it or not, it’s not very
far from what you’re seeing right now to this finished product. Because this gives you all of the information that you need. It gives us a way to get stuff into the Arduino, a way to get stuff out, or
outputs, from the Arduino and its showing us that it can count the clock, so
that’s all we need. So look for the show notes because they’re going to have
links to all the components that you need to buy if you want to follow along.
In fact, if you don’t want to build this, if you took Mark’s advice and you
just figured out something that you want to do in your life, something that you
need, that’s fine and all of the lessons that you’re going to learn from this
module will help you because it will show you how to program the Arduino. But
if you do want to build yourself a really snappy clock then go ahead and buy
all of those components on the show notes and we’re going to show you how they
work. Until next time, that’s Mark Smith, he’s been our code warrior and back
to … me, in the studio? We want to thank Mark Smith for dropping the knowledge
about embedded programming on us. He’s going to be coming back for 3 more
segments where we’re going to talk about how you take the Arduino and turn it
into something useful. Don’t forget that you can follow him on his Twitter account, it is the way to find out what he’s doing. Just go
to twitter.com/smittyhalibut. Now we will be getting back to some of our
discussion about embedded programming but before we do that, let’s take a
moment to thank our second sponsor of this episode of Coding 101. We are a tech
agency, so of course we talk a lot about communications. In fact, in the shows
I do, the Coding 101 and Know How and This Week in Enterprise Tech, I’m every
week bringing up new tools, new sweets that people have developed to be able to
communicate better. But even in a world of email and chat and 15 different
types of telecommunications, we sometimes need a type of communication that’s
set up exactly for business. And that’s why we’ve got HipChat. Now what is
HipChat? It’s fantastic. It’s business communications. I know there’s going to
be people out there going wait a minute, we communicate in my business. We’ve
got email, we’ve got text, and some of us have pagers. We have voicemail, we
have video calls. But even though that may work and even though that’s a good
way to communicate, there are plenty of sweets out there, HipChat is
specifically designed for businesses. And businesses are the ones who are going
to love HipChat because it allows you to keep a history of what your
communication looks like. I’ll explain why that’s important. When your team
communicates, when they use a variety of programs, from email, IM, texting,
cloud storage, document sharing apps, they have little bits of pieces of the
answer everywhere. And if you’ve ever had to do forensics on your project
planning to figure out where a good idea came from, or where a bad idea came
from, you know that you want an easy way to look back through time. Through the
time of your communications and figure out what happened when. That’s what
HipChat lets you do. It gives you a time machine so you can see the genesis of
that next great idea. They give you IM, video chat, document sharing, screen
sharing, system updates, and code sharing integration, which is important for
our audience, in one simple platform. Email is too slow, meetings get
sidetracked and regular IM doesn’t work well for groups, but HipChat keeps your
team in synch. And it works from any device no matter where you are. The best
part is that HipChat integrates with the top developer tools like GitHub, Gira,
Zen Desk and more. You go to their website and check out the 57 services that
HipChat plays nice with to see if maybe you don’t have to do much integration
at all. Just turn on HipChat and start working better. They bring your entire
project and team together in one communication suite. It’s easy to set up, it’s fun to use, and it makes you productive. Now here’s
what we want you to do. We want you to try HipChat Plus. You can get your team
on the same page in seconds. I want you to try them for free, no credit card
required. Visit HipChat.com/c101, click on “start chatting” to sign up now.
Then invite a few team members and all the features are free for 30 days. After
the free trial you can always stick with the freemium version. Remember, that’s
hipchat.com/c101 and here is a super-secret piece for everyone who wants to act
now. If you sign up now the first 100 signups are going to get their free trial
extended to 90 days. That’s hipchat.com/c101. Hipchat.com/c101. HipChat, your team, your project, in synch, instantly. And we thank HipChat for their support of Coding 101. Now Lou, what did you
think about that? I mean, embedded processing, Mark was all about explaining
that it’s not necessarily about the hardware, although we love focusing on the
hardware, it’s about that idea of finding something you want to do, finding a
problem you want to fix, figuring out your inputs and outputs and then, only
then, starting to spec out the hardware that you’re going to need.
Lou: Super powerful stuff if you think about
it. If you know what the device is that you need and you find a way to hook
them together, they become an aggregate of a system that can control a lot more
things and do a lot more things than you could actually do by yourself. So
that’s where the power of IOT devices come from and it’s some awesome stuff.
Looking forward to next week!
Fr. Robert: And that’s really the difference
between a lame IOT device and a good IOT device. A lame IOT device is, here’s something that we added a chip so we could connect
it to the internet. A good IOT device is something where you said, you know
what, this would be better if we had visibility into it over the internet,
that’s why we should make it. And I think that’s something that Mark really
gets. Now really quickly I want to run through some of the parts that Mark
suggested that you get. So if you want to follow along, if you want to go step
by step and build your own clock, because that’s what we’re going to be
creating, here are the parts you’re going to need. The first one is an Arduino
Uno. Now this one you can find on Amazon and you’re going to find it for about
$24.95. It’s a fantastic device, very easy to use. You can get a lot of clones
out there, but I would really suggest that you try to get an authentic one
because some of the clones have issues with some versions of Windows. The
second thing is a protoshield. You’re going to find this at solarbotics.com. This
was the device that Mark showed you that goes on top of the Arduino. It’s a
shield that plugs into the pins on the side which will allow you to extend the
capabilities of the board. It allows you to solder in new components, etc. The
third thing is the RTC, the real time clock. You absolutely need this if you’re
going to be doing the clock. We’re going to explain why in the next episode,
but if you jump over to this you can again, get this from amazon. Its $6.99, its free shipping. And then you’ll need some 10k
potentiometers. Get this over at Amazon, it’s not going to cost you that much.
Now here’s something Mark and I talked about. You could buy 5 of them for $5.43
or you could buy like 100 of them for $30. So if you’re going to be doing a lot
of these projects in the future, consider getting a larger pack. And the last bit that you’ll need are the analog volt panel meters. You
can get these from Amazon. But if you live near a Halted Supplies store or a
Surplus Supply store, often you can get some much nicer looking ones. Mark was
a big fan of the aviator ones. The rounded dials! But those are going to cost
you between 3 and 10 bucks a pop depending on what style you like. All together
this project is going to cost you just under $70, including shipping. So if you
want to follow along, that’s a really good way to do it. If you want to cheap
out you can get a clone, a knockoff Arduino and a knockoff protoshield, it’ll
knock off $10-20 off the project, but I’d go authentic. Lou, what do you think, is this a project that you might want to play with?
Lou: Definitely. And I would say definitely
stay authentic. This way you’ll get better tool support and you kind of know
where the compiler comes from and ID and all that stuff. So I’d stay with the
authentic stuff.
Fr. Robert: One last bit before we go. These are
some of the devices that I use on a daily basis. These are all embedded
processors. So this is a KK2.15 flight controller. These are both multi flight
controllers that I use, and this was actually the badge. This was the
conference badge from DefCon 2 years ago. These are using ATMIL chips, these are using propeller chip sets. But these are
all embedded. So whenever I create a custom firmware for my flight controllers,
I use this USB controller to tie straight into the serial board. The I2C on
each of these boards and it allows me to reprogram the firmware. Now this
obviously has a very dedicated use, but the nice thing is that the wisdom that
Mark is going to be dropping on you is the same wisdom you’d be using to
program any of these. So embedded programming, it’s not just for geeks anymore.
Next time we’re going to be going into the actual programming. We’re going to
be showing you how to assemble some of the hardware and Mark is going to
explain why you need a real time clock. But until then I want to thank my co-host,
Mr. Lou Maresca, a Senior Software Lead from Microsoft. Lou, where can they go
to find out more about you?
Lou: On Twitter, @LouMM,
and about me, Lou MM as well. And all of my work during my day job is at
crm.dynamics.com.
Fr. Robert: Fantastic, and
you’ll be here next week, to help spread the knowledge to all the boys and
girls. Until then there is some information that we need to let you know. We
know that this is a lot of information and we want to make it easy for you to
follow along on the projects. So we’re going to make sure that in our show
notes we’ll have links to the places you can buy the individual pieces as well
as where you get to download the Arduino IDE and a few helpful hint sites so if
you want to move ahead in the class, you can do that. But in order to get that
information, drop by our show notes page, at twit.tv/code. You can find our
entire back catalogue of episodes which is important because it’ll let you
download entire modules if you want to learn what we did in C Sharp or Perl or
PHP, it’s all right there. It also gives you a place where you can use that
little dropdown menu to get every episode of Coding 101 automatically
downloaded into your device of choice. We make it easy because we love you.
Also, we do this show live every week. Now it’s on Thursday at 1:30 pacific
time. Starting in March, we’ll move to 2:30 pacific time on Mondays. You can
join us at live.twit.tv. And as long as you’re watching live, jump into our chatroom
at irc.twit.tv. Until next time, he’s Lou Maresca, I’m
Robert Ballecer, end of line!