How to Use Print Center on macOS
AI-generated, human spot-cleaned.
Managing printers on your Mac doesn't have to be complicated. The Print Center utility in macOS provides a central hub for all your printer-related needs. Whether you need to add a new printer, check supply levels, or troubleshoot printing issues, Print Center has you covered. Let's explore how to use this essential utility effectively.
Finding Print Center
There are several ways to access Print Center on your Mac:
- Using Spotlight: Press Command (⌘) + Space, then type "Print Center" and hit Enter.
- Menu Bar: Click the search icon in your menu bar and search for "Print Center."
- Applications Folder: Navigate to Finder > Applications > Utilities > Print Center.
Managing Your Printers
Once you open Print Center, you'll see all your connected printers in the sidebar. The interface provides several helpful features:
Viewing Printer Status
- Green circle: Printer is connected and ready to use
- Yellow circle: Warning or alert (like low toner/ink)
- Red circle: Printer is unavailable or disconnected
Adding a New Printer
To add a printer to your Mac:
- Click the + (plus) icon in the bottom left corner
- Choose how to connect:
- Default: Uses Bonjour to discover nearby printers automatically
- IP: Connect using the printer's IP address
- Windows: Connect to printers on Windows networks
When using the IP option, select AirPrint if your printer supports it—this makes the printer available to all your Apple devices.
Checking Supply Levels
- Select your printer from the sidebar
- Click the i (information) icon in the top toolbar
- Look for "Supply Levels" to see the status of ink or toner cartridges
Managing Print Jobs
In the sidebar, you can see:
- Jobs: Current print queue
- Completed Jobs: Recent print history
For active print jobs, you can:
- Pause: Click the pause icon to temporarily stop printing
- Cancel: Right-click on a job and select "Remove" to cancel it
Accessing Printer Settings
When you select a printer and click the information (i) icon, you can:
- Rename the printer
- View the printer model and driver version
- Access the printer's web interface by clicking "Show Printer Webpage"
- Check supply levels
- Use "Find Printer" to reconnect to a missing printer
For Multifunction Printers
If your printer includes scanning capabilities:
- Select the printer
- Click the scanner icon in the toolbar
- This will open Image Capture for scanning documents
Additional Options
Right-Click Menu
Right-clicking on a printer gives you options to:
- Make it the default printer
- Add it to the Dock for quick access
- Remove the printer (useful for troubleshooting)
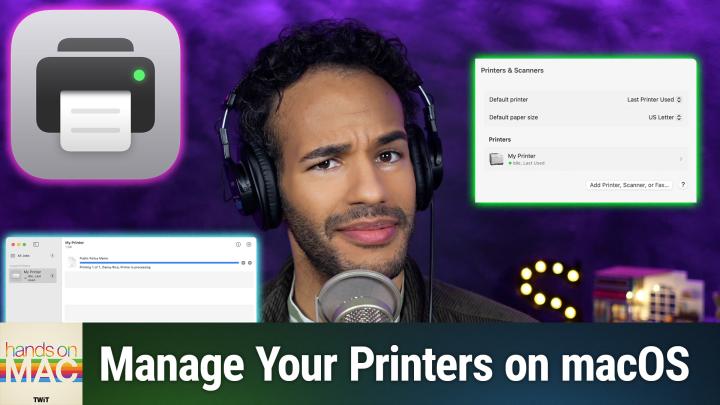
System Settings Integration
From the Print Center menu bar, select "Printers & Scanners Settings" to access:
- Default printer selection
- Default paper size
- Option to reset the printing system (helpful for troubleshooting)
- Print test page feature
Troubleshooting Tips
If you're having printer problems:
- Try removing and re-adding the printer
- Use "Reset Printing System" in System Settings if multiple printers are having issues
- Access your printer's web interface through Print Center to check for firmware updates or deeper settings
Conclusion
Print Center is a powerful yet straightforward utility that helps you manage all aspects of printing on your Mac. It provides a clean interface for adding printers, monitoring supply levels, managing print jobs, and troubleshooting issues—all without needing to install bloated printer software from manufacturers.
For those who still rely on printers at home or in the office, mastering Print Center will make your printing experience much smoother and more efficient. Tune into Hands-On Mac for more excellent Mac advice!