Know How... 129 (Transcript)
Netcasts you love, from people you trust. This is Twit! Bandwidth for Know How is brought to you by cachefly.com.
On this episode of Know How we are going to be teaching you some premise wiring for Ethernet lovers, a little bit of augmented reality back with Epson’s Movario glasses, oh and you want to know how to segment your network? We are going to teach you how.
Father Robert Ballecer: Welcome to Know How, it is the Twit show where we build, bend, break and upgrade. I’m Father Robert Ballecer.
Bryan Burnett: And I’m… the tri-caster says auto play?
Fr. Robert: And for the next 40 to 50 minutes we are Going to be taking you through some of the projects that we have been working on so that you can geek out on your own. But first things first, Bryan. You got haircut.
Bryan: I did get a haircut.
Fr. Robert: I just noticed that.
Bryan: I've had a haircut for like two weeks now, Padre. Or is it the face haircut?
Fr. Robert: The face cut, that was it.
Bryan: We all look the same to you don’t we.
Fr. Robert: You do. I can't tell the difference between you and Alex and Leo.
Bryan: You can only tell by her voice.
Fr. Robert: I know. It is this cute thing. But seriously, before we get into the meat of the episode there is a little something something that I have been watching for a while. There is a project going on over at JPL, the laboratory here. It is in our backyard. At least part of it is.
Bryan: We have a very large backyard.
Fr. Robert: They have been looking at different ways to explore Mars. And specifically they want to use a multi-rotor. Not a drone, not a quad copter. But a multi-rotor.
Bryan: What is the difference between a multi-rotor and anything else?
Fr. Robert: This just uses two propellers. It uses counter rotating propellers to offset the torque. We talked about that a little bit before.
Bryan: Who uses helicopters like that?
Fr. Robert: Exactly. But it is a multi-rotor. It has more than one rotor, that is all that it means. The issue that they have when they do probes for Mars is they typically use satellite imagery, because we’ve got a couple of satellites that are circling the planet, to figure out where they should land to get the best potential sites for sampling soil and rocks. But once you get the rover on the surface of the planet it has got a really limited view of what is around it. You can’t get the super fine detail from space that you get from the ground. So, do you really want to risk having your multimillion dollar probe land into just absolute nothingness and then wander around for a year not even knowing where the good stuff is?
Bryan: So this would fix the problem of being able to relocate to further distances?
Fr. Robert: So the idea is they’ve got a craft that weighs about 2.2 pounds. It is a kilogram. It is a multi-rotor helicopter that can fly once a day for about two or so minutes, maybe closer to 90 seconds.
Bryan: I like the little crate it has attached to it.
Fr. Robert: It’s got to be super small and it’s got to be super durable. Now this thing can get enough altitude and get about 500 m away from the rotor. So the idea is you get yourself a little bit of elevation, you can scan the horizon and get a much better view than you would be able to get from the rover. And then it can figure out where the rover should travel the next day.
Bryan: Oh. So it’s like a little scout.
Fr. Robert: A scout. That is the whole idea. There are some major, major technical hurdles in flying in Mars. People are going to say but oh there is less gravity so it is easier right? And that is true.
Bryan: But there is also less atmosphere.
Fr. Robert: There is also less atmosphere. Which way more than offsets. So the gravity is about a third of Earth normal, so it is 3.7 m/s squared acceleration due to gravity. On earth it is 9.8. Which is good because it means that objects aren’t going to be held down as much on Mars as they are on earth. But, there is also less than 1% the amount of atmosphere on Mars as there is on earth. And that is important because the more dense it is in the more propellers bite. The more lift that they will generate. Now we know from our quad copters that there are a couple ways to get more left. The first one is to spin it much faster.
Bryan: The other way is bigger props.
Fr. Robert: That is basically the only two ways you are going to do it. Either more surface area so you create more left or spend the same propeller faster. There is a limit to how fast you can spin it. We are actually going to show you this in the new built. We built a new quad copter that spins the props so fast that the edge is are just squealing. They are no longer generating lift they are just cavitating.
Bryan: They are just cutting the air. It is kind of scary actually.
Fr. Robert: And kind of creepy. So what they did is they went ahead and they made 3.6 feet propellers. Remember this is a tiny little device. It is like mylar. They don’t need them to be really stiff because you are working in a very thin atmosphere. And that generates enough left for that thing to fly close to two minutes, about 500 m away from the rover and get up high enough to shoot some pictures, relay them back to the rover and have the rover relay them back to earth. And the people on earth can say, we should be going that way.
Bryan: There is something really cool over there, let’s go check it out.
Fr. Robert: That is not the only thing that is challenging about flying on Mars. The other thing is that there is no magnetic field. Remember that Earth has a hot spinning core…
Bryan: Whereas Mars does not.
Fr. Robert: The magnetic sphere is toast because it is cold or who knows. There are actually some great theories, we should do an episode just on Mars.
Bryan: Let me finish the Martian first.
Fr. Robert: There is no magnetic field so you can use, like on earth we use magnetometers so we know which way is pointing.
Bryan: Like a compass.
Fr. Robert: Yeah. There is none of that. So you can basically only use images. There is no GPS system on Mars. So you have to be able from the imagery to know I was heading in that direction yesterday and I want to go 3° this way but I can only do it by what I see, not by any sensors that I have.
Bryan: Okay. That is fascinating.
Fr. Robert: And the other part is that it gets cold. Really, really cold. The average is -80°F and it gets down to -190°F at the poles. Electronics just don’t work past about -30°F. Weird things start to happen and you start to lose. Especially the batteries. Batteries are basically fatal at 0°F.
Bryan: I’ve had my motorcycle battery killed because it sat out one night when it was really cold.
Fr. Robert: And so, when you look at this you need to be able to get enough power from the tiny little solar cell. Right at the top of the propeller assembly, that little thing is a solar cell. So all the power that this craft needs to generate is coming from that little solar cell. Now that has to create enough power to give the battery enough power to make it fly for two minutes a day but also to keep it warm through the night. Because it is going to have to run heaters so the battery and the electronics don’t drop below that fatal point.
Bryan: Oh jeez. This is not easy.
Fr. Robert: It is not easy. It sounds easy, like Oh I could do that. This is what they think it will do. Remember there is no radio control on Mars. It’s got to have all the logic built into the craft to figure out where it can and cannot land. If this thing flops over there is no one to pick it up.
Bryan: Fortunately the Martian landscape doesn’t have any trees.
Fr. Robert: But it does have rocks. So you need to have a craft that can land hard and stay up right. So that is what they are doing. They are testing this over and over again to make sure that it is going to be able to handle most of the scenarios. They want to be able to use this thing for about a month. But, most of the rovers that they manufacture to operate for 90 days so who knows how long it might actually go. This is actually a mockup of how the rover would work…
Bryan: If there were Astronauts on Mars? You wouldn’t have to worry about the batteries with that.
Fr. Robert: When you think about this program aside from those wonderful flying machines, The advantages are actually huge for the Mars program. Because you are already talking about multiple billions for a probe, the rover program. This is actually adding a $30 million ticket. And it is not a whole lot of weight. It is 1 kg. So if you could add this to an existing rover program and greatly expand the usability of that rover, it is a win – win.
Bryan: It give so much more range to the rover than it would if it was just sitting there without the little drone scouts that go out and look around at everything.
Fr. Robert: Because right now, as we said NASA is figuring out where each of their rovers should go based on satellite imagery, but satellite imagery is taken from way way up. Which doesn’t give you the fine detail that you could get from a camera that is 100 feet off the ground.
Bryan: Coal.
Fr. Robert: There you go. Now, that is all we are going to talk about multi-copters on Mars. But we did want to address a question that has been asked over and over again. We are kind of reaching back because we covered this way back when we talked about premise wiring here on Know How back in one of the first episodes I did solo. At the beginning of last year. But we have had a lot of people say wait a minute I want to set up a network in my house and I want to do the wiring on my own. How do I do it? Some people have said should I buy a 300 foot cable and run it through my house? You can do that. It is a little bit messy and we want to give you a better way to do it.
Bryan: Definitely. It looks like you’ve got the set up to show us how.
Fr. Robert: These are all the tools that I use. I’ve got crimper’s and cutters and this is an old set of dyke. All it does is allow me to cut cable. These are keystone jacks and we are going to talk a little bit about that. These are the heads for ethernet cables. This is a coupler, couplers are always useful because it allows you to connect to cables with the QuickLink in case you want to do some testing. This is an impact tool. I will explain what that means. And then this is a tester. This is a nice tester. This is an expensive tester. They don’t make these anymore but I love these old net tools. These were fantastic. Not only can they do everything from simple cable testing that they could also test the status of the network. You don’t need this, in fact you can buy something for $10 that basically does what we are going to ask of this tool for this particular episode. But, it is nice to have something like this because when you get more advanced you have more options.
Bryan: Especially for you because you like to do the network stuff and you do it a lot. But maybe if you are planning on doing it at your house and then also planning on doing other people’s houses for them or something, it might be a good investment.
Fr. Robert: It might be. It is just the stuff that I like to have in my tool belt. This does let you fix so many things that might be wrong with your network. There are so many times where I am helping someone troubleshoot over email or over the phone and I just want to say it could just be a wire. Can you easily replace the wire? This is a good way to do it. So, here is what we are going to do. We are going to show people how to use the T568B wiring standard. There are a couple of other standards including T568A, but B is the one that almost everybody uses because it was designed for commercial use and everyone just kind of settled on it.
Bryan: The broad spectrum.
Fr.
Robert: The broad
spectrum. T568B. If you are going to wire to a standard, then why are two that went. We are going to explain what that means in a bit. This
is category five cable, we had this down in the basement. This is category 5E
so this is good up to a gigabit. So I am going to give you a link that of cable
that is way short. I am using my pair of dikes just to cut.
Bryan: Thank you. I will be
connecting.
Fr. Robert: I am giving you a nice set of clippers. I am going to cut myself another little length here and we are going to start with how to do a simple cable. I just want it to look like the store-bought cable right here. I want it to have Ethernet cable in the middle and I want to have two heads on either side. So I can connect devices. I would not suggest that you do this to save money because this has actually become so cheap you can go to Monoprice and get yourself a box of jumpers but this is always good practice to have because those longer runs that you want a custom link this is a really good way to do it and make sure that you don’t have a lot of excess. The worst thing is that you get a long run and you have a loop. That is just kind of sitting.
Bryan: A long time ago when me and my dad did a project like this and we ran cable through the house. We wouldn’t have been able to do it unless we got the cables ourselves and cut them. So we could have the exact length for the master bedroom, the bedroom, the living room.
Fr. Robert: The other part you are going to need is this. The crimpers. This is a really old set of crimper’s. I bought this on eBay about 20 years ago.
Bryan: Was eBay even around them?
Fr. Robert: Actually no. You know where I bought this? I bought this from Fry's electronics before I entered the Priesthood.
Bryan: A brick and mortar?
Fr. Robert: A brick and mortar. This was the super cheap seven dollar model. This is a nice one. This kind of tools are actually going to cost you upwards of $150. Because they have replaceable guys and they are super custom. Very nice, very good for crimping and I’m going to let you use those.
Bryan: If you had a studio engineer you could steal their tools too.
Fr. Robert: We already took Alex’s tools. They are all gone. Okay, so in addition to this we are also going to need some heads. These are self-crimping heads. And the reason they are self-crimping is when I put this in the Tee of my crimper, it is actually going to squeeze down those tiny little gold contacts that you see in the head and it is going to penetrate through the installation of the wire, make contact with the copper and it creates a nice firm connection. There are eight of those. This has eight pieces of copper that are done in pairs so they are twisted pairs. They are colored and we are going to show you with the colors mean. Now we need to strip some of the insulation off of this wiring because as it is, I can’t access it. You can either use these dikes, this might actually be easier for you at the beginning, you are going to want to go an inch and a half down from the top. I’m going to use these really cheap ones and I just make a little score. You don’t want to cut all the way through because if you cut all the way through you are going to be cutting into the conductors. And you just pull off the edge. There you go. Now you can see the nice little colored strands. The first thing you want to do is check the base of your wires here, you want to make sure that you did not get any of them if you see copper on any of those it means you’ve got to start over because you cut too deep and you are now cutting into the insulation of the individual conductors and that is bad.
Bryan: I am trying to be delicate. But we will see.
Fr. Robert: Actually here let me show you a really cool technique. And this one also has blades on both sides. The easiest way to do it is don’t move the crimper, but move the wire. So take this and score the wire with just barely enough pressure to hold it and you turn the wire so that you cut into the conductor and then give it a little tired and when you give it that tug it is going to strip the insulation so you can do just that. Okay? Now in here there is this little fuzz, that is actually fiber glass and that gives it strength. So as people are pulling on the cable it is actually putting the pressure on that and not on the copper. You can get rid of that. You don’t need that at all you can just cut it off. As you can see, inside I've got a couple different colors. I’ve got brown, green, orange and I've got blue. This is very important. Those colors are absolutely necessary because I want my heads, I want both ends of the cable to match up. So I need to remember the order into which I put them into the plug. Otherwise I am going to have cross connections and weird connections. So, that T568B standard state that I need to wire white/ orange, orange/ white/ green, blue/ white/ blue, green/ and white/ brown/ brown. That is it right there and you can’t find this on Wikipedia so if you go to Wikipedia and type in T568B it will give you that wiring standard. There are people who are going to say wait a minute! Look at this. White, orange, orange, white, green, blue, white, blue, green… why would you do that? That is so weird. The reason why we do it, we have that little flip actually reduces the amount of cross talk that you are going to get in the connector.
Bryan: What is cross talk?
Fr. Robert: Cross talk is whenever you have wire plus signal equals antenna. And you are going to be broadcasting signals back and forth and if you do that and now you actually decrease the amount of throughput because there is a lot of interference and a lot of retransmissions. They figured out by splitting that second pair you are actually going to reduce the amount of signal crosstalk that you are going to get. So it is physics and it works. If you want you can go ahead and create a straight through cable, just for you. Just make it all for pairs straight down and compare the throughput between that and a properly wired cable and you will notice the difference.
Bryan: Is there any required link to reduce crosstalk or does that matter?
Fr. Robert: Well that is the fun thing. This is actually way too short. Anything about a foot you don’t have enough space for it to complete a complete wavelength. And that is bad. You end up with standing waves. That is not good. I always say to make the cable at least 5 feet. Make it by feet and then there is a maximum limit depending on how much speed you are trying to push through. And we will talk about that a little bit later. So we know that we want orange and then we are going to want to start with green, then blue then brown. So, sort it out like that. Then you need to and twist. Here is the funny thing with and twisting. You want to and twist but you don’t want to untwist all the way. The strength of the pair is by keeping it twisted as much as it can until it gets into the socket. If you untwist it all away down to the conductor, or the insulation, you actually increase the probability of interference again.
Bryan: Okay. Mine look like they kind of came undone a little bit is that okay to just twist it back?
Fr. Robert: Yes, just twist it back. Exactly. What we are going to do is twist the conductors and remember we want white/ orange, so make white/orange first, then orange and then we want white/green, then blue, then white/blue, then green. That is our little flip. And then we want white/ brown and then brown. There we go. And so, I am going to rub it back and forth to try to get it back in the rows and now I look like…
Bryan: White/orange/orange, white/green/blue, white/blue/green, white/brown/brown.
Fr. Robert: So white/orange/orange, white/green/blue, white/blue/green, white/brown/brown. And you want that from left to right.
Bryan: You want brown on the left?
Fr. Robert: For me, your left you want orange over here to brown on your right.
Bryan: Okay.
Fr. Robert: You are going to take the head and you want the contacts to be facing you. Not the clip side, you want the contact side to be facing you. Now if I just put this on like this you are going to notice how these wires, these conductors, will go straight and but I am going to have a connector that looks something like that. Now, I don’t want that. I want this had to go all the way down to the insulation. Because there is a little click here at the end that is going to snag on to that insulation and it will hold it. It will give it strength.
Bryan: So mine is….
Fr. Robert: You are going to have issues. And so, this entire thing is about half an inch. You are going to want to take your dikes and slip down to about half an inch of cable. Everything else goes. And then I am going to take my head and I am just going to insert these and as long as I have them in the right order when I push they will go right into and underneath the gold teeth. And so there are two things to check. Make sure before you cramp that you got the right order. So I’ve got white/orange/orange, white/green/blue, white/blue/green, white/brown/brown. And you want to make sure that the insulation is in the base of the head. Now, that I have this I can take it and put it into my tee crimper. This one is right here and this one is right here. It is on the edge. But when I do this, when I squeeze it is both pushing down the gold teeth of the head and it is squeezing against the insulation so that it is going to make nice firm contact. Now here is the thing. If you buy yourself one of these cheap ones you are going to have to squeeze a couple of times. I would suggest that you advance it a little bit and pull it back and keep crimping. Because these cheap ones are cheap. And they don’t bite everything at the same time.
Bryan: What is the difference in price between these two crimpers?
Fr. Robert: $7 and $150. So it might be worth it for you to squeeze a couple of times. But again this is a really nice tool. And see this one actually ratchets. So what I have now is I have 1/2 of an Ethernet cable. This has a head on it that has been properly put and I can put one on the edge. So you keep working on that and I am going to…
Bryan: It is taking me a little bit longer.
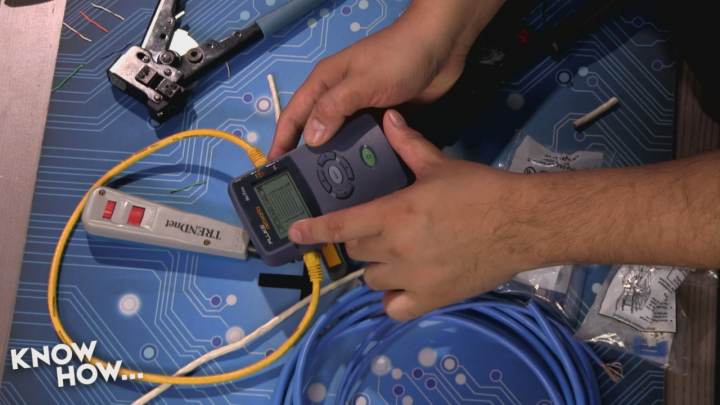
Fr. Robert: That’s fine. That’s what this is for. Once you've got your cable, I am going to cheat and use this one, this is where you want to use your tester. So you’ve got both ends and this one allows me to actually plug both sides into my tester like this. I don’t have to do that I could actually use this. This is an end point for the tester. This allows me to hook up to the far end of the cable. And it will basically loop back the single so that my tester knows what is going on with the cable. But in this case I am going to go ahead and turn this thing on and I am just going to auto test it. When I auto test it, it is going to do the wire map and it is going to tell me everything is straight through. All of my connections go from one to one down to 8 to 8.
Bryan: What is that at the very bottom? 5H? Does that mean anything?
Fr. Robert: No, not for this. And the nice thing about this tester is that there are a lot of testers that would do what is called continuity testing. This is just testing the eight conductors and making sure that they go to the eight the other side. But if I have a break, this will actually tell me where in the cable there is a break.
Bryan: Like how far away it is or something?
Fr. Robert: Yes because it does and an echo back. So when it sends a signal out and it hits a broken cable it will actually bounce back and this measures how long it takes it to bounce back. And it will tell you, you've got a break 64 feet into the line. That is super, super useful if you are doing premise wiring through your house because now it isn’t just own no I have to rewire it. It is I’ve got a break 30 feet in and that is where it goes in the wall, I bet I over cramped or something.
Bryan: Or it got caught on something in the attic and got cramped.
Fr. Robert: Right. Very fun tool.
Bryan: I guess that is a great way of testing to see if you did your headpiece properly.
Fr. Robert: Exactly. If you do your head pieces properly it should go straight through. And if you didn’t then the first thing I would suggest if it is broken is… I am going to purposely mess this up.
Bryan: You will have a done a correct one and a broken one before I have gotten this one.
Fr. Robert: I’ve been doing this for years man, it’s all good. But a broken connector, whenever you are making new cables, I would always suspect the crimp first. The crimp is probably kind of messed up and you just need to re-crimp it.
Bryan: So, would you recommend making the cable links that you want, putting on your heads and testing it before you install it?
Fr. Robert: No, to thread it first. Assume the cable you are running through your box is going to be good. We’ve got this. This is cable that we buy from the store. I am just going to assume it is good but what I will typically do is I will run more than one run at a time. I will always run at least two runs through any conduit just because one might break and if it doesn’t break I get a spare. It is all good. So I am going to deliberately do a couple things the bad to this side so we can see what it looks like.
Bryan: You could just do the wrong order.
Fr. Robert: Do the wrong order, break one or two of them, just to show you what a bad run would look like on your tester. So, here we go. Bad cable, let’s run this in the tester. Keep going. It is cool. I am going to go ahead and test this thing. This is a horribly bad cable and we are going to auto test and see with the wire map looks like.
Bryan: So that is the bad.
Fr. Robert: I've got a busted link on three, and then I’ve got crossed over cables on four, six, seven and eight. Basically it is because I didn’t do the lead over. I went straight green, straight blue, straight brown. And if you see this it just means I just screwed up the connection in the head. So cut the head off and start over again. Buy yourself a big old bag of heads because you are going to need them especially if you are first starting out.
Bryan: Have you ever bought an Ethernet cable that has been pre made and it was not wired properly?
Fr. Robert: Yes. Not often. And if you buy from a good source it is not going to happen often. But I have bought from a local store and it was bunk. My rule of thumb is when I am doing a premise set up, before anything goes in I test it. I don’t care if it is straight out of the bag I will at least do a continuity test because it saves you so much trouble shooting time in the end. I don’t understand why this network is not working, everything is brand-new. Just test before it goes in and you are good to go.
Bryan: What is this little guy called?
Fr. Robert: This comes with it, so if I get this… and the reason why they have this is because most of the time you are not going to be able to run both sides. So this is on the far end of the house and I can do my test with this at the far end of the house and it will act as if I have the other in plugged back in to my tester. It should give me the exact same results. It takes a while longer because it has some bounce back. There we go. I’ve got the exact same results and I only have one side of the cable plugged in.
Bryan: Cool. I think I've got mine. So now I crimp both. I’m going to use the nice one.
Fr. Robert: Keep working on that and I’m going to move on to the next part. Because making cables is just one part. It is an important part but it is just one part. What we really want in order to have a super clean installation are jacks. Because this is what makes your network sexy.
Bryan: Right. Because then you can label it, you know master bedroom, living room.
Fr. Robert: You know this. I know you know this. There is nothing quite like running out your network and having all your cables everywhere and then six months down the line you need to rewire something and nothing is labeled. And you are just looking at going, “Do you see a light, is there a light now”? You don’t want that.
Bryan: When me and my dad did it we ran some extra cables with the thought that in the future we will have more a ethernet to plug in. And then we didn’t label where they went so we have these empty keystones but no idea which cable goes to which. It is going to be a headache to figure it out.
Fr. Robert: Exactly. That is why we've got this. This is a patch panel. Let’s say your wiring closet is in the garage and you’ve got four of these. Each of these is 24 ports. And so you’ve got 96 ports. Which is good. You could label each one and you could have documentation to show where each goes. Like these four go to the bedroom, and these two are for the kitchen, and these three are for the TV room etc. Go down the line and make sure you label each one as it goes. But then on the other side I have another Jack. This is what is called a keystone and the reason it is called a Keystone is there are wall mount and wall plates that will just accept these. I can just plug it in and it will be flush with the wall. And the nice thing about that system is that you can get multiple keystones. So you can get them for Ethernet jacks you could get them for coaxial cables if you are running cable you could get them for fiber if you were running fiber. For your audio system. So basically anything that says Keystone will fit into the Keystone system. Wiring fees are slightly different. This is where we are going to use the impact tool. How are you doing over there with that?
Bryan: I'm working on my second one right now. Because I want to test it out.
Fr. Robert: Good stuff. Well you are still working on that I’ve got this prewired one because I didn’t want the audience to wait. I am going to use position number two right here. So I have something in position number one and position number two is down below. You can see, again this is a 568B wiring standard, I’ve got blue, orange, green, and brown. Now always check the manual of your patch panel to make sure you are wiring it properly. But in this particular case it is going to go white/blue/blue, white/orange/orange, white/green/green, white/brown/brown.
Bryan: But that is different.
Fr. Robert: It is different but it will end up the same on the other side. That is why you have to look. I am going to go ahead and cut myself… oh actually I’ve got this. I’m pretty sure this is busted so this should turn out completely wrong. I’m going to do the same thing and I’m going to go ahead and give myself a little snip here like so. And then I am going to strip the wire just like I would if I was doing a standard ethernet cable like you are doing right now. And I’m going to go ahead and cut off the insulation like we did before. And I am going to spread my wires so that they will match up with the wiring diagram here, which again starts with blue/orange/green/brown. And there is no twist, it is going to do the twist for me inside. The wiring is doing the twist. So I go blue/orange/green/brown. I am going to be like that. But I want this on the inside because I want my wiring to be neat so all the wires are in the inside channel and not on the outside. So what I will do is go ahead and one twist my wires again, the same rules apply you want to try to keep as much of it twisted as possible. Because the more you untwist it the more susceptible it becomes to interference. An interference is not your friend.
Bryan: And so this patch panel and stuff… where would you get all this?
Fr. Robert: You can buy it off of Amazon. Everybody has these and everybody has their own personal favorites. Personally I like the patch panels that have keystones rather than these dedicated ports. Because it means I can just terminate into these and then plug them in. It saves me time. But these tend to be a little bit cheaper because you don’t have to buy a bunch of Keystone jacks. So I am going to go ahead and wire this in. White/blue/blue, white/orange/orange, white/green/green, white/brown/brown. Don’t ever do this on TV. okay that is what it is going to look like. I’m not done yet so all I have done is go ahead and put these in the right position but now I need to use this impact tool. Bryan?
Bryan: Yes.
Fr. Robert: A little Something something about impact tools. They have blades. Those blades can be adjusted for what you need. So, for example, depending on the gauge of the wire and depending on what you want to do with it this blade has two sides. On one side you will see that it is completely flat. There is no cut on that. Go to the other side and there is a slight blade. This is the one I am typically going to want to use. Because it will impact and cut the excess at the same time. So I am going to make sure I have that in my tool. It is a very important that the blade goes to the outside. If you put the blade to the inside then you are cutting through the connector that you want. And I say that from experience. I've done that. Don’t ever do premise wiring when you are sleep deprived. Okay, so what I am going to do is the blade goes on the outside like that and I am just going to put it in the groove and give it a nice impact. There we go. And you just go right down the line and just keep doing it. I like to give it a couple because especially since this is a super cheap impact tool and not the most expensive patch panel, I don’t always trust that it is cut all the way through the insulation. Because just like with the heads there are actually teeth inside of here and when you impact it they are supposed to cut through the insulation to be able to make contact with the copper.
Bryan: That is cool. And so, when you push down it kind of pops in.
Fr. Robert: So there is a vee and when you push down it pushes the copper into that vee and it will cut through the installation and make contact with the copper. It should actually cut a little bit into the copper to make that really strong. So now I've got this in two an iPod this jack in one. I am going to test the jack. The idea is that I would use the Keystone Jack to have the other side. So this is the side that is actually in the bedroom. And keystone jacks look just like this. This is a brand new one. And it looks exactly like that patch panel that we just did. It has a bunch of channels into which we put the wires and then we use the impact tool to terminate the wires. So we are not going to show that again because it is the exact same process. Now this is how we would test it. We would take our little fluke thing and we would put it remote. So we had a partner on the other side and we say go ahead and plug it into Jack 1A. So they would put this into 1A and I would have my tester on the remote side, again in my wiring closet in the garage. And I would plug my tester into port 1A. And now I should be able to do an auto test with this thing. So right now it is finding signals down the line against this Jack here. To the little fluke tester thing and then looping back.
Bryan: So it is sending the signal back and then it is going to tell us if there is any interference.
Fr. Robert: So when I check it, it will tell me it is straight through. So I have a clean connection between port one and this Jack. You want to do that for the entire network because we want to make sure that we don’t have cross connection, or broken connections. This is where a more advanced tester does fit in really nicely because it will tell me if there is a break. And if the break is at 0 feet or at 300 feet. That way I know if it is on either end I am good. That is fine because I can just re-terminate. If the break is halfway through the run, I go, “damn”. we've got to rerun that. You can't fix it.
Bryan: I can see that coming in really handy like when we did my parent’s house we ran the cable to what we thought was the master bedroom and then when we would plug it in we had no connection. So we were like, we go the cables messed up, like we have to move the keystone to this one. We got them switched around but we couldn’t figure out why we were getting connection to the one in the bedrooms.
Fr. Robert: We got a really good comment in the chat room. PC guy is mentioning that there are Jack’s out there that don’t require punch down tools. In fact you can do it with this one you just put the wires into the right slots and then you use the cap and push it down. I don’t like those. They always hit and miss. I like having an impact tool. But again that is just me. I am kind of old-fashioned. This gives me positive feedback that it has actually gone down and it will cut off the excess, which makes it nice and neat. We’ve got another person, Sandstrom, who is saying these punch down jacks are a pain if you don’t have enough slack. That is absolutely a yes. Something I should mention, I always give myself what is called a service loop. So I run as much wider as I need and I will leave 3 feet of slack.
Bryan: In case you make a mistake?
Fr. Robert: In case I make a mistake but also because if you don’t give yourself enough slack and you are terminating this. It is inside the wall. And that is a pain. Give yourself just a little bit of a service loop, something that you can shove back into the wall or into the wall mount. If I am really pressed for space, I will make my service loop 6 inches. But at least give yourself enough that you can make one or two mistakes without having to re-run the entire thing. Because that is a pain.
Bryan: Don’t measure exactly the amount that you need. Do a little extra.
Fr. Robert: And actually I cheat sometimes. There has been installations where we have the walls out. We just redid my family home in Fremont. And we will leave little pieces of slack in between the connection joints as it is running through the house, so that we really need it we can pull on it and get an extra 8 inches. You shouldn’t do that, but I do it because I know that things are going to happen.
Bryan: You know your family better than anyone else.
Fr. Robert: Right. But, this is what premise wiring is all about. Premise wiring is repetitive. It is incredibly repetitive. You are going to use the same skills that we just showed you over and over again. But the rewards are incredible. If you are going to be in that house or that office for any amount of time there is nothing like having a custom-made network.
Bryan: And it’s fun. And I think I got better at doing this one. It went a little easier than the other one so we’ll see.
Fr. Robert: We are coming to the end here so we are going to go ahead and see how cranky hippo did. This is the judgmental tester here. This tells no lies.
Bryan: Why did water just shoot out of it? It went in my cup. Hold on. Now, is water bad for network cables? Hold on. Is it okay to plug it in if it is wet?
Fr. Robert: It is fine. Well I've never done this before so let’s see, it might explode. So this is that hippo cable. You know what helps sometimes? You have two crimp all the wires.
Bryan: Did I not crimp them all?
Fr. Robert: That’s okay. It’s cool. I still respect you, don’t worry about it. All right. Here we go. Hands off, I am not trying to modify the test results at all. That's pretty close. You got one.
Bryan: I think it is the water. The water probably did not help that situation.
Fr. Robert: So, practice.
Bryan: So if you need me to come over and help with my network….
Fr. Robert: One out of 8 ain’t bad!
Bryan: It’s pretty bad!
Fr. Robert: We are going to do some future episodes on some advanced premise wiring because there are a couple of tricks for when you start to do things like this. This is freaking monster cable. This is actually what I ran in the house in Fremont.
Bryan: Why is it so thick?
Fr. Robert: This thing can do 10 gig over distance. And believe it or not, 10 gig may sound ridiculous right now but it is not because 80211AC, which is what is called wave 2 devices are coming in now and those can do 7 Gb per second per wireless connection. Which means, you need to be able to give it enough speed to the access point. So when those start coming in that is why we did this in our house so that we could future proof it. This is difficult to terminate. It is much less tolerant of doing things like fun twist in pairs. And actually if you look in the middle here there is shielding, like a cross beam that keeps the pairs separated inside the cable. It is serious stuff.
Bryan: So you are saying if I ever do mess with that I need to practice a little bit more?
Fr. Robert: Probably a little bit more. Although I’ve never seen this where… normally when you have a cross you have a cross all over the place. You have actually managed to cross at the connector.
Bryan: I was just trying to do a test study.
Alex: Padre, can we see yours in the tester again?
Fr. Robert: Okay. So folks this is what a proper one looks like. Where did mine go? Oh here it is. This is what it looks like when you only take 45 seconds to make the cable. It should look like…
Bryan: Instead of taking 45 minutes.
Fr. Robert: It’s cool man. Seriously. It’s all about practice. So that is what it should look like.
Bryan: Mine was pretty close to that right?
Fr. Robert: All right, now. We are having fun with this and we are going to diagnose a little bit. That now is the time for us to take a quick look at something else at CES that I thought was pretty cool. Last week we took a look at Epson’s Movario AR, augmented reality glasses. And I talked about some of the different things that people were doing with them. Like for example, letting you steer your quad copter with them. Well, there is a company called Lyte Shot that has a different idea of what you do with AR.
Fr. Robert: I played a lot of Ingress over the last couple of years. It is a game that Google put out and it is sort of a VR/AR but you have to play it with your phone. You have to be staring at your screen, setting off bursars, setting up shields, capturing portals. It is fun. But wouldn’t it be nice if you could put on a set of glasses and just see the world of Ingress? Well that is what they are trying to do here at Lyte Shot. I’m standing next to Tom who kicked off a wonderful program with Kickstarter to create an augmented reality gaming environment. Tell me what this is.
Tom Ketola: So what we have here is the light shot platform which is an infrared transmitter and an infrared receiver that are parried using Bluetooth to your phone. So something similar to a laser tag. Now you can do much more advanced gameplay. What we are doing here is a game called assassin, which is based on the classic game that people will have played on college campuses for a long time with Nerf guns. It normally required a ref and somebody to keep track of all the rules. And in our case it is all automated! So in this game you would take a Selfie, you are playing with three, four or five of your friends. You start up the game and each of you is assigned another player that you are trying to hunt down and shoot with the infrared beam. You are all wearing lytepot, which is the sensor. And so you have a limited amount of time in which you can complete your mission. If you complete the mission you are assigned a new target and the timer resets and the game continues until there is only one player left. And this was just a simple example of the power of the things that you can do once you start connecting the Internet of things to gaming. We are very excited about all the various possibilities. This is just the first of many games that we are working on. It is going to be an open platform. So other people can make games for our system, people can modify the hardware and our Kickstarter started just a couple days ago so you can now actually order the hardware and we will be shipping in Q3 of this year.
Fr. Robert: One of the things that people need to realize about this is that you are not making a game. You have made a game that you are really building a platform. You are building a framework that others can use to build up their fantasy environment. Now, in fact Google could come in and say we are now going to enable Ingress so that you see the portals in the glasses as you walk past them. That is what I love about this technology. Now, tell me what is the challenge of using something like the Movario from Epson to create your AR game? What is the most difficult thing to do?
Tom: I think the most difficult thing to do that people don’t realize is that when you are using something on a monitor you are just playing a full screen. So you need to be very cognizant of the fact that people are looking through the glasses and so there is a lot of things going on in the real world that they need to pay attention to. So you need to display a limited amount of information for the player, only what is necessary as opposed to trying to display everything to them. So in the case of assassin all we have is a compass dial at the bottom of the screen that is telling you the range, and the direction that your opponent is in, there is a timer in the top right-hand corner that is telling you how much time you have left to complete your mission. And when you eliminate your target you will be assigned a new target and you will see that in the glasses as well. But we are trying to minimize the information in the display. We are trying to copy it off something like a heads up display from a fighter jet. So that you can run around, see what is going on in the real world while you are getting the data that is relevant to you and the glasses.
Fr. Robert: All right. I don’t know how you did this but my glasses are telling me that I have to shoot Carsten. Which, kudos. Very well done. Okay now. Let's get real. We know that you had a phenomenal kick starter but what needs to happen next? Do you need developers? Do you need people to come in and design a wand so that people can fight in a Harry Potter-esque type world? What do you want to see this do in 2016?
Tom: What we really want to see is we want to get people playing mobile games in general, interacting with other people in the real world and not sitting down staring at their phone. So if I can get people to play games and interact with the world around them in various ways than I think that says success for us. And that is basically what we are trying to do here. My background is in development where everything is always a secret. I can’t talk about it with anybody, you’ve got to get approval and with that we were sort of rebelling against that with our product. So anybody can make any kind of game that they want for our system. They don’t have to get permission from us. You can host your own game and you don’t need to ever talk to us. Or, if you want to host your games on our platform then you can pay us a small fee for hosting it. And you can run your own games. If you buy the hardware we are going to give you the STL files for all the peripherals, there is an Arduino inside so you can modify the hardware and make it do whatever you want.
Fr. Robert: Now, did question. Pricing, availability, where do they go if they want to find out more about LyteShot?
Tom: So you can go to www.lyteshot.com and you can find out more about our product. It also has a link to our Kickstarter which just went live a couple days ago. We have been working very hard for several years on this product, the hardware development has been done and we are really trying to get people to just adopt the product. We will be shipping the hardware to people in Q3 this year.
Fr. Robert: Thank you very much for talking to us, thank you for showing off your wonderful dream for AR, and until next time remember Lyte Shot.
Bryan: That is cool. What are you doing? God, you are a dork.
Fr. Robert: The gun game is kind of cool but I love this idea. He showed me the mockup. It would track the movement of your wand so that you would have to do the right combination of movements in order to make the spell.
Bryan: Okay. Okay.
Fr. Robert: That is larking in real world. I can’t remember all the spells. I think that is just the start of what we are going to have with the AR revolution. Remember we films all that before Microsoft made their announcements of the incredible HoloLens. that it is the same kind of technology, which is if you can track what is going on in the real world and map it onto some sort of virtual layer, the possibilities are endless. Not just a video games but then of course a lot of things start with video games. It drives the profit margin and then you start having things like real life CAD. Can you imagine if I could take this mug and it would see the mug and I could do this and start adding things to the mug with my fingers and then have that go straight to a 3-D printer.
Bryan: I think it was the Microsoft commercial for their stuff where it was like mine craft. And they were building the world on their coffee table.
Fr. Robert: I like to liken it to minesweeper. Back when I was growing up, minesweeper and hearts or solitaire where the things that trained people how to use the mouse interface. Those were games that people learn that when I move the mouse here this happened.
Bryan: And then Counterstrike came out.
Fr. Robert: And then Counterstrike came out. This is the same sort of thing. AR is great technology and people are going to say why do games when you can do much greater things. But, when you do the games you learn how to use the tech and once you learn how to use the tech that is when it becomes productive.
Bryan: And Jason just bought the Samsung VR goggles. First thing I wanted to do was play games with it.
Fr. Robert: I can’t use those. Anything that is VR, I get nauseous really quickly. I don’t know. My brain just says this is not real. Let’s stop.
Bryan: Maybe you need to do VR Minesweeper.
Fr. Robert: For me, AR is much better because I actually see. I am looking at you and now there are pop-ups next to you.
Bryan: In case you ever forget, in case you can’t remember my name.
Fr. Robert: Exactly. Well, we are going to see more of that. Now I believe in the next episode we are moving away from AR. We do want to show you a few more things from CES. They are going to be pretty dang pool.
Bryan: The stuff we’ve already seen is pretty dang cool. So I am excited.
Fr. Robert: Now, we know that this is a lot of material. Especially all the premise wiring stuff. There have been people in the chat room who are absolutely fantastic in giving some beginners the clues. But we have people who are saying don’t ever cram your own jumpers, go ahead and buy those. I would actually heed that advice. It is good to know how to crimp it but I would never spend the time crimping for the cables just so that I could patch things in. I would just buy for $25 all the cables I needed. It is not worth my time. Other people are saying always run two Period in fact I typically run like four. Just in case. And also it is not like I’m not going to use them. I am at the point where I always want to plug things in and if I don’t have to plug a switch on the far end because I’ve got enough ports on the far end to get me back into my main switch, of course I am going to do that. Right? So, always future proof. Whenever you are running premise wiring it is so much easier to over do it now than to redo it later.
Bryan: Save yourself some time. The thing I really want to do, if I redo it now, I think we did it at my house when the first Xbox came out. So was that in 2001? So it has been a while. I want to do it where I wire to wireless hubs in the ceiling. Kind of like a fire alarm? And then just to be able to wire the signals through the house like that.
Fr. Robert: I should have taken a video when we did the house in Fremont. We took all the drywall out and we had access to everything. There is about a mile and a half of cable. I had a deal from an old warehouse that I used to work with that gave me all their CAT7 cable. So there was cable everywhere. In places that we had nothing there and had no plans to have anything there. But just in case.
Bryan: That sounds like the ideal situation. Where you have no walls as a barrier for getting cables.
Fr. Robert: One thing we shouldn’t be doing this at the very end. One thing I will say is if you are running premise wiring and this is for your home, spend a little bit of extra money and make sure you get the Plenum cable. Plenum, what it will happen is if there is a fire and it will actually melt it and basically seal itself so that the fire doesn’t continue true any holes that you have made for the cable. It doesn’t help a whole lot, but it helps just enough so you could stop a fire before it spread.
Bryan: Spreading along the cable to another room or something?
Fr. Robert: People will be cutting up between baseboards and stuff. And the fire will go straight through that. So if you have Plenum cable it will actually plug the hole. And give you just a little extra time before the fire spreads through.
Bryan: And is it much more expensive?
Fr. Robert: It is. I’m sorry. The truth is, a lot of people don’t use Plenum, but I always do because that is how I was trained. I will pay the extra. You can do premise wiring without the Plenum but I would not suggest it. In fact it will not be up to code.
Bryan: Okay, well, there’s that.
Fr. Robert: FYI. All right! If you want any of our notes, so that we can show you exactly what we did and we can show you where we bought our parts and the procedure we followed you can always go to our show notes page. Which, Bryan where was that?
Bryan: At twit.tv/kh, all our prior episodes are there too. Especially after this episode you are going to want to run through the show notes. And you know what? I am probably going to have to look through the show notes so I can get my network cable right the next time. There is also links to subscribe or download whichever video or audio version of your pleasure.
Fr. Robert: Good. Good. That is what we do.
Bryan: We make it easy for you.
Fr. Robert: I have 47,000 devices downloaded on podcast every week.
Bryan: I was wondering how you were getting 46,995 downloads.
Fr. Robert: Also don’t forget that if you want to talk to the wonderful people in the chat room, because actually they’ve got some great tips. You should be watching live right now and be in the chat room see you can see what they are saying. You can get some of the wisdom by going to our Google plus group. Just go to Google plus and look for the Know How group. We’ve got over 8000 people in there and they cover topics. Everything from networking to quad copters to how to program a Rasp Pi and Ardueno.
Bryan: And showing off their projects and stuff and showing us up with their projects.
Fr. Robert: Don’t like that. Actually we do like that. If you are not in the Google plus you can also follow us on Twitter. That is a fantastic place to suggest topics for new shows and you can find me @PadreSJ.
Bryan: And I’m @cranky_hippo. And if you want to know where more of the behind the scenes stuff happens follow Alex.
Fr. Robert: Alex is shy but remember he is @anelf3. Follow him and you can see what he does with minesweeper.
Bryan: Oh, careful!
Fr. Robert: Wait. Until next time… I’m Father Robert Ballecer.
Bryan: And I’m Bryan Burnett.
Fr. Robert: Now that you know how…
Bryan: Go do it!