Know How... 120 (Transcript)
Net Casts
you love, from people you trust. This is Twit! Bandwidth for Know How is
brought to you by cachefly.com.
This
episode of Know How is brought to you by Lynda.com. Lynda.com is an easy and
affordable way to help you learn. You can stream thousands of courses created
by experts on business, software, web development, graphic design and more. For
a free trial, visit Lynda.com/knowhow.
And by ifixit. You can
fix it and ifixit makes it easy with free step by
step repair guide, high quality replacement parts and all the tools that you’ll
ever need. For $10 off your purchase of $50 or more go to iFixit.com/twit and
enter the code Know How at checkout.
On this
episode of Know How, your feedback, going to talk a little bit about soldering
bullets and quad copter Avionics.
Father Robert Ballecer: Welcome to
Know How, it’s the Twit show where we build, bend, break, and upgrade. I’m
Father Robert Ballecer.
Bryan Burnett: And I’m Bryan Burnett.
Fr. Robert: And for the next 50 or so minutes we
are going to take you through some of the projects that we’ve been working on
so that you can take them home and geek out yourself.
Bryan: Absolutely. This week we are talking
about pollution.
Fr. Robert: I think we all kind of agree that
pollution is bad. No matter where you stand on the whole global warning thing,
it’s not good to breathe in soot.
Bryan: Yeah, it’s generally not advised.
Fr. Robert: There is a particulate particle that
the world health organization thinks is the most dangerous. That is the 2.5 PM.
And that is because it is small enough that you can inhale it and then it will
get absorbed in your blood stream.
Bryan: That sounds terrifying.
Fr. Robert: That sounds horrible. Imagine what is
in the air of a modern city and then shoot that up into a vein, basically. But
there is one place in the world where it is the worst. That is China. Specifically
near Beijing. The World Health Organization says that for 2.5 PM you can have a
concentration no greater than 25 micrograms per cubic meter. So at 25 that is
not good for you, but it won’t have adverse health effects. Unfortunately Beijing,
most days is about 525.
Bryan: Oh man. That sounds frightening.
Fr. Robert: It is frightening. And actually there
have been a couple of student activist groups pushing for more openness. For
example there was a climate summit in Beijing just last week and what they did
was that the Beijing government shut down all the sensors so people couldn’t
check to see how bad it was. Because they didn’t want to look
bad.
Bryan: Ignoring it will make it go away.
Fr. Robert: Yeah. If people can’t check it on their
cell phone then they won’t know. Now there are students at UC Berkley led by a
man by the name of David Lu, born in Shanghai and is an international student
at UC Berkley. He has decided to create a small device that can actually
measure pollution. Now the cool thing about this is that it is like a pendant
size. It is inexpensive, like $50 to $75 per unit. You can automatically check
your air quality on your smart phone. So sync up your smart phone so you’ll be
able to find out the nitrogen content so like nitrogen dioxide, it will take a
look at ammonia and most importantly the sensors can actually count
particulates.
Bryan: That is very cool.
Fr. Robert: It takes a little puff of air every
once in a while, runs it through the sensors and it will tell you. It can look
for those 2.5 PM. It will tell you how many micrograms.
Bryan: Okay, so if you have this device and it
detects that it’s very bad pollution around what do you do then?
Fr. Robert: Well, that is not like sucking you in.
Bryan: You could walk around in an astronaut
suit or something.
Fr. Robert: I have seen those people who walk
around with those collar locked filters that just blows clean air in their
face.
Bryan: There is that story of the guy who was
selling cans of air.
Fr. Robert: I guess you could do that. But this is
more of an educational thing. It is not going to help you if you are walking
through pollution. But what they are hoping is that because these can be linked
through your smart phones to the internet you will crowd source pollution
monitor.
Bryan: And maybe make a map and see where the
most pollution is. And pinpoint some of the biggest contributors to it.
Fr. Robert: And what you can do is if you have
hundreds or thousands or tens of thousands of pollution monitors rather than
just a dozen or two dozen sensors you can see it at street level, you can see
it in buildings. You can see it pretty much anywhere. And you can make a map of
pollution and say, “It’s a bad quality day. It’s really bad on Mission and
14th. Let’s see what business is on Mission and 14th that might be
dumping stuff in the air.
Bryan: Yeah, let’s avoid that area for the
time being.
Fr. Robert: It’s a cool idea and it takes this
whole crowd sourcing thing to the next level.
Bryan: I like the whole idea of the networking
and things working together. It’s also like if you’ve in one position and you
look out the window and you’re like, okay obviously the pollution is really and
I need to go get lunch. Where can I go that doesn’t have all the particulates
killing me?
Fr. Robert: We actually looked at something not too
long ago, a couple of months back. Do you remember the name of that little
weather guide?
Bryan: Something sky. We actually just set it
up again on the roof.
Fr. Robert: It is the same thing. It is crowd
sourced weather monitor. I t looks at the sky, temperature, humidity.
Bryan: So you can see those little
micro-climates. Micro-pollution climates.
Fr. Robert: So as we move to an internet of things
I think that is going to be one of those things.
Bryan: Totally. I like that idea. All working together and hopefully coming up with a solution.
Fr. Robert: I hope so because I’m tired of
breathing in nasty air.
Bryan: You need clean water? You need clean
air? Just put it in a can. And then don’t worry about it.
Fr. Robert: Clean water, clean air, clean ideas. I’m
thinking of ideas on a website.
Bryan: Like a collection of ideas? I think I
know where you’re going with this.
Fr. Robert: Where?
Bryan: Lynda.com.
Fr. Robert: That’s right. Now Lynda.com is your
repository on the internet for knowledge. We like to say that everyone has a
knowledge hole. This is a good thing. You want a knowledge hole. But you need
something to pour into the knowledge hole. That is what Lynda.com helps you do.
Fill your knowledge hole. It’s like a bucket. Now Lynda.com is an easy and
affordable way to help you learn. You can instantly stream thousands of courses
created by experts on software, web development, graphic design and more. Lynda.com
works directly with industry experts and software companies to provide timely
training. Often the same day that new versions and releases hit the market so
that you are always up to speed. All courses are produced at the highest
quality. These aren’t these home-made YouTube videos. They are great, that is
what I like to do. But sometimes you just want to pay attention to the
material. Not bad lighting or bad audio, not shaky production. Lynda.com gives
you good production so you can focus on the information at hand. They include
tools like searchable transcripts, playlists and certificates of course
completion which you can publish to your LinkedIn profile. And whether you’re a
beginner or advanced, Lynda.com has courses for all experience levels. You can
learn while you are on the go with a Lynda.com map for IOs and Android and one
low monthly price of $25 gives you unlimited access to over 100,000 video
tutorials. Premium plan members can also download project files and practice
along with the instructor. Premium members with an annual plan can download courses
to watch offline which means it becomes your ultimate offline resource. No
matter where you are you can always have the material to help you figure out
how to use Premiere. Or how to mount a camera on a Quad
Copter. Essentially the information that you need is always at your
fingertips with Lynda.com. Now we’ve been doing a lot of work with the new
Creative Suite. We’re moving over to it. We are dumping Final Cut and going
with one thing that does photos and videos. We’ve been using Lynda.com to brush
up on all those things.
Bryan: Because I’ve known all the basics but
now that we are using it day to day or soon to be using it day to day, I needed
to learn up on all the hot keys and everything.
Fr. Robert: Exactly. And that is one of the things
that Lynda.com is so good at. It is not just to go learn new stuff. But to brush up on stuff. Or just to make the connection
between the things you did in Final Cut and the things you do in Premiere. It
is really something that is going to help you improve no matter what you are
doing. Be it business, be it software, video production, Lynda.com has
something for you. Now their new course include after effects tips and
techniques, compositing and effects, writing for the web, google add words,
essential training and excel data mining fundamentals. For any software you
rely on, lynda.com can help you stay current with all software updates and
learn the ins and outs to be more efficient and productive. We’ve got a special
offer just for you. You get to access all the courses free for ten days. Visit
Lynda.com/knowhow to try Lynda.com free for ten days. Lynda.com/knowhow. And we thank Lynda for their support of Know How.
Fr. Robert: Let’s get into some feedback.
Bryan: Dive deep into the feedback.
Fr. Robert: This is one of the segments I enjoy the
most because we get to take the questions and the queries and the projects from
our audience and put them on the show.
Bryan: We’ve both gone through this ourselves most of the time. But then it is nice to go
through the feedback and find out what people are wondering. We’ve got ideas
for you.
Fr. Robert: Let’s kick it off.
Bryan: The first one was from Austin Clark. He
is looking for a laptop. He’s upgrading an aging laptop and it is Windows. It
is his work horse, has Photoshop and Lightroom. He’s
got a 14 inch screen, which is pretty tiny for that kind of stuff. He’s got an
I7, he wants 8 gb of ram,
SSD, a back lit keyboard, touch screen is optional, he would like to have a
digitizer with a stylus but it seems to be impossible for that sort of thing. He
is also maybe, if he can, get a Wackum pad which we’ve played with. But since he’ll be editing photo’s he also wants a
high resolution screen. He’ll definitely want something 17 inches or bigger and
4K if he’s going to be doing that sort of stuff. We have a couple
recommendations for that.
Fr. Robert: Actually he is in one of the
professions that I would say a 4K monitor actually makes sense. Most of the
time 4K monitors are nice, but on 17 inches and below you can’t really tell the
difference. Unless you’ve got a 35 inch monitor or above you can’t tell the
difference between 4K and 2K. But if you are a photo professional and that is
what you do most of the time, your source material will regularly be 4K or above.
So it does make sense to have that extra resolution.
Bryan: It does. When it is on a bigger monitor
it helps a lot. Especially when you are zooming in on photo’s.
Changing colors, contrasts and things like that. It makes a big difference.
Fr. Robert: I know that he’s been doing some
research on his own. If you look at the actual comments. There are a few people suggesting an Asus Notebook. I like their stuff. Dell
Precision 4800 M is decent. It is going to give you an I7 processor, 8 GB of
memory, SSD, 15.6 inch screen. Very nice, little bit over his
price range. He was looking for something between $1300 and $1600. That
configuration is probably going to run somewhere about $1800 or $1900. This is
my personal favorite right now. I actually haven’t even finished the review on
this. This is the new Acer hotness. This is their gaming notebook. B15 Nitro Black addition. It doesn’t have the touch screen,
which actually is fine. It has a 15.6 inch screen, NVidia G force GTX860M which
is great if you are going to be doing video editing, because it is going to
help with the rendering. It’s got 16 GB of memory, Intel I74710HQ, that’s a 2.5
GHz cpu with 6 MG cache, it’s got 256 GB SSD, plus a
1 TB rotating. Which is nice. If you are a creative
professional you want that. You get the speed plus the capacity. It starts at
$1300. This one is slightly different because this one actually comes with a 4K
screen.
Bryan: Yes, and we were playing around with
that earlier when I was watching Greg. And from a distance I couldn’t say if it
was 4K or 1080. It looked really sharp.
Fr. Robert: It is super sharp. For videos that are
coming in, because you have a lot of moving pixels it is hard to see the
difference. When you do photo editing, you actually do see the difference. The
larger dot count, the smaller space between pixels, it actually does show off
more detail when you are really zoomed in on something. The other thing that I
like about this, and I think he would like the Nitro series, is a lot of
Notebooks they explode the color. It pops. They are super saturated. This
doesn’t. It is a matt screen so you are not going to get that false saturation
of color. Which lot of Notebooks won’t do. So that
matt screen will actually give you better color reproduction so that final
output that you do is actually going to look right.
Bryan: I like this. The view angle is pretty good
too.
Fr. Robert: This is actually not out yet. Which
means the pricing is not out yet. But if the 1080 P version was about $1300,
street price at $1200, this is probably going to add $400 to that?
Bryan: So you could get the lower resolution
one and then maybe get another monitor that you would hook up to it. And you
were saying it is not a touch screen.
Fr. Robert: What he was saying is that he would
like to have a Notebook with an active digitizer. I don’t know of any Notebook
of any decent mainstream that has an active digitizer. I’m sure there is one
out for the service that will do it, but if you want a power house laptop it is
going to be hard to find that.
Bryan: There are a lot of compromises when it
comes to that. So I would stay focused with the hardware and subtract the
digitizer and get something additional for that.
Fr. Robert: Options. The Asus is pretty good, Dell is good, Toshiba’s W50 if you can replace the
hard drive with an SSD is actually pretty good.
Bryan: No Mac recommendations there Padre?
Fr. Robert: For $1300? No, I’m sorry. I just don’t.
Some Macs would be great. The new 5K iMac would be fantastic, but it is going
to be way out of his price range.
Bryan: And I think he did say he wanted to
focus on Windows. Makes sense!
Fr. Robert: There you go. That is the Notebook you
should take a look at. We’ve got another one here talking about batteries.
Bryan: Right. This one comes from Bostjan Cadej. Shout out to BC. He
was asking our last show when we were talking about batteries. The lifetime of some of these batteries we’ve been using for our
drone projects. He was saying battery or cell life time distribution or
a life time cycle. Life under severe and mild usage, battery discharge when not used, battery long term storage for minimum damage and
longer lifetime for minimum discharge while stored. So, how are LiPo batteries we used for our Quad Copter different from
the low ion batteries or other batteries?
Fr. Robert: This is actually a segment we were
going to get to in the second arc of Quad Copter because it is a bit more
complicated. Relax man. No! I’m glad that you asked because we will talk about
it. LiPo chemistry is actually lithium polymer.
Remember one of the differences that we spelled out in the episode where we
talked specifically about the batteries is that unlike lithium ion batteries
that you might find in some consumer applications, this is in a bag. It is a
plastic bag that is holding the chemistry rather than a solid cylindrical cell.
It has a stabilizing agent to make it where it doesn’t leak all over the place.
If it gets pierced it is going to burn. Don’t do that. As to the other part of
your questions, we did address a lot of that. For example the cycles, this is a
typical lithium ion battery – a lithium polymer battery. You are going to get
about 500 cycles if you charge it at 1C. We talked about the formula for what
that means. This is a 1000 ml amp battery which means 1C charge would be
charging it at 1 amp per hour. Now, if you run it at its maximum charge rate,
the big battery pack has a maximum charge rate of 4C which means I could charge
that at 8 amps per hour. I could do that and it would charge a lot faster but I
go down from about 500 cycles to like 50 cycles. So the more power you dump
into it the more the chemistry is going to de-stabilize. Which means the
battery will puff up. It will no longer hold a charge much sooner in its life
cycle.
Bryan: Is it important to trickle charge these
batteries?
Fr. Robert: I do. I have a lot of batteries so I
don’t ever need to get a pack charged up right away. So I typically charge them
at 1C all the time. It prolongs the life of the pack and it also means you are
going to get a pack that has an SOC that is more balanced across the cells. So
this is 3 cells inside of here. My max charge is 4.2 volts per cell. If I fast
charge it I might get one cell at 4.2, one at 4.15 and one cell at 4.07. If I
balance charge this at 1C they are all going to end up at 4.2. So I get more
power into the pack.
Bryan: So are these batteries that we are
using for the larger Quad Copters much different than the ones that we are
using for our Trainer Quad Copters?
Fr. Robert: No, they are actually
the same. Quality will differ.
Bryan: That is one thing I was wondering about
because I
Bryan: That is one thing I was wondering about
because when I bought my Quad Copter it came with the 500 ml amp and that one
seems to have the same level of charge each time. But I’ve also been using one
of the 650’s that you bought. It doesn’t seem to hold the same level of charge
and each time it seems to be getting a little bit worse.
Fr. Robert: Just like most things in the consumer
world you can buy good. And sometimes we buy cheap. Some of those are just
cheap, they are not very good. They are not well made. The chemistry is
probably contaminated. So you get weird results from time to time.
Bryan: They are very tiny batteries. And they
are very cheap. So I guess in the end it probably was only $3 or $4. I think
you can buy a five pack for $18.
Fr. Robert: Our thing was, so what if two or three
are bad? Probably shouldn’t have done that but we did. The other question he
asked was about discharge. Batteries will discharge over time. And LiPo packs are no exception to that rule. But we are going
to talk about this when we talk about storing packs. For example when we get
into January and February you are probably not going to be flying your quad as
much as you were during the summer. Because of the weather. You don’t want to fly in the rain.
Bryan: Water proof our Quad copters?
Fr. Robert: When you store it, remember this. The
more voltage that is in the pack, the more voltage that will leak and the more
chances are that you are going to damage the pack. The maximum voltage per pack
is 4.2 volts. The minimum voltage per pack is 3 volts. If you
go below 3 volts or above 4.2 volts that is extremely bad. But when you’re
storing it, you want to store it at 3.85 volts. That is the optimal voltage to
store a pack. The reason is this. If you store it at 4.2 volts you are going to
lose about 2 to 4 % of the charge every month. It is just going to leak out. And
that charge is actually damaging the so it decreases the life of the pack. If
you store it at 3.85 volts which is 50% capacity, you are going to lose about
.2 to maybe .5%.
Bryan: So that is the optimum amount of power
that you want to keep it.
Fr. Robert: I could cold store these for a year or
two. At that voltage, and not worry about damaging the pack. So there you go.
Bryan: Cool. I do remember Steve Gibson and
Leo talking about it for a pretty good period of time because they were talking
about cell phones and laptops if you were going to store one for a long period
of time. You would want to keep the battery at 50%. Don’t charge it all the way, don’t bring it all the way to the bottom. So that is
the next question I have. What about if you discharge all the way to zero and
then recharge to 100%?
Fr. Robert: If you discharge a lithium battery to
zero it will no longer work. It is gone. Don’t even do it.
Bryan: Is it possible then?
Fr. Robert: Yes. 50/50 chance of
it blowing up.
Bryan: Okay, so you are flying your quad
copter and you get it…
Fr. Robert: A lithium polymer, if you go to zero
volts like literally zero volts, the battery is gone. It is never coming back. You’ve
destroyed the chemistry. It means you have literally broken down the insulation
in the battery pack and it will no longer hold a charge.
Bryan: But you would purposely have to do
that. Right?
Fr. Robert: You would really try hard to make that
happen. Now here is something that I’m going to show this tip. But before I
show the tip in a future episode and I will say if you do this, have a fire
extinguisher handy.
Bryan: Like most of the things we do on this
show. Have a fire extinguisher handy.
Fr. Robert: The intelligent battery chargers will
know if the battery pack dips below 3 volts and it will actually cut it. It
will say, under volt and it will not charge it because it knows that it is
dangerous. What you can do on the charger that we have, you can switch from
Lithium Ion to nickel medal high which doesn’t have that limitation. And put 30
seconds of charge into it just to get it over 3 Volts. And then charge it. It
is to save the battery pack. It is exceptionally dangerous. Just buy a new
battery! A $9 battery pack –and how expensive is your house?
Bryan: I like knowing that you can do that,
but I don’t think I’d try it.
Fr. Robert: There are a lot of videos that show you
how to do that. I’m like no.
Bryan: Precautions.
Fr. Robert: And they all say the same thing, which
is don’t do this. Then why are you doing it? Stop!
Bryan: So we have some more stuff coming up
don’t do? Calibrating an ESC. This is from Will. He
asked, “My roommate and I are working on building a car that will serve as a
test bed for various control theory situations. We are using Arduino as the
brains and we will load the control system onto it. One situation is a turbine
drive/friction drive hybrid system. I cannot get the turbine ESC to arm using
the Arduino. I know that with Arduino’s ESC’s can be treated as Servos but the
arming procedure involves going full throttle and then back to zero several
times sing Arduino as the brains and we will load the control system onto it. One
situation is a turbine drive/friction drive hybrid system. I cannot get the
turbine ESC to arm using the Arduino. I know that with Arduino’s ESC’s can be
treated as Servos but the arming procedure involves going full throttle and
then back to zero several times in waiting for the beeps. I can only get the
first beep to happen but then nothing when I go full throttle. How do I arm an ESC with an Arduino”?
Fr. Robert: A little bit confusing. I think we are
having differing terminology so I can going to take a
stab based on what I think he is asking for. ESC is an electronic speed
controller. This is an ESC. This is what an ESC looks like. This is a 30 amp
readytoflyquads.com. He probably has the best hardware and prices on the
internet. And he is a very good guy. He will probably answer your questions. This
is what an ESC looks like. The whole idea is, and we will talk about this on
the avionics segment, you have a control lead and the control lead allows you
to control how much power goes from the battery to the motor. That is what an
ESC does. And now what I’ve done here is I’m set up something to show him how
we calibrate an ESC. That is normally what requires full throttle. When you get
an ESC out of the box it doesn’t really know what is the low
and high voltage.
Bryan: You have to set the parameters for it?
Fr. Robert: Most ESC’s, in fact every one, uses the
same procedure which is you plug it in, you power it
while the transmitter is at full throttle. And you pull it back at low throttle
and it knows that is zero percent and that is 100%. I’m good. So this is how it
works. So I’ve got this receiver, which is bound to this transmitter and it is
tied to this motor and this power lead. So what I’m going to do is I’m going to
turn on my transmitter and I’m going to set it for full throttle. Now I’m going
to take a battery and I’m going to go ahead and plug it in so that it powers up
the ESC and that little beep you hear at the end that means it just measured
the full throttle. If I bring this down you’ll hear it again. So now it means
it is calibrated. It understands that it is at zero throttle and this is 100 throttle. That calibrates your ESC. You could do this one at a
time. One of the things I got is this thing. This is a four to one. This will
allow me to plug in all four of my ESC’s at once. And then plug this in to my
receiver so that I can calibrate all of them at the same time.
Bryan: I like that idea because then you know
they are all set to the same . There is no chance that
you didn’t actually put the throttle to 100% on one of them and you made a mistake.
Fr. Robert: Which is why you do
it. Because these are all providing the carrying
thrust. So if one of them thinks 100% is a different level it will just
keep dipping.
Bryan: And you’ll drive yourself insane.
Fr. Robert: Now it is slightly different with Arduino,
but what I would suggest is to buy yourself a cheap transmitter, something like
this with a receiver so you can easily set a calibration point on your machine.
Bryan: How much is that transmitter again?
Fr. Robert: It is $54.
Bryan: And it looks serious.
Fr. Robert: I’ve beat this
thing up a lot. I think we have one more.
Bryan: This one is cloud backup. We’re moving
all around here. This is from Adam. “What is a good backup service/company? I
have a Linux, Windows, Mac I’m looking to backup. I
like back blaze but I do not offer anything on Linux. Crash plan offers a
version on Linux but for some reason it won’t work on my Ubuntu box. It needs
to support all three, unlimited bandwidth and around $5 a month or $60 a year”.
That is pretty broad.
Fr. Robert: It is pretty broad. Here is the thing. You
can’t get a decent way to sync up data from a Linux box to the cloud. You are
going to pay too much, it’s going to be a little wonky and you are not going to
like the results. What you could do is instead of paying $60 a year for
something, get a really, really cheap windows box. Like bare bones Windows box.
And then you do the super backup solution that we showed off about 10 episodes
ago. Go with SkyDrive or Drop Box. What you do is basically turn that into the
sync point for all your data. It gets synced into that machine and then it is
put out to the web. It is a decent way to do it but I don’t like doing this because
I know Linux people you are not going to want to use a
Windows box. I get that, I understand that. Just think of it this way. Your
windows box can sit in the closet. It’s only job is to
make sure the Linux data gets preserved properly.
Bryan: It is just a head that leads to the
cloud!
Fr. Robert: You can do it in Linux. I will show you
a way to get Drop Box and Sky Drive to work on Linux. There are work-arounds. It is just such a pain in the butt. And the other
thing is sometimes it just doesn’t work. I wasn’t able to figure out why did it
just stop working? I had to re-do the solution to make it work. Whereas, I know
if it syncs to the Windows box, the Windows box will sync it to Drop box.
Bryan: Okay. Is this something we should bring
Aaron in on?
Fr. Robert: You should bring Aaron in. Maybe he has
a way to do it. The thing that always scares me about running those sorts of
services on Linux because those clients really don’t work well with Linux, is that if it fails once and that is the one time you
needed it, you are going to hate yourself.
Bryan: Some sensitive data that you wanted to
try and keep.
Fr. Robert: Now when we come back we are going to
be talking a little bit about avionics. I’m going to show you how Quad Copters
actually stay in the air. But before that, here is a quick video on soldering
bullets.
Fr. Robert: If you are going to spend any amount of
time in the DIY maker arena, you are going to have to learn soldering. In
episode 88 of Know How we had Mark Smitty Smith on
the show to give us the finer points of not soldering like a barbarian. While
most of us will never have the steady hand and iron skills of Smitty we can at least learn enough not to completely mess
up basic soldering. And project quad copter gives us a fantastic opportunity to
practice. Once you get past basic Quad copter kits you will see bare wires and
pads. It is inevitable. And because we’ll be swapping out components, because
of upgrades and maintenance, it is not always the best idea to directly solder
every component to ever other. So we use Banana connectors. Coming in several
sizes, banana or bullet connectors are fantastically efficient, easy to use and
worth their weight in gold when it comes to repairing their gear. Many of the
components you buy will have the connectors out of the box but occasionally
you’ll have to bust out your iron. Here’s how to do it. First look to your kit.
You’ll need a soldering iron, I’m using the worst
piece of heat in my lap, a 30 Watt Radio Shack Iron that was at its peak in the
‘90’s. Just to show you that you don’t need to buy an expensive soldering iron
to do it. You’ll also want a set of helping hands, articulating arms that can
keep wires and components in their proper positions while you’re soldering. Get
yourself some lead free rosin course solder. While you are at it, have a pair
of pliers handy. Start the process by tinning the wires that you plan to put
into the connectors. Heat up the wire and then let the solder flow onto the
strands. This is an important step because it will ensure a solid connection
once the wires are put into the bullets. Speaking of the bullets, there are a
variety of banana plug sized that you can use. The most
popular being 2 and 3.5 ml. The larger the bullet, the more power you
can push through it. Motors with smaller craft tend to use the 2 ml bullets,
while the larger cans will use 3.5 and 4 ml plugs. Once your wires are tinned,
place the appropriate bullet into one of your helping hands. There are a few
ways to join the wire to the bullet, but my method starts with heating up the
bullet until it is hot enough to flow the solder. I place my iron in the
connector, then use the side hole to push through a
little solder. Quick note. Don’t use too much, like
me, I always use too much. A little will go a long way. Now switch the position
of your iron to pass heat into the solder through the solder plug. This will
keep the solder hot and fluid, essentially what you’ve just done is to create a
little solder pod. Using a pair of pliers, move your wire into the solder pod
and allow the heat to melt the solder from the wire onto the tinning. A good
way to know if everything is fluid is to look at the junction in between the
solder in the plug and the wire. If it looks like there is a break it needs
more time. Once you are satisfied that everything is fluid, position the wire
where you want it and remove heat. In a few seconds the solder should cool
enough to become solid. You now have a solid bond between the wire and banana
plug bullet. But you are going to need to insulate the assembly to keep it from
shorting out. Put a length of heat treat tubing and place it over the bullet
and wire and then use a heat source to seal and insulate. Rinse, repeat and
take pride in your soldering skills.
Fr. Robert: We should probably reiterate. That’s
not the iron I always use. I have a very nice digital one.
Bryan: You just wanted to make a point that
you could use that.
Fr. Robert: You could. The iron is a 25 year old
iron. It is horrible. It is bad. But, if you do it right you don’t need to buy
a super expensive piece of gear. I love my Weller, it is fantastic. That tip
has been cleaned so many times you can see that carbonized film just forms
every time I turn it on. It’s very gross and Smitty would cry.
Bryan: Somewhere out there Smitty is just tearing up.
Fr. Robert: But here is the thing. The kit, the
basic kit that we are going to assemble is all non-solder. So it is all bullet
connectors, pre-soldered. Which is nice but when you start getting a bit more
advanced like all of these ESC’s from readytofly.com. These all are bare wire
and bare pad, so you have to learn to solder at least just a little bit. And
there are people in the chat room saying you know what, even if you are good at
soldering if you stop, you forget it. That is so true. It is a skill that
you’ve got to practice once in a while to make sure you can still do it.
Bryan: And I just recently sat down on a
project and if you don’t have all the right tools when you want to do it, it
gets really frustrating.
Fr. Robert: It is bad. You end up with blobs of
solder everywhere.
Bryan: I will tease it a little bit was I was doing
the antennae extension for our controller and the wire that I was working was
itty bitty wire. And fortunately I was using Berk’s really nice soldering kit but it was tough. It was really tough. I had to
practice a little bit before I actually did anything to the board.
Fr. Robert: And you have people who have the
magnifying glass but then you’re like I really want one right now.
Bryan: When you are looking at wires that look
like a hair.
Fr. Robert: And you’ve got Berk saying No you don’t want to solder that one. But you know what it is? You’ve
got to have the right tools. Exactly and that is what we are all about here on
Know How. You’ve got to have the right tools. You could use something that you
find in a tool drawer somewhere. It makes it so much more frustrating and it
just makes it so much more work. Which is why Know How is
always proud to have as one of its sponsors, ifixit. You can fix it and ifixit can help. Ifixit isn’t just a collection of tools, they are a collection of knowledge. They give you ready repair manuals for
everything from your electronics to your appliances to your clothing. Ifixit is a one stop show for knowledge for how to fix
everything in your electronic life. Now from tear town to the iPhone 6 and
other gadgets, you will fall in love with their line of professional tools
built off of that knowledge. Ifixit tools are
designed by their tear down engineers who have torn apart hundreds of devices
and built thousands of repair guides. They know what it takes to work on
gadgets and this holiday season they want to arm you and everyone on your gift
list with all the tools you’ll need to tackle any electronic repair project or
hack. Ifixit offers the perfect 1-2 punch, the
Protect Tool Kit and the magnetic project matt. This is actually my personal
favorite. It is a good way to make sure that as you disassemble things your
projects screws don’t end up everywhere. It is also a fantastic way to label
things so that you know where everything should go when you put it back
together. Now, the ifixtit tool kit is available
right now. It is 72 tools to assist you with any mod, malfunction or
misfortune. It has the gold standard for electronics work. Used by garage
hackers and the FBI. More importantly, their unique tools have been used by
repair technicians everywhere. It includes ifixit 54
bit driver kit with 54 standard, speciality and secdurity bits, a swivel top precision driver, fleck
extension for hard to reach scrUsed by garage hackers
and the FBI. More importantly, their unique tools have been used by repair
technicians everywhere. It includes ifixit 54 bit
driver kit with 54 standard, specialty and security bits, a swivel top
precision driver, fleck extension for hard to reach screws, ESD safe precision
tweezers for delicate manipulation, nylon spongers, metal spongers and plastic
opening tools for prying, scraping, and opening tablets, phones, whatever it
might be. It is light weigh, compact and it has a durable tool roll which makes
it an on the go tool choice for repair professionals and amateur alike. Obviously
home DYI fixers for all use the protect tool kit for door knobs, eyeglasses,
cabinets doors, sink fixtures and more. Right now ifixit is offering both of these. Both the tool-kit and the magnetic
pad for $74.95. Now you can fixt it and ifixit can help. It sure helps us. Go ahead and try ifixit this holiday season. They’ve got something for every
DIY hacker and geek on your list. Head over to ifixit.com/twi to check out their holiday deals, including the protect tool kit and a magnetic
bundle for only $74.95. And when you enter the cod Know How at checkout you’ll
save $10 off any purchase of $50 or more. So it is $64.95. That
is ifixit.com/twit and use the code KnowHow. Ifixit.com/twit
and use the code Know How. We thank ifixtit for their
support of Know How.
Bryan: I just took apart the trainer drone
that we have and the nice thing about it is that it does come with a
screwdriver that you can use, but these have magnetic tips and it makes it so
easy.
Fr. Robert: What I like to do is use screw drivers
that are way to big and it strips the head and I like
to dump the chassis upside down to force all the screws out.
Bryan: And then watch them all fall on the
ground.
Fr. Robert: That’s always the best way to do it!
Bryan: The amount of things that we take
apart, it saves so much time having a little magnetic tip.
Fr. Robert: For us it is not just a luxury. We use
it all the time.
Bryan: I hide them in different places in the
studio.
Fr. Robert: Before Debbie gave me this one she said
she needed the old one back. I said someone took my old one.
Bryan: It was probably me actually. Because I store them under my desk. They are in the Know
Hole.
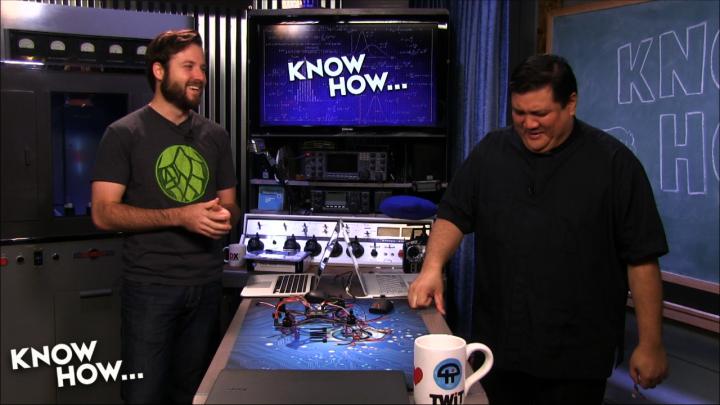
Fr. Robert: All right, let’s talk a little bit
avionics. Because this is what is going to keep our quad
copters in the air. You need to know how your quad copter stays in the
air so you can design it properly. Little teeny, tiny boards. Let’s look at the summary first of all. This is what the avionics package looks
like. Greg is not here today and he normally does our artwork. So sorry about this. You’ve got your fore motors and they
are in a specific location. On most quad copters you are going to find motor 1,
2, 3, and 4. They go clockwise unless the instructions tell you otherwise for
those weird controllers. This is important because the controller needs to know
which motor is on what corner so that it knows where to increase and decrease
thrust to keep this level. So from the motors you are going to go to these
things. These are the ESC’s. So this is a different brand, Afro. The motors
connect to the ESC’s, the ESC’s provide power to the
motors. Those ESC’s are connected to the battery so that is how they get power
to the motor. But they also need to know how much power to supply to the motor.
Bryan: Anywhere between 0 and 100%.
Fr. Robert: Between 0 and 100. Which
is why the ESC’s are connected to this, the flight controller. This is
the brains of the ship. It does not fly without the fly controller. Because
what the fly controller will do is that it will actually keep everything level.
Bryan: Because that is what has all the
sensors on it.
Fr. Robert: Right. It’s got a magnetometer, gyros,
a stabilizer so that it knows if I start dipping on this side, I want to
increase thrust on motor three to get it back up to level.
Bryan: It does it all on the fly so when it is
fighting the wind.
Fr. Robert: Right. We’ll talk about how those
settings change. And of course you’ve got the receiver and it goes into the
flight controller so that you can actually get input from your transmitter into
your quad. This is what the general setup looks like. If you’re going to be
setting up your quad, you’re going to be setting up this. There are no
exceptions. You can add things to the flight controller like a GPS, and
navigation but it is still going to look like this. Now let’s go ahead and take
a look at the setups we’ve got here on the table. This is what a typical flight
controller looks like. For new fliers this is actually a really good option,
this is called the KK Board. You can find these all over the internet. This is
a KK 2.15. Let me give power to this so that you can actually see what it looks
like. So when I turn this thing on it is going to look like this. Inside this
menu I have the ability to set pretty much everything. From how much stick it’s
going to get from the receiver to what kind of quad copter this controller has
been set for. So it is telling you motor 1, 2, 3, 4. But
I could load a bunch of different settings, it is actually possible to set this
up so that it is an x copter, a single copter, a counter rotating copter, an octi-copter, a septi-copter so
that when you roll those layouts the screen will actually tell you where you
need to wire your ESC’s in order make it possible for the controller to control
it.
Bryan: That is really cool. How much does this
board cost?
Fr. Robert: Like $20 or $30. These are not
expensive. This is the one that I would recommend for crazy, crazy beginners. Because all of the instructions are on the screen.
Bryan: You can thumb through the menu system. Is
there any point you need to hook it up to a computer to update software or
anything like that?
Fr. Robert: Nope. This thing is
ready. You could. You can actually plug this into a USB adaptor to upgrade the
firmware. But assuming that you’ve got the KK2.15 or the KK2.19, the software
is going to work fine. And there are a couple of things. There is one thing I
want to show you here really quickly. If we go to the self-leveling settings,
right here this is actually very important for beginners. Because especially
that P number. That is telling the controller how much input it can give to
stabilize the ship. We’ll see that when we get to this part of the project quad
copter I’m going to show you what happens when you have your P level set way
too high and when you have it set way too low. When it is too high you get osculations because it is going to overcorrect, it ends up
fighting with itself all the time. If you set it too low you will have lazy
rolls where you’ll start to flip over and then maybe it will go back slowly.
Bryan: So you’ve got to dial it in depending
on your preferences.
Fr. Robert: Exactly. So what I have on mine is I
have one of my switches tied to turn off the self stabilyzer.
Bryan: So you can go full manual.
Fr. Robert: Which mean it is no longer helping you
at all. You’ve got to keep it level. Which is good. When
we do the first flight episode we’re going to show people why they want to be
able to do that.
Bryan: I can think of a few reasons, but okay.
Fr. Robert: This is super simple, super basic. Let
me show you something that is a little bit different. This is a MWC. It is a
flip controller. This thing is also from readytoflyquads.com. This is a more
advanced flight controller. You can see it is a lot smaller. It is actually an Ardueno Uno in there. It has been programmed from Baxter
from readytoflyquads.com to do what you want it to do. It doesn’t have a screen
so it is going to be a bit more difficult for you to tune.
Bryan: So you’ll have to have it plugged into
your laptop or something like that?
Fr. Robert: Yes. Or you can actually have this one
connected to your Android phone. I wouldn’t say that this is a beginner board,
but it is pretty easy. This is actually the telemetry that it is getting. This
is the cool stuff. So if I am flying my quad copter like
right here, and you’re flying like this, stalling, falling, and then dead. The nice thing about this kind of software, if you have the NAV setting you can
plan out missions, where your quad is going to go, you can look at flight
tuning, you can basically configure everything you want to configure about how
this thing is going to work. The nice thing about this is that I can actually
hook up a wireless transmitter to this so it sends me real time telemetry from
my quad as well as data. So afterwards I can look at this see where I went and
it will actually show the path of my quad.
Bryan: I want to use this for more than just
Quads.
Fr. Robert: It is an Ardueno so you can re-program this at will. People have used this to…
Bryan: Do you hear a plane flying around? Is
there a plane coming in? Uh-Oh.
Fr. Robert: F-14’s used to use these in order to
launch off of carrier decks. No I’m kidding. Hold on, hold on.
Bryan: I felt like you were telling the
truth…but not.
Fr. Robert: And this is a $15 board.
Bryan: That is so cool.
Fr. Robert: So it is crazy cheap. And if you buy it
from Paul Baxter at readytoflyquads.com, you can actually tell him what kind of
settings you want. Like are you a beginner? He’ll set it up so that you never
have to plug it in. Just plug in the receiver and the ESC’s and you are ready
to go.
Bryan: I want this for my motorcycle and have
like a black box that gives me all the data from that.
Fr. Robert: You could. Wouldn’t it be awesome to
get this kind of telemetry. Like how fast you were
going and how far you were leaning. And I’m sure that you are mostly going I
thought I was leaning a lot more than that. So this is what an avionics package
looks like. The motors, the speed controllers, the battery,
the receiver. That is pretty much going to stay the same. But what will
change is what you do with your flight control. This is another reason why we told
people they should use bullets instead of soldering things in.
Bryan: Because you will be plugging and
unplugging things a lot.
Fr. Robert: Right. So start with the KK. There is
nothing wrong with the KK. I’m going to be using them forever. There are going
to be times when I am going to want to go with something a bit more advanced
and I will probably pull this out. Or the professional
version of this. It will have things like GPS, navigation.
Bryan: And it’s not that expensive. It would
be easy to swap out these controllers.
Fr. Robert: And then it becomes a completely
different ship when you change the controllers. Because the
KK has the job of keeping the thing level. That is what it does. Then
you get to the point where you don’t want it to be level.
Bryan: What I want to do is the FPP. And then
have the HUD display overlaid so you are flying…
Fr. Robert: This will actually do that, it will take all that telemetry information and will
push it through the video signal that this thing sends out. So along with the
picture in front of the quad you will see at the bottom or the top altitude,
speed, it will show you the little horizon.
Bryan: You know that little excited feeling
you get in your gut? That’s what I want.
Fr. Robert: We know that this was a lot of
information to take in. Don’t forget you can find our notes, get all the notes
for this. We’ll show you exactly how you should be soldering and we’ll give you
the links on where you can buy all this gear online. Because
if you haven’t already you are probably going to want to get your gear. Because
the next episode we are actually doing integration. I’m going to show you how
all of these parts go together so you can actually build yourself a quad. This
is a really cool one. The frame is a 230 class with motors twice as powerful.
Bryan: So is this a race one?
Fr. Robert: That is my race one. We will race the
same ones.
Bryan: If you’re like us and you bought the
trainer, I’ve kind of hit the ceiling with it. I’ve dialed in the fine tuning
of the flying of the contraption and I’ve modified it and now I want to play
with it more but I’ve taken it as far as I can.
Fr. Robert: That is how it is going to be with all
the gear and that is why I say use bullets because eventually you are going to
get to the point where you’ve mastered these motors and you want to go up. I’ve
mastered this flight controller I want one that does GPS or I’ve mastered this
frame, I want one that is really aggressive and will give me a lot of speed
even though it is going to be harder to control. Those are all things that you
can do without buying an entirely new quad. That is the exciting thing about
this. It is like geeks with hotrods where I can swap out so many different
parts and it becomes a different character.
Bryan: And it seems like the technology is
getting better and better really quickly because even with the DJI that we toasted,
you’re talking about replacing the controller in that with one of these one
which is $15 and it is way better.
Fr. Robert: Actually this is a really good example.
ON the DJI, the controller is built for photography so it is the most boring
flight ever. It tries to hold it steady but it is so complicated because if the
GPS doesn’t sync it freaks out. These are all, turn it on and fly it.
Bryan: Which is what I
wanted.
Fr. Robert: Don’t forget you can always get our
show notes at twit.tv/kh. Right?
Bryan: That is where all our episodes live. You’ll
definitely want to go back and re-visit them. You can also subscribe to the
video if you choose to. There are a lot of different ways. But yeah, look at
those show notes.
Fr. Robert: We have step by step instruction.
Bryan: And links to everything that we talk
about because those are definitely a lot of questions that people have. But
that isn’t the only place you can follow uw.
Fr. Robert: You can get us on google plus. Go to
gplus.to/twit.kh. Just go to google plus and look for Know How. Look for the
community and join it. It is 7600 people or so. They are all experts in their
own right. If you combine us as a community you’ll know everything.
Bryan: It is a cool place to thumb through. Somebody
contacted me through it and they were asking about the MES project again. That
came back up. And they were telling me they had a better way of hooking up the
USB’s. It looked way better.
Fr. Robert: And you know what? IF you’ve got any
examples of your soldering skills, take a video or picture and put it up on the
community. We want to show off so we know what people are actually doing. Don’t
forget you can also find us on Twitter. I’m @PadreSJ.
Bryan: And I’m @cranky_hippo.
Fr. Robert: And don’t forget our TD is @anelf3. Follow
him and find out what he’s doing. Until next time, I’m Father Robert Ballecer.
Bryan: And I’m Bryan Burnett.
Fr. Robert: And now that you know how…
Bryan: Go do it!